CONNECTION INSTRUCTIONS
MICROPHONES
PHONOS
AUTO START
TAPE/TUNER/CD/VIDEO
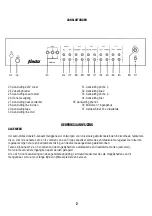
Make sure that the "POWER" switch of the mixer is in "OFF" position. - Plug shielded audio cables from mixer output
(27) to your amplifier input. - Turn the amplifier volume control to its lowest position. - Turn the mixer volume control
to "0" position.
Two low impedance microphones may be used with this mixer.
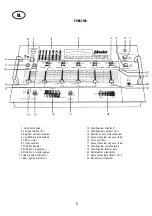
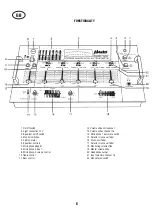
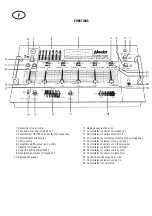
Microphone 1: the volume level of microphone 1 is adjusted by slide control 12. Treble and Bass are adjusted by
rotary controllers 10 and 11. When switch 14 is in "talk" position, the master output le vel will reduce automatically
without affecting the volume level of mic. 1 (auto mute).
Microphone 2: the volume level of microphone 2 is adjusted by rotary controller 9.
Three magneto-dynamic record-players can be connected to inputs 31, 33 and 35 (s witches 21 in phono position).
Volume level is controlled by slides 13. Ceramic record-players can be connected to the line inputs (switch 21 in line
position).
Channels 1, 2, and 3 are connected with three s witches who are controlled by slides ch.1/2/3. When setting the slide
level controller to "0" position, the switch is "open" (OFF) and if set to over "l" position the switch will be "short" (ON).
Connectors: 3.5 mm jack. CAUTION: SWITCHES ONLY TO BE USED WITH LOW VOLTAGE.
These audio sources must be connected to inputs 28, 29, 30, 32, 34 (s witches 21 in matching position). Volume
levels are controlled by slides 13. When required the recording input jacks of a tape recorder can be connected to
the mixers recording output jacks (26).
Note: Switched-off inputs will be automatically shor t-circuited (this means that an audio source wil not function when
connected).
8


