background image

SD1600V

Safety

information

+

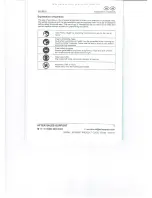
Do

not

position, join,

or

construct

any

parts

on

the

work

table

while

the

saw

is

running.

Only

switch

the

saw

on

after

you

have

removed

any

remaining

material

and

tools

from

the

work

table.

Leave

only

the

workpiece

to

be

machined

and

any

aids

(e.g.

wedges) on

the

work

table.

*

Always

wear

safety

goggles!

*

Keep your

fingers

at

a

safe

distance

from

the

saw

blade.

Carefully

guide

the

workpiece

and

keep

it

steady

at

all

times.

+

Never leave

the

work

area

without

having

already

switched

the

saw

off.

Do

not

let

your

familiarity

with

the

saw

allow

you

to be

careless.

Carelessness

can

lead

to

severe

injuries

within

a

fraction

of

a

second.

Safe

work

+

Never

use

the

protective

devices

for

handling

or

transport.

+

Make

sure

that

the

lower

part

of

the

saw

blade

is covered

during transport,

e.g.

by

the

protective

device.

*

Working position

is

always

laterally

of

the

saw

blade.

Do

not

lose

this

safety

information.

Residual

risks

Even if

you

use

this

electric

power

tool

in

accordance

to

instructions,

certain

residual

risks

cannot

be

eliminated.

The

following

hazards

may

arise

in connection

with

the

equipment's

construction

and

layout:

*

Lung

damage

if

no

suitable

protective

dust

mask

is

applied

*

Damage

to

hearing

if

no

suitable

ear

protection

is

applied

*

Contact

with

the

blade

in the

uncovered

cutting

zone

*

Injuries (cuts)

when

changing

the

blade

*

Crushed

fingers

*

Kickback

Tilting

of

the

workpiece

due

to

inadequate

support

Touching

the

blade

Catapulting

of

pieces

of timber

and

workpieces

AFTER

SALES

SUPPORT

17

a

@

00800

4003

4003

&

[email protected]

MODEL:

SD1600V

PRODUCT

CODE:

85590

10/2018

All manuals and user guides at all-guides.com

Summary of Contents for WORKZONE SD1600V

Page 1: ...rca eer 72 Vela SCROLL SAW Vers No 180405 Original instructions All manuals and user guides at all guides com a l l g u i d e s c o m...

Page 2: ...All manuals and user guides at all guides com...

Page 3: ...esel2 Intended use Safety information csesscccccessccccessceseescssecsseee3 Technical data scsssccssccsccscccccccscssssssceessessesst Before starting the machine 200020 QPeration icsccsdeasiccicdrcccc...

Page 4: ...Overview All manuals and user guides at all guides com...

Page 5: ...All manuals and user guides at all guides com...

Page 6: ...off device 3 1 x Saw blade guard 4 2 x Adapter 5 2 x Saw blade with pin 6 1 x Setting gauge 7 1 x Allen key 8 1 x Instruction manual 9 1 x Warranty card Pack contents parts All manuals and user guide...

Page 7: ...SD1600V AFTER SALES SUPPORT 7 B 00800 4003 4003 service uk scheppach com MODEL SD1600V PRODUCT CODE 85590 10 2018 All manuals and user guides at all guides com...

Page 8: ...Sore A ene weceseepormamecorm epee SD1600V 8 AFTER SALES SUPPORT service uk scheppach com 00800 4003 4003 MODEL SD1600V PRODUCT CODE 85590 10 2018 All manuals and user guides at all guides com...

Page 9: ...therisk of injury Wear a breathing mask Dust which is injurious to health can be generated when working on wood and other materials Never use the tool to work on any materi als containing asbestos We...

Page 10: ...ating instructions contain important notes on how to work safely properly and economically with your machine and how to avoid dangers save repair costs reduce downtime and increase the reliability and...

Page 11: ...Bearings Tightening lever Arm Graduated scale Locking lever Extractor connection ON OFF switch Speed regulator Assembly points Work lamp ON OFF switch work lamp Retaining device Bracket Allen key Ada...

Page 12: ...ubber leather and cork Do not use this scroll saw to cut round materials Round materials can easily become jammed Risk of injury Parts can be catapulted The scroll sawmay only be used for the tasks it...

Page 13: ...ore using the equipment 1 Keep your work area tidy Untidy work areas can result in accidents 2 Check the ambient conditions Do not expose electric tools to rain Never use electric power tools in damp...

Page 14: ...in use before starting any mainte nance work or when changing attachments such as saw blades drill bits and all kinds of mounted tools Always remove keys and wrenches after use Always check that keys...

Page 15: ...roundwood without a suitable holding device The machine is equipped with a safety switch to prevent it from being switched on again accidentally after a power failure If you need to use an extension...

Page 16: ...nt prevention regulations in force in your area as well as all other generally recognized rules of safety The saw is intended to be used indoors only Workpieces that are smaller than the saw blade gua...

Page 17: ...Make sure that the lower part of the saw blade is covered during transport e g by the protective device Working position is alwayslaterally of the saw blade Do not lose this safety information Residu...

Page 18: ...Hz 80 Watt S1 120 Watt S6 30 500 1700 min IP20 21mm 630 295 mm 0 45 to theleft 415 x 255 mm 134 mm 406 mm 50 mm 22mm 100 x 22 mm 400 x 50 mm 12 7 kg Continuous operation with idling cycle time 10 minu...

Page 19: ...t the workplace include the duration of impact the type of room and other sources of noise etc e g the number of machines and other neighboring operations Reliable workplace values may also vary from...

Page 20: ...ly Installing the scroll saw on a workbench Fig 3 5 Requiredfor installing not provided M6 hex screw 4x M6 hex nut 8x Washer 7 mm 4x Flat gasket 7 mm 4x Rubber base 410 x 255 x 13 mm The length of the...

Page 21: ...he socket outlet before removing or changing the saw blade Inserting saw blades with pin Fig 1 9 10 11 12 Theteeth of the saw blade 26 must always point downwards 1 Release the tension by lifting the...

Page 22: ...to the upper saw blade holder 8 Tighten the saw blade K with the tightening lever 11 by pressing it down again Check the tension of the saw blade K If the tension is insufficient it can be increased...

Page 23: ...ses its service life ON OFF switch Fig 2 Item 16 Press the button green to switch on Press the 0 button red to switch off Important The scroll saw is equipped with a safety switch to prevent it from b...

Page 24: ...he following causes Passage points where connection cables are passed through windows or doors Kinks where the connection cable has been improperly fastened or routed Places where the connection cable...

Page 25: ...s in the equipment Ensure that no water can get into theinterior of the equipment Servicing There are no parts inside the equipment which require additional maintenance Bearing s Fig 1 Item 10 Periodi...

Page 26: ...from children and dispose of it as soon as possible Old devices must not be disposed of with household waste __ This symbol indicates that this product must not be disposed of together with a domesti...

Page 27: ...SD1600V AFTER SALES SUPPORT 27 B 00800 4003 4003 service uk scheppach com MODEL SD1600V PRODUCT CODE 85590 10 2018 All manuals and user guides at all guides com...

Page 28: ...SD1600V 28 AFTER SALES SUPPORT service uk scheppach com 00800 4003 4003 MODEL SD1600V PRODUCT CODE 85590 10 2018 All manuals and user guides at all guides com...

Page 29: ...r hermed at folgende produkt er ioverens stemmelse med nedenstaende EUdirektiver og Standarder f rsakrar harmed f ljande verensstammelse e1 ligt EU direktiv och standarder for f ljande artikein C preh...

Page 30: ...SD1600V 30 AFTER SALES SUPPORT service uk scheppach com B 00800 4003 4003 MODEL SD1600V PRODUCT CODE 85590 10 2018 All manuals and user guides at all guides com...

Page 31: ...SD1600V AFTER SALES SUPPORT service uk scheppach com a 00800 4003 4003 MODEL SD1600V PRODUCT CODE 85590 10 2018 All manuals and user guides at all guides com a l l g u i d e s c o m...

Page 32: ...the unlikely event of such an occurrenece or if you require any information about the product please contact us via our helpline support services details of which are to be found both in this manual a...

Page 33: ...cheppach com If after contacting the manufacturer you are requested to return the faulty product please return the completed warranty card together with it GreatStar Europe Unit 55 Romsey Industrial E...

Page 34: ...l components included in the packaging The warranty does not cover damage caused by Accident or unanticipated events e g lightning water fire Improper use or transport Disregard of the safety and main...

Reviews: