background image

M12 Taximeter User Guide. © 2016 


Alberen Electronics


14 

printed if a printer connected




Tariff 2




Tariff 3


.................................. 




Tariff 10





Tariff 

Checksum 
(CRC)



Tariff 

Installation 
date 



Setup Device 
number



………


The CRC code for all tariff parameters is 
shown. 
Maximum last 20 records are stored about 
tariff information  (CRC of the tariff, date of 
change and setup device number) 




6 digit password




Printer Reports



Daily Report




Total Counter     Report




Totals Report for past days (Maybe last 30 days)



Distance and Time 
Test


Time (unit: 0.5 second) on the top screen. Pulse counter on the sub screen




Software Information 



Setu Device Number



Software Version

At the upper screen, it is shown Setup 
Device Number which has changed the 
parameters as date, constant k, etc. 
Software Version is shown at the lower 
display.  


13.


CLOSING THE TAXIMETER 

In FOR HIRE position when pressed                 button, taximeter firstly shows shift number. 

To close the taximeter, it is pressed to                  button minimum 2 seconds while in the “FOR HIRE” 
position. While the taximeter is closed, when pressed any button, it passes to driver selection menu 


14.


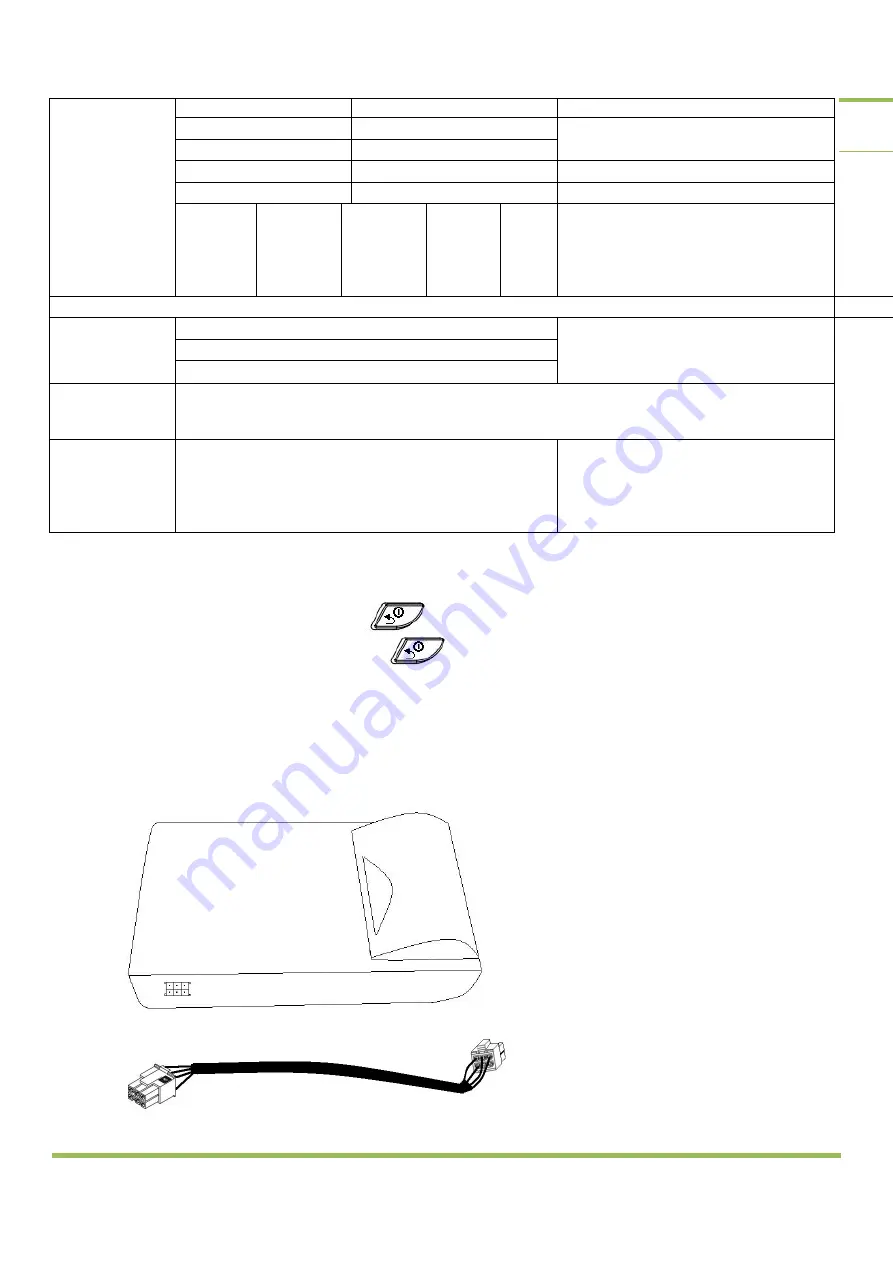
 PRINTER CONNECTION 

The Printer Cable is connected to Printer and printer connector of the taximeter.  The printer gets 
power from the taximeter via printer cable. 


                                   Printer Cable 

Summary of Contents for iTAKSI M12

Page 1: ...t provides information to assist in the users Alberen Electronics Limited reserve the right to change the specification of its products without notice If any further information is required please con...

Page 2: ...N EXPRESSIONS WHILE THE TAXIMETER IS ON 5 5 CHARACTER TABLE 5 6 OPENING THE TAXIMETER 6 6 1 OPENING THE TAXIMETER AS ADMIN 6 7 DISPLAY TIME AND DATE 7 8 DISPLAY LAST FARE METER MEASUREMENT AND SPEED 8...

Page 3: ...M12 Taximeter User Guide 2016 Alberen Electronics 3 1 VIEW 1 1 FRONT VIEW 1 2 REAR VIEW...

Page 4: ...M12 Taximeter User Guide 2016 Alberen Electronics 4 2 CABLES 2 1 POWER CABLE 2 2 POWER CABLE WITH SECOND LAMP DRIVE 2 3 PRINTER CABLE...

Page 5: ...ast fare meter counting speed Pass to mode FOR HIRE Change to the previous parameter Decrement digit Enter menu Increment extra fee Pass to sub menu Confirm the changes Cancel time date or speed showi...

Page 6: ...eter 4 User is admin Separate records for every 3 drivers are saved Fourth user admin can see all records Later if any password is entered for the drivers the password menu is shown in the screen afte...

Page 7: ...r is incremented 8 DISPLAY TIME AND DATE There are three formats for showing time date in the taxi meter When button is pressed once in the FOR HIRE position time is shown in the upper screen as at th...

Page 8: ...the screen as at the below When vehicle moved counter starts to count in meters Press again button speed of the vehicle is shown in the screen as at the below If the taximeter doesn t receive speed s...

Page 9: ...y information of the active tariffs can be shown on the taximeter screen at that moment There are three types of the tariffs Normal N Daily D Weekly W The tariffs can be set according to specific date...

Page 10: ...YY MON HH MM HH MM TUE HH MM HH MM WED HH MM HH MM Specific Date Interval Specific time of the week days HH Hour Hour MM Minute Minute MM Month Month DD Day Day YY Year Year If the start time bigger t...

Page 11: ...0 Unit distance or unit distance fare yard 100 or p 10 Unit time or unit time fare second 64 or p 10 Tariffs which changed automatically as depends speed exceeding in the journey Tariff 1 Tariff 2 Tar...

Page 12: ...nnected to the taximeter it can be selected by pressing button again as shown below After selected or pressed button If 10 seconds have passed after button pressed the taximeter will pass to the FOR H...

Page 13: ...m last 20 records are stored about Constant k constant k value date of change and setup device number These parameters can be changed using only the Setup Device Date Constant k date of change of cons...

Page 14: ...e counter on the sub screen Software Information Setu Device Number Software Version At the upper screen it is shown Setup Device Number which has changed the parameters as date constant k etc Softwar...

Page 15: ...of the power cable is connected to the positive pole of the roof lamp other ground pole of the roof lamp is connected chassis of the vehicle If a second roof lamb will be connected to taximeter then...

Reviews: