KM400A Series
55
Create Array
1.
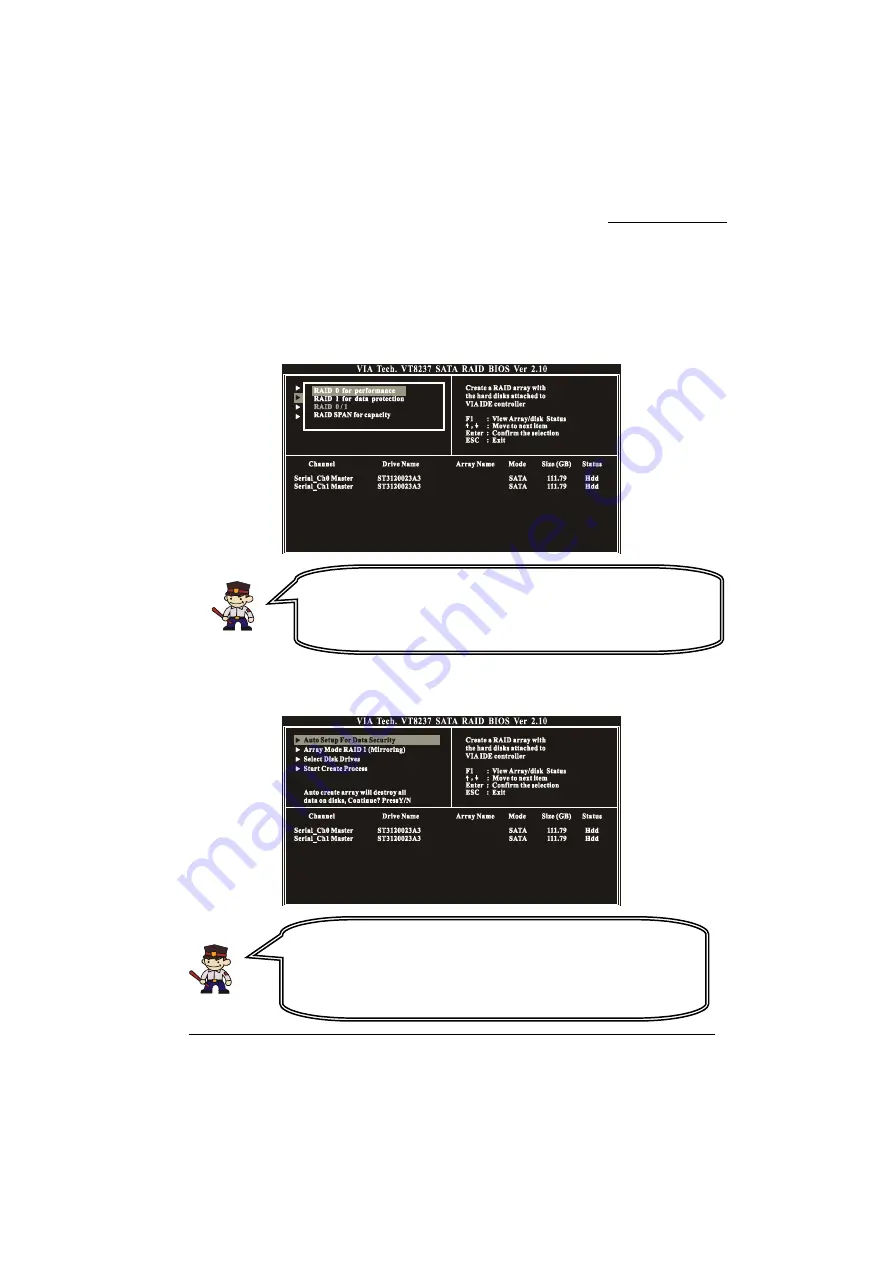
The “Create Array” option will allow you to initialize a RAID array. Choose the “Create
Array” on the main screen and press <Enter>. The screen below will display. According to
your needs, select “RAID 0 for performance” (striping), “RAID 1 for data protection”
(mirroring) or “RAID SPAN for capacity” (JBOD). Then press <Enter>.
2.
Next, choose the “Auto Setup for Data Security” option and press <Enter>. The screen will
display a confirmation message as shown below. Press <Y> to continue with the creation of
the new array.
Attention
The “Channel”
、
“Drive Name”
、
“Mode”
、
“Size (GB)”, located at the
bottom portion of the screen above, reflect the devices that are currently
installed on the SATA connectors. The example information above may
therefore differ with the information that displays on your screen.
Attention
For RAID 1 (Mirrored Arrays), you can manually select the “source
device” instead of having the system determine it for you. After step 1,
select the “Select Disk Drives” to manually select the “source device”.
Then choose the “Start Create Process” and press <Enter> to complete
the RAID 1 array creation.


