9
OPERATION
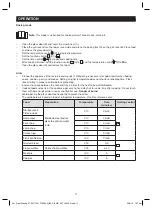
Start cooking
•
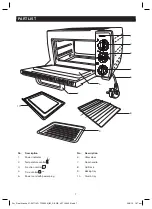
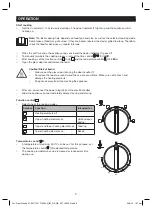
S et the 3 controls (2, 3, 4) to desired settings. The power indicator (1) lights up and the appliance starts
heating up.
Note:
The ideal cooking time depends on food type and size, as well as the selected cooking mode.
Some types of food may get burned, if they are baked, roasted, toasted or grilled too long. Therefore,
check the food for done-ness in regular intervals.
•
When the set time ends, the appliance rings once and the power indicator (1) goes off.
•
To manually terminate the cooking process, just set the time control
min
(4) to
Off
.
•
After cooking, set the function control (3) to and the temperature control
c
(2) to
Min
.
•
Open the glass door (6) and remove the food.
Caution! Risk of burns!
•
Always open the glass door (6) using the door handle (7).
•
To remove the food, we recommend the use of oven mittens. Make sure not to touch and
damage the heating elements.
•
Keep hands away from steam exiting the appliance.
•
After use, disconnect the power plug (5) from the electrical outlet.
•
Allow the appliance to cool completely before cleaning and storing.
Function
control
•
Select one of the cooking modes:
Symbol
Function
Intended for
Heating elements off
Upper heating elements on
Grill and over-
baking
Upper and lower heating elements on
Toasting
Lower heating elements on
Baking
Temperature control
c
•
A temperature of maximum 230
℃
can be set. For this purpose, set
the temperature control
c
(2) to desired temperature.
•
The cooking temperature can be increased or reduced anytime
during use.
150
210
90
120
180
230
Min
For_Real_Alaska_37-001714R_TO1300N_IM_DE_GB_V07_140424.indb 9
24/4/14 1:57 pm


