Akura ATLDVD3230W-HDID, User Manual
The Akura ATLDVD3230W-HDID is a versatile entertainment device that delivers high-definition visuals and exceptional audio quality. Ensure easy setup and optimal usage with our comprehensive User Manual, available for free download on our website. Explore the full potential of your Akura ATLDVD3230W-HDID and enhance your viewing experience with this detailed manual.
Share
Download


Reviews:
No comments
Related manuals for ATLDVD3230W-HDID
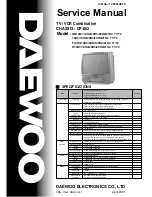
14H3 T1
Brand: Daewoo Pages: 54

C 2273F
Brand: Cello Pages: 28

6620LDG
Brand: Sylvania Pages: 74

DVD-V8000
Brand: Samsung Pages: 37

DVD-V77MS
Brand: Samsung Pages: 42

DVD-V4300
Brand: Samsung Pages: 20

DVD-V3600
Brand: Samsung Pages: 34

DVD-V3800
Brand: Samsung Pages: 35

DVD-V4500
Brand: Samsung Pages: 38

DVD-V4600
Brand: Samsung Pages: 40

DVD-V3300
Brand: Samsung Pages: 35

DVD-V17000N
Brand: Samsung Pages: 36

DVD-V7500K
Brand: Samsung Pages: 69

DVD-V19000K
Brand: Samsung Pages: 37

DVD-V4300
Brand: Samsung Pages: 56

DVD-V8600
Brand: Samsung Pages: 87

DVD-V2000
Brand: Samsung Pages: 57

LD195SL8 A
Brand: Sylvania Pages: 96


