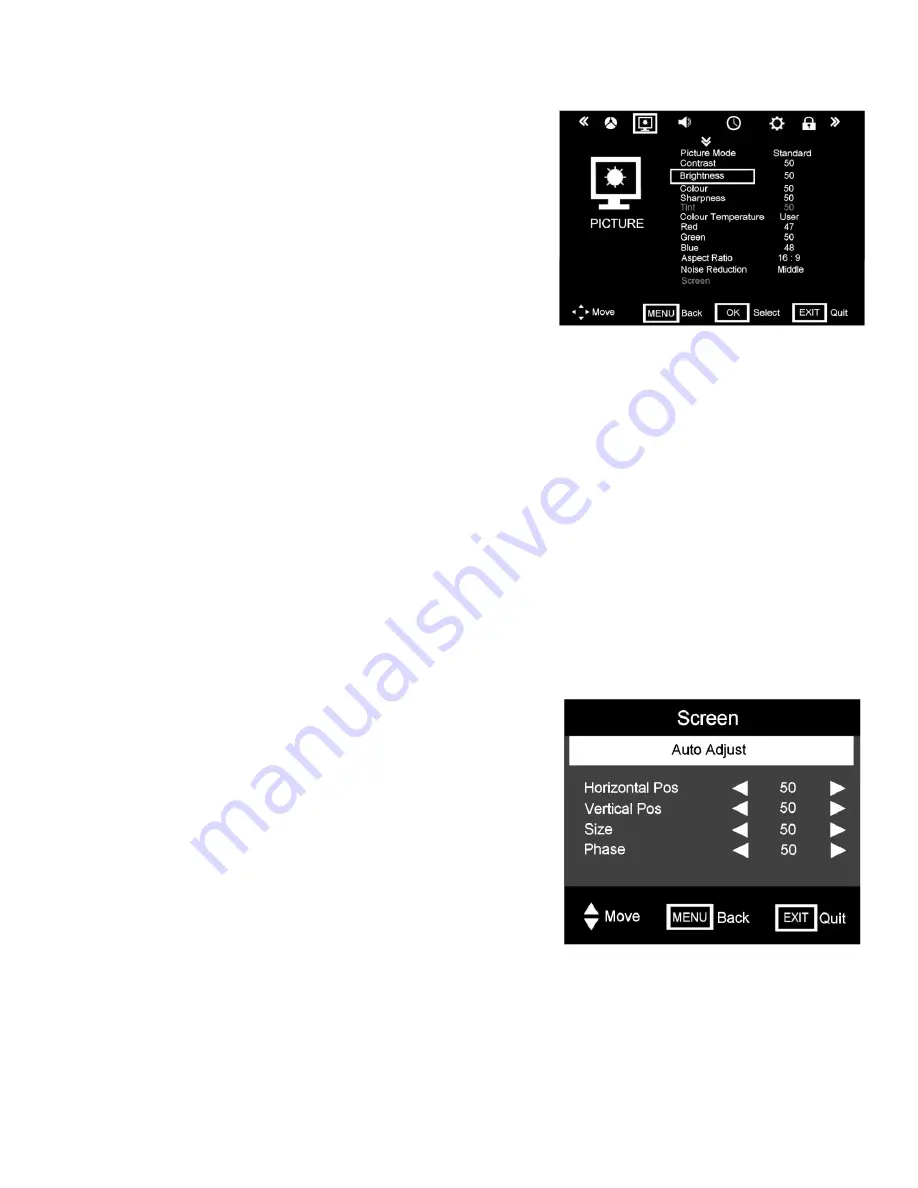
8. Menu Operation.
Fig 19
Fig 20
16
Picture Menu
. (Fig 19).
Picture Mode.
There are four settings. Standard, Mild, User and
Dynamic.
“Standard is set as default”
Standard
. Select for viewing in normal room lighting.
Mild.
Select when viewing in subdued room lighting, this will help
prevent eye strain.
User.
This allows you to set your own levels of Brightness, Contrast
and Colour.
Dynamic.
Select when using in bright room lighting conditions.
These selections may also be selected using the “P MODE” on the
remote control.
Brightness.
Adjusts the overall picture brightness.
Contrast.
Adjusts the ratio of dark to light.
Colour.
Adjusts the colour saturation (colour depth).
Sharpness
. Adjusts the clarity of the picture. If the signal is noisy (ATV Mode only) then this setting should be
reduced to mask the noise. This also reduces the picture sharpness.
Tint.
Only available when using NTSC sourced material from the AV inputs.
Colour Temperature
. There are four settings, Cool, Medium, Warm and User.
Cool
has a Blue tint and may be a little harsh.
Medium
is the natural setting.
Warm
has a reddish tint to give a
“warm” feeling.
User.
This allows you to set the Red, Green and Blue settings individually.
Aspect Ratio
. There are up to seven settings, depending upon the input mode chosen.
16:9,
Normal format for general viewing.
Zoom 1
, magnifies the picture,
Zoom 2
, increases magnification,
Just
scan
, fills the screen with no overscan.
Panorama
, gives the effect of “cinemascope”,
Auto,
adjusts the aspect ratio
automatically as some material is transmitted in different formats to match the original material.
4:3
is for films that
were originally made in 4:3 format. The Aspect ratio may also be set using the “ASPECT” button on the remote
control.
Noise Reduction
. There are four settings. Off, Low, Medium and High. Certain material may be transmitted with a
“noisy” background. Use the settings to obtain the best picture.
Screen. (Fig 20)
This is “greyed out” in all modes except VGA/PC
mode. When connecting to a PC, the PC will need to be matched to
the TV.
In most situations “Auto Adjust” will be sufficient. When selected the
picture will jump and shake for a few seconds until the settings are
finalised.
For special applications you may set the four adjustments :-
Horizontal Pos
. Adjusts the picture position horizontally.
Vertical Pos
. Adjusts the picture position vertically.
Size.
Adjusts the vertical height.
Phase.
Adjusts the clock phase to minimise picture jitter.
To select use the
▲
/
▼
buttons, to adjust use the
►
/
◄
buttons.
16


