background image

3

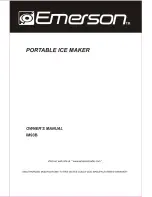
Introduction to the Control Panel

The operation time
for each program

This indicates the program 
you have chosen

1

3:00

10.CAKE

12.BAKE

9.JAM

2.FRENCH

1.BASIC

4.QUICK

3.WHOLE WHEAT

7.ULTRA FAST-II

6.ULTRA FAST-I

8.DOUGH

5.SWEET

LIGHT MEDIUM DARK 1.5 2.0 

11.SANDWICH

COLOR

Start-up

As soon as the bread maker is plugged into the power supply, a beep will sound 

and “13:00” appears in the display. The default settings will appear. The “1” 

indicates the menu choice (basic) and the arrows point to “750g” (loaf size) and 

MEDIUM (crust colour).


START/STOP

This button is used for starting and stopping the selected baking programme.

To start a programme, touch the “START/STOP” button for approximately 1 second.  

A short beep will sound and the two dots in the time display will begin to flash and 

then the programme will start. To stop the programme, press the “START/STOP” 

button for approximately 3 seconds until a beep confirms that the programme has 

been switched off. This feature will help to prevent any unintentional disruption to 

the operation of programme.

MENU 

This button is used to set different programmes. Each time it is touched the 

programme will vary. Touch the button continuously and the 12 menus will be 

cycled to show on the LCD display. Select your desired programme. The functions 

of 12 menus are explained below.

1.   BASIC 

For white and mixed breads that mainly consists of wheat or rye flour. The 

bread has a compact consistency. You can adjust the brownness of  the bread by 

setting the colour button.             

MEAL

Light  Medium  Dark 

450g   750g

Summary of Contents for XBM-1128

Page 1: ...N13275 Bread Maker XBM 1128 Instruction Manual AFTER SALES SUPPORT NZ 0800 836 761 AU 1300 886 649 ...

Page 2: ...ppliance or pan whilst they contain hot jam or other hot liquids To protect against electric shock do not immerse cord plugs or housing in water or any other liquid Always unplug the appliance from the wall outlet when not in use and before putting on or taking off parts and before cleaning Do not let the cord hang over the edge of a table or bench Do not use accessories unless recommended by the ...

Page 3: ...2 Know your Bread Maker Measuring cup easuring spoon Measuring cup Measuring spoon ...

Page 4: ...tton for approximately 1 second A short beep will sound and the two dots in the time display will begin to flash and then the programme will start To stop the programme press the START STOP button for approximately 3 seconds until a beep confirms that the programme has been switched off This feature will help to prevent any unintentional disruption to the operation of programme MENU This button is...

Page 5: ... smaller with a denser texture 5 SWEET The sweet bread settings are for baking breads with high amounts of sugar fats and proteins all of which tend to increase browning Due to a longer phase of rising the bread will be light and airy 6 ULTRA FAST I the loaf size cannot be adjusted only display the default loaf size of 450g and the delay time is not applicable Kneads rises and bakes a 450g loaf in...

Page 6: ... time should include the baking time of the programme That is at the completion of delay time there is hot bread ready for serving After selecting the programme and degree of browning press TIME or TIME to increase or decrease the delay time at the increment of 10 minutes The maximum delay is 13 hours Example If the time is 8 30pm and you would like your bread to be ready the following morning at ...

Page 7: ...urther than the kneading phase when the power supply cuts off you can press the START STOP straight away to continue the programme from the beginning WARNING DISPLAY 1 If the display shows HHH after you have pressed the START STOP button beeps will sound Beeping indicates that the temperature inside is still too high The programme will be stalled after beeping Open the lid and let the machine cool...

Page 8: ... if you want the bread maker to start working immediately 8 Press the START STOP button to start working 9 For the BASIC FRENCH WHOLE WHEAT SWEET and SANDWICH programmes a beep will sound during operation This is to prompt you to add extra ingredients Open the lid and put the ingredients in It is possible the steam will escape through the vent slits in the lid during baking This is normal 10 Once ...

Page 9: ...oisture and heat For perfect quick breads we recommend that you place all the liquid ingredients at the bottom of the bread pan and the dry ingredients on the top During the initial stages of mixing the quick bread batters dry ingredients may collect in the corners of the pan It may be necessary to help the machine mix the batter to avoid flour clumps If this is required please use a rubber spatul...

Page 10: ...wheat flour is a type of high fibre flour similar to wholemeal flour It contains no gluten so to obtain a large size after rising it must be used in combination with a high proportion of bread flour 5 Self raising flour A type of flour that contains baking powder It is commonly used for making cakes 6 Cornmeal and oatmeal flour Cornmeal and oatmeal flour are ground from corn and oats They are the ...

Page 11: ...not this indicates the yeast is dead or inactive 10 Egg Eggs can improve bread texture nutritional value and size Lightly beat the egg before adding 11 Butter and Vegetable Oil Butter and oil can make bread soft and prolong storage life Butter should be melted or chopped into small pieces before using 12 Baking Powder Baking powder is used for rising the Ultra Fast bread and cake It does not need ...

Page 12: ...ients the measuring spoon must be used Measurements must be level not heaped as a small difference could throw out the critical balance of the recipe Baking Tips Follow your recipe sequence when adding ingredients Often the sequence is liquids eggs salt and milk powder etc When adding the flour it should not be wet or damp at all The yeast can only be placed on the dry flour Don t let the yeast to...

Page 13: ...lect the correct programme for the type of bread you are baking Do not open the cover during the final stages of baking or when the bread is rising Check the kneader hole then take the bread pan out and operate without ingredients If the appliance still fails to knead and rotate contact the After Sales Support Line 5 The bread maker displays H HH after pressing the start stop button The temperatur...

Page 14: ... too high 3 Excessive water makes the dough too wet and soft Use bread flour or other suitable flour Only use yeast at a cool temperature Adjust the water content till you have a suitable wet to dry ingredients ratio as specified in the recipe 11 Bread weight is very heavy and the bread is too dense 1 Too much flour and too little water 2 Too many fruit ingredients or too much wholemeal flour Redu...

Page 15: ...2 Kneading blade If the kneading blade is difficult to remove from the axle fill the container with warm water and allow it to soak for approximately 30 minutes The kneader can then be easily removed for cleaning Wipe the blade carefully with a damp cotton cloth Both the bread pan and kneading blade are dishwasher safe components 3 Lid and window Clean the lid inside and outside with a slightly da...

Page 16: ... and are completely reliable We are confident in our products We back them up with a full 2 year replacement warranty Now you too can relax knowing that you are covered Customer Helpline NZ 0800 836 761 AU 1300 886 649 This Product is covered by 2 year replacement warranty when accompanied by proof of purchase ...

Reviews: