8
USING AUDACITY TO RECORD TO WAV
1. Save your files to the computer, once
recording and editing are complete.
Click on file. Scroll down to the “Export
as WAV” tab and select it.
2. You’ll be prompted for the file name of
your music. Save it in the pre-selected
folder or save it in a folder of your
choice. Note: This can either be an
existing one or a new folder.
USING AUDACITY TO RECORD TO MP3
1. Save your files to the computer, once
recording and editing are complete.
Click on file. Scroll down to the “Export
as MP3” tab and click on it.
2. You’ll be prompted for the file name of
your music. Save it in the pre-selected
folder or save it in a folder of your
choice. Note: This can either be an
existing one or a new folder.
Note: To activate the “Export to Mp3”
feature, you must copy a file named
“lame_enc.dll” from the installation CD
and paste it into the AUDACITY folder on
the hard drive that contains the software
on that was copied from the CD during
installation. The software will automatically
detect this file and the “Export to Mp3” will
be enabled.
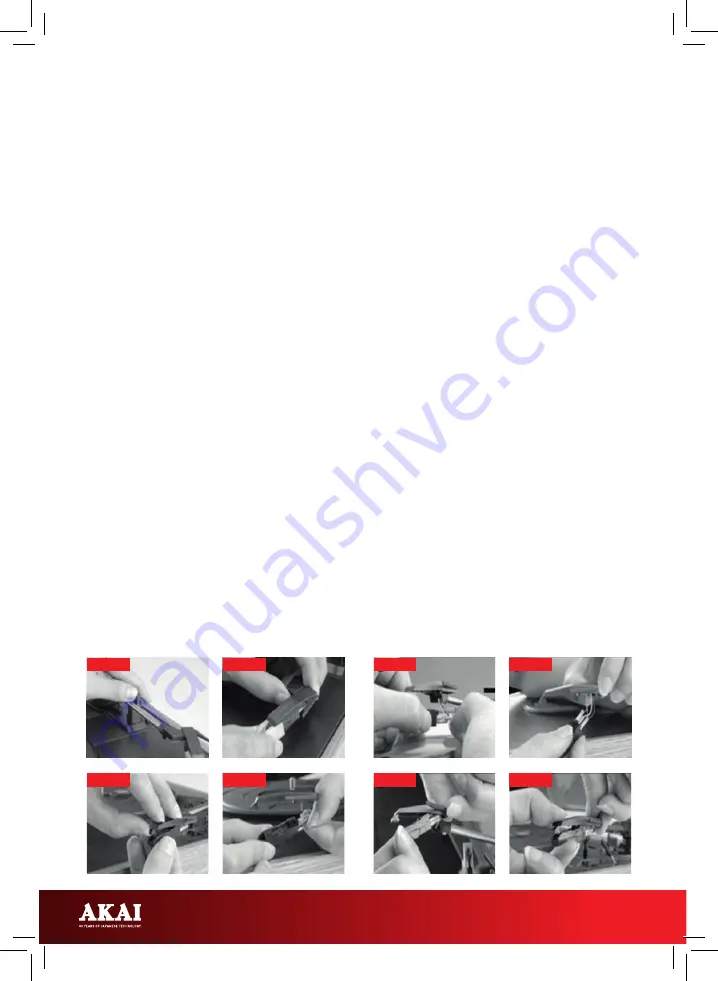
REPLACING THE STYLUS
Replace your stylus periodically
(approximately every 250 hours).
1. Push the arm lock to release the tone
arm.
2. Take off cap of the cartridge to expose
the stylus.
3. Gently separate the cartridge from the
socket.
4. Take off the audio line from the
cartridge.
5. To replace the stylus with a new one,
reverse the above operations
Note: Please exercise extreme care whilst
performing this operation to avoid the tone
arm and audio wires from being damaged.
Dust the stylus from time to time using a
very soft brush dipped in alcohol (brushing
from back to front of the cartridge).
When transporting your record player do
not forget to:
•
Replace the protective cap on the
stylus.
•
Put the rest clip into the pick-up arm.
FIG 1
FIG 3
FIG 2
FIG 4
FIG 5
FIG 7
FIG 6
FIG 8
Summary of Contents for A60021
Page 11: ...11 NOTES ...


