background image

15

En

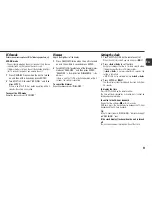
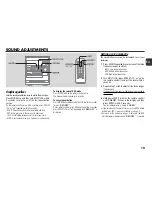
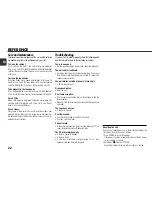
Auto Graphic equalizer (AG)

The unit automatically selects a sound equalization curve to
match the music program type (PTY) data being transmitted
from the station. (e.g. 'POP' curve is selected for POP M [PTY].)

Press AG when tuning in to an RDS station.

"

AG

" lights up.

To cancel AG function

Press AG so that "

AG

" disappears.

Clock-time (CT)

You can automatically set and update the clock on the hour
every hour just by tuning in an RDS station since RDS stations
transmit clock signals.

1

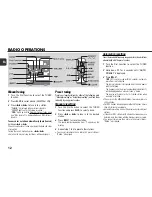
Press RT repeatedly to select "

CT ON

" while the

unit is on and the time is displayed (see "Setting
the clock").

2

Tune in an RDS station.

To deactivate CT function (If the clock is set wrongly
due to an incorrect clock signal)

Repeat step 1 to select "

CT OFF

".

Adjustments

Antennas

Keep antennas away from metallic objects, electrical equipment
and cords.
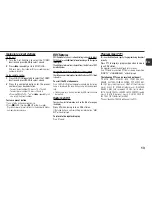
FM antenna: Extend fully and position for the best reception.
If receiving condition is poor, connect optional outdoor antenna
to FM 75 

 terminal.

MW/LW antenna: Rotate to find best reception.

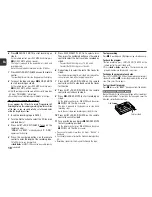
To switch to monaural FM reception

Press SHIFT+TUNER MODE on the remote control. With each
press, "

MONO

" and "

STEREO

" are displayed alternately

on the display.

Tip:

When FM stereo reception is poor, switching to monaural
reduces noise.

To switch the MW tuning interval

Hold down BAND and press POWER on the unit. With each
press, the MW tuning interval alternates between 9 kHz/step
and 10 kHz/step.

Tip:

The default is 9 kHz/step. Change it only when using the unit
in a 10 kHz/step area. Switching MW tuning interval clears all
the preset stations.

Note on RDS features

The RDS features described above may not function correctly
if the RDS transmission data from the station contains too
much interference or the reception signal is too weak.

Summary of Contents for NSX-R71

Page 1: ... R71 E Español F Français D Deutsch I Italiano NL Nederlands Cz Česky M Magyar Po Polski OPERATING INSTRUCTIONS MANUAL DE INSTRUCCIONES MODE D EMPLOI BEDIENUNGSANLEITUNG ISTRUZIONI PER L USO GEBRUIKSAANWIJZING NÁVOD K OBSLUZE HASZNÁLATI UTASÍTÁS INSTRUKCJA OBS UGI ...

Page 2: ...stops excessiveforce andunevensurfacesmaycause the unit or cart to overturn or fall 7 Condensation Moisture may form on the CD pickup lens when The unit is moved from a cold spot to a warm spot The heating system has just been turned on The unit is used in a very humid room The unit is cooled by an air conditioner When this unit has condensation inside it may not function normally Should this occu...

Page 3: ... Power cords should be firmly secured to avoid being severely bent pinched or walked upon Pay particular attention to the cord from the unit to the power socket Avoid overloading power socket and extension cords beyond their capacity as this could result in fire or shock 3 When not in use Unplug the AC power cord from the power socket if the unit will not be used for several months or more When th...

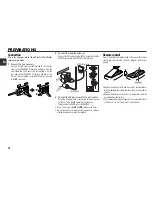
Page 4: ...ord to the wall socket When the AC power cord is connected to the wall socket for the first time DEMO appears on the display To deactivate the DEMO press DEMO ECO Do not short circuit the 0 and 9 speaker cord leads Do not leave objects generating magnetism or objects affected by magnetism near the speakers Remote control Detach the battery compartment lid at the rear of the remote control and inse...

Page 5: ...eoperatinginstructionsofyourequipment Toswitchfunctiontoexternalinput turntheDialFunction see ADJUSTMENTS BEFORE OPERATIONS to select the VIDEO AUX function Tip To change the displayed name for this function select the VIDEO AUX function then hold down ENTER and press POWER on the unit Repeat the procedure to select AUX VIDEO or TV 4 SPEAKERS3 terminals Connect the speaker cord of the supplied fro...

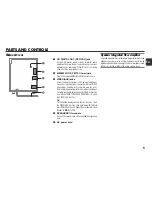
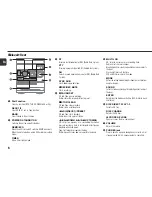
Page 6: ...SC DIRECT PLAY 1 3 Selects a CD tray DISC CHANGE Rotates the CD trays zCD OPEN CLOSE Opens or closes the disc compartment 7 VOLUME Adjusts the volume 8 PHONES jack Plug in here an optional headphones set with a mini stereo plug ø3 5 mm Speaker output is cancelled Main unit front 3 RT Displays text information for RDS Radio Data System PTY Displays a program type for RDS Radio Data System AG Select...

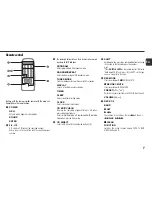
Page 7: ...e CLOCK Enters clock adjustment mode CD EDIT CHECK Displays the remaining playback time of a CD when pressed during playback Enters AI Edit Recording or Programmed Edit Recording mode when pressed during stop 4 CD DIRECT Select a CD tray with the numbered button 1 3 5 SHIFT Hold down when pressing a numbered button to change its function to that printed above the number e g Press SHIFT SLEEP on th...

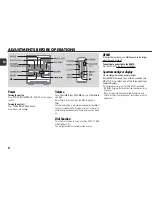
Page 8: ... the three spectrum analyzer displays On the remote control press SHIFT DISPLAY repeatedly NORMAL Displays the fluctuation from low frequencies to high ones BASS Displays the fluctuation of low frequencies only LEVEL Displays the fluctuation of the average of all the frequencies Volume Turn VOLUME Press VOLUME on the remote control Adjust from 0 minimum to 40 and MAX maximum Tip Volume level setti...

Page 9: ...splay the time Press SHIFT CLOCK on the remote control The time will be displayed for 4 seconds but it cannot be displayed during recording To switch to the 24 hour standard Display the time and press s within 4 seconds With each press the clock alternates between the 12 hour standard and the 24 hour standard Tip In the 12 hour standard AM 12 00 indicates midnight and PM 12 00 noon If the clock di...

Page 10: ...ck To select track 25 press 10 10 and 5 To select track 10 press 10 and 0 To display the remaining playback time of the CD Press SHIFT CD EDIT CHECK on the remote control Press again to return to the elapsed time display Remaining playback time cannot be displayed during random playback or programmed playback To replace disc s during playback without interruption While one disc is being played bac...

Page 11: ...exceeds 99 59 minutes or if a track with a track number exceeding 30 is programmed the playing time is displayed as You cannot program more than 30 tracks FULL is displayed To check the program Press for grepeatedlyduringstop The tracknumber and program number are displayed in succession To clear the program Press s during stop PRGM disappears on the display To add tracks to the program Repeat ste...

Page 12: ...umber beginning from 1 appears on the display 4 Repeat step 1 to 3 to preset other stations You cannot store more than a total of 32 preset stations FULL isdisplayed Automatic presetting Scans the receivable frequency range and stores tuned stations automatically with the preset number 1 Turn the Dial Function to select the TUNER function 2 Hold down RT for 4 seconds until AUTO PRESET is displayed...

Page 13: ...layedautomaticallywhenanRDSstation is tuned in To scroll the PS station name Press SHIFT DISPLAY on the remote control while the station name is displayed The long station name will be displayed fully Station name for a station received by EON search cannot be scrolled Radio Text RT You can show text information such as the title of a song on the display Press RT when tuning in to an RDS station I...

Page 14: ...en it ends EON Search makes the function above possible with the help of EON which gives the receivers a cross reference to other stations You need to preset every available station in advance since the unit searches only the preset stations 1 Tune in an RDS station If EON lights up proceed to the next step If not try to tune in another RDS station until it does 2 Press PTY to display the program ...

Page 15: ...ayfrommetallicobjects electricalequipment and cords FM antenna Extend fully and position for the best reception Ifreceivingconditionispoor connectoptionaloutdoorantenna to FM 75 Ω terminal MW LW antenna Rotate to find best reception To switch to monaural FM reception Press SHIFT TUNER MODE on the remote control With each press MONO and STEREO are displayed alternately on the display Tip When FM st...

Page 16: ...f or g To change the playback side DECK 1 only Press d in play mode To select a deck DECK 1 or DECK 2 Press DECK 1 2 in stop mode when tapes are loaded in both decks The deck number T1 or T2 is displayed To reset the tape counter Press s in stop mode and the tape counter on the display is reset to 0000 Opening and closing the cassette holder will also reset the tape counter To play continuously DE...

Page 17: ...an a 4 second blank space press wREC REC MUTE again while REC flashes To record more than a 4 second blank space press wREC REC MUTE againafter the unit enters recording pause mode Each time the button is pressed a 4 second blank space is added 2 Press a to resume recording To eliminate squealing or beating sounds when recording MW or LW broadcast Press SHIFT TUNER MODE repeatedly on the remote co...

Page 18: ...h track press 10 and 0 6 Repeat step 5 to select the rest of the tracks for side A The remaining recording time of side A is displayed You cannot select a track with a longer playing time 7 Press SHIFT CD EDIT CHECK on the remote control to switch to side B and select the tracks for the side 8 Press SHIFT CD EDIT CHECK on the remote control to switch back to side A 9 Press wREC REC MUTE to start r...

Page 19: ... and then within 4 seconds press PRESET Nor Mrepeatedly until GEQ OFF is displayed Setting a curve manually The equalization curve can be customized to suit your preference 1 Press SOUND repeatedly to select one of the three frequency ranges to adjust BASS Low range frequencies MID Middle range frequencies TRE High range frequencies 2 Turn MULTI JOG press PRESET N or M on the remote control to adj...

Page 20: ...will exit the timer setting mode and the previous setting however is entered 3 Press f or g to select the source then press ENTER or aSET 4 Press f or g to set the timer activated duration then press ENTER or aSET With each press the timer activated duration changes in 5 minute steps between 5 to 240 minutes 5 Press f or g to adjust the volume level then press ENTER or aSET Adjust from 0 to 26 6 P...

Page 21: ...mer is cancelled Next time the timer is activated you can change your previous setting or simply use the same setting again Timer recording Timer recording is available only for TUNER and VIDEO AUX with an external timer sources 1 Press TIMER SHIFT TIMER on the remote control repeatedly until 5REC appears on the display 2 Carry out step 2 to step 5 described in Timer playback 3 Prepare the source ...

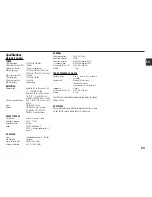
Page 22: ...o perform properly check the following guide and the relevant sections of the Operating Instructions There is no sound Are the speakers and AC power cord connected properly The unit shut off suddenly Possibly a short circuit in the speaker terminals Disconnect the AC power cord from the wall socket and re connect the speaker cords correctly The unit blacks out when the unit is turned off Is ECO mo...

Page 23: ...nnels stereo Frequency response 50 Hz 15 kHz Recording system AC bias Heads DECK 1 playback x 1 DECK 2 recording playback x 1 erase x 1 CD PLAYER Laser Semiconductor laser λ 780 nm D A converter 1 bit dual Signal to noise ratio 85 dB 1 kHz 0 dB Harmonic distortion 0 05 1 kHz 0 dB GENERAL Power requirements 230 V AC 50 Hz Power consumption 105 W Power consumption With ECO mode on 0 6 W in standby m...

Page 24: ...idennabruksanvisning specificerats kan användaren utsätta för osnylig laser strålning som överskrider gränsen för laserklass 1 OBSERVERA Så länge som apparaten är ansluten till nätet flyter en svag ström genom densamma även då den är avstängd Om man under en längre tid ej har för avsikt att använda den drag då ur nätkabeln BEMÆRK Apparatet er stadig forbundet med lysnettet så længe stikket er tils...

Reviews: