


Line
AirTies WAV-180
2.
WAV-180 Installation and Internet Connection
2.1.
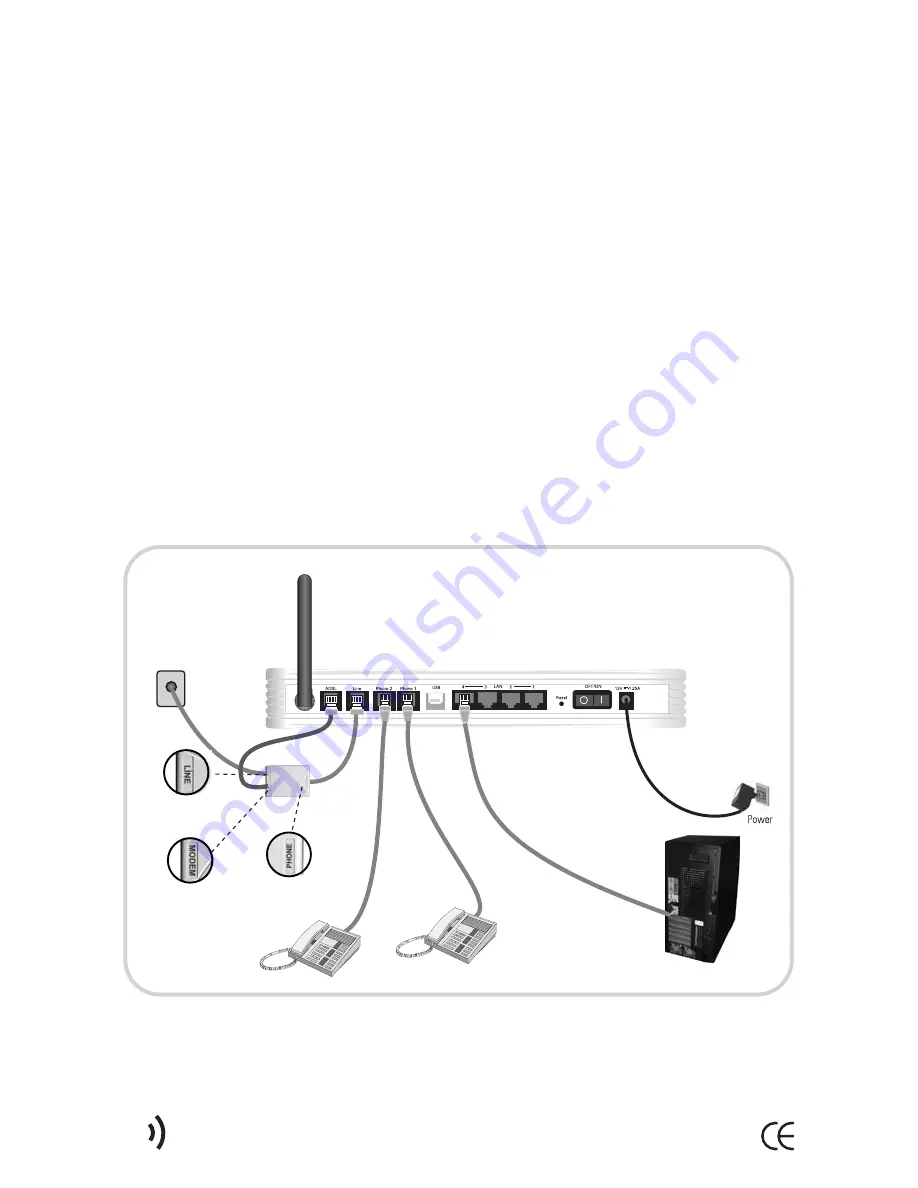
Connecting the Cables
The following figure shows how to connect your router using the cables provided.
How to connect the cables is also explained in detail by the animated instructions that automatically
start when you insert the Easy Setup CD into the CD drive of your PC.
1. Connect your ADSL telephone plug to the LINE port of the splitter provided.
2. Using the short telephone/ADSL cable provided, connect the MODEM port of the splitter with
the ADSL port of your router.
3. Connect the PHONE port of the splitter to the LINE port of your WAV-180.
4. Connect a telephone (corded or cordless) or a PBX line to the PHONE-1 port of your router.
5. Connect another telephone (optionally) or a PBX line to the PHONE-2 port of your router.
6. You can connect your PCs to the Ethernet ports or the USB port of the AirTies WAV-180.
Alternatively, you can connect your PCs wirelessly to the local wireless network set up by the
AirTies WAV-180. If you are using the USB port, please install the USB driver supplied on the CD
that comes with the WAV-180 as explained in the next section.
7. Screw in the supplied antenna to the BNC connected on the back panel.
8. Make sure all cabling is done properly before turning the power on. Plug the power adapter
provided into the 220V wall outlet and the other end of the power cord to the WAV-180 and turn on
the device.
9
AirTies WAV-180 User Manual
Summary of Contents for WAV-180
Page 1: ......
Page 38: ...36 AirTies WAV 180 User Manual...
Page 50: ...YM WR 180 UM EN D00REV13062007...


