10
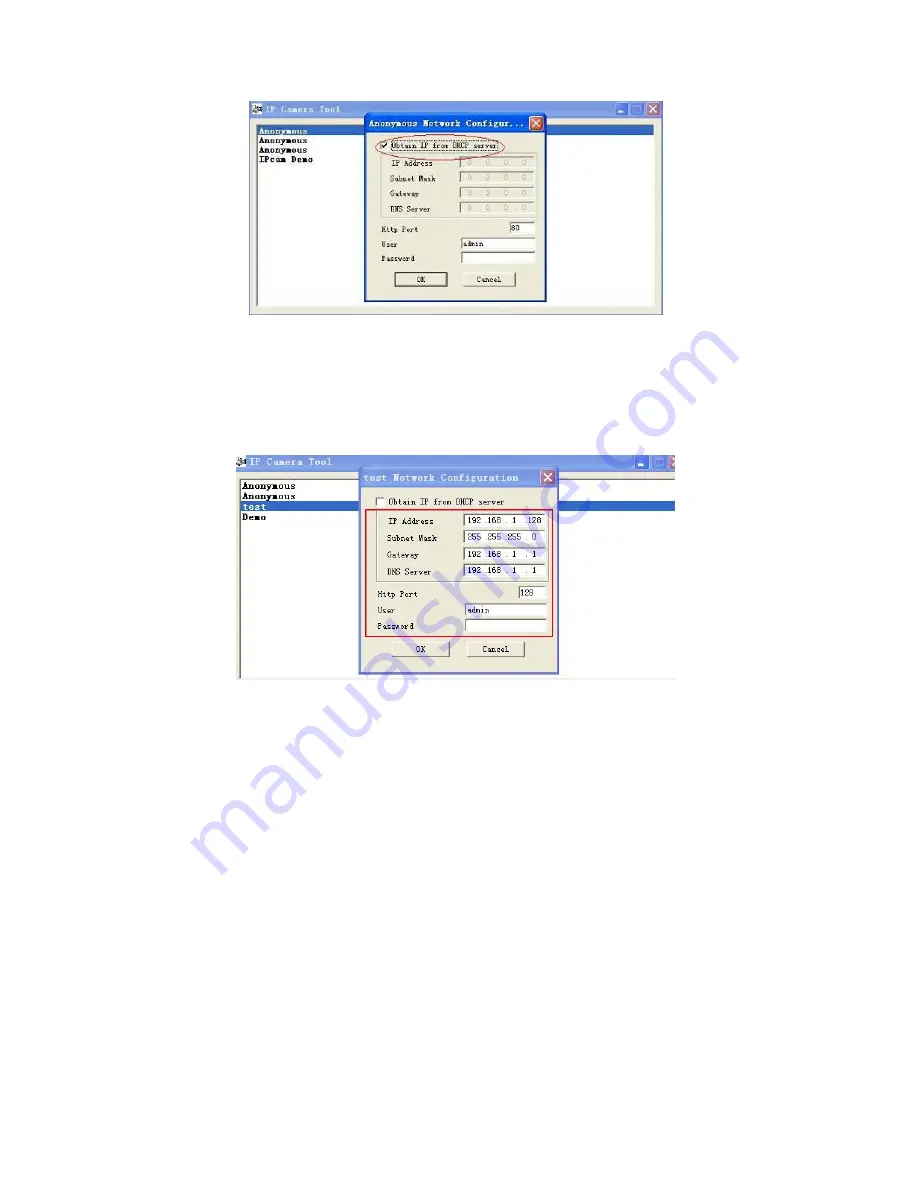
Figure 2.2
Obtain IP from DHCP server:
If clicked, the device will obtain IP from DHCP server. In other words, the
camera will have a dynamic IP. (Make sure the Router which the camera connects to has DHCP function and
DHCP is enabled)
.
(Figure 2.2).
Figure 2.3
IP address:
Fill in the IP address assigned and make sure it is in the same subnet as the
Gateway
, and the
subnet should be the same as your computer or router. (I.e. the first three sections are the same).
Subnet Mask:
The default subnet mask of the equipment is: 255.255.255.0. You can find the subnet mask
from your PC or router.
Gateway:
Make sure it is in the same subnet with PC’s IP address .Here gateway is the LAN IP of your router.
DNS Server:
IP address of ISP network provider. You can also set it to the same as the Gateway.
NOTE
: You can find the
Subnet Mask
,
Gateway
,
DNS Server
from your router, or check the local connection
status of your computer, to get all the parameters. Normally two DNS servers are optional.
Http Port:
LAN port assigned for the equipment, default is 80. You could set another port number like 81, 801,
8001 etc.
User:
Default administrator username is:
admin
(please make sure all are lowercase letters).
Password:
Default password is bank, i.e. no password.
NOTE:
If the prompt “subnet doesn’t match, double chick to change!” appears, please set the
IP Address
,
Subnet Mask
,
Gateway
,
DNS Server
once again, or enable
Obtain IP from DHCP server.


