©
DM Aviation Limited 2007
Page 2
W1005-INS
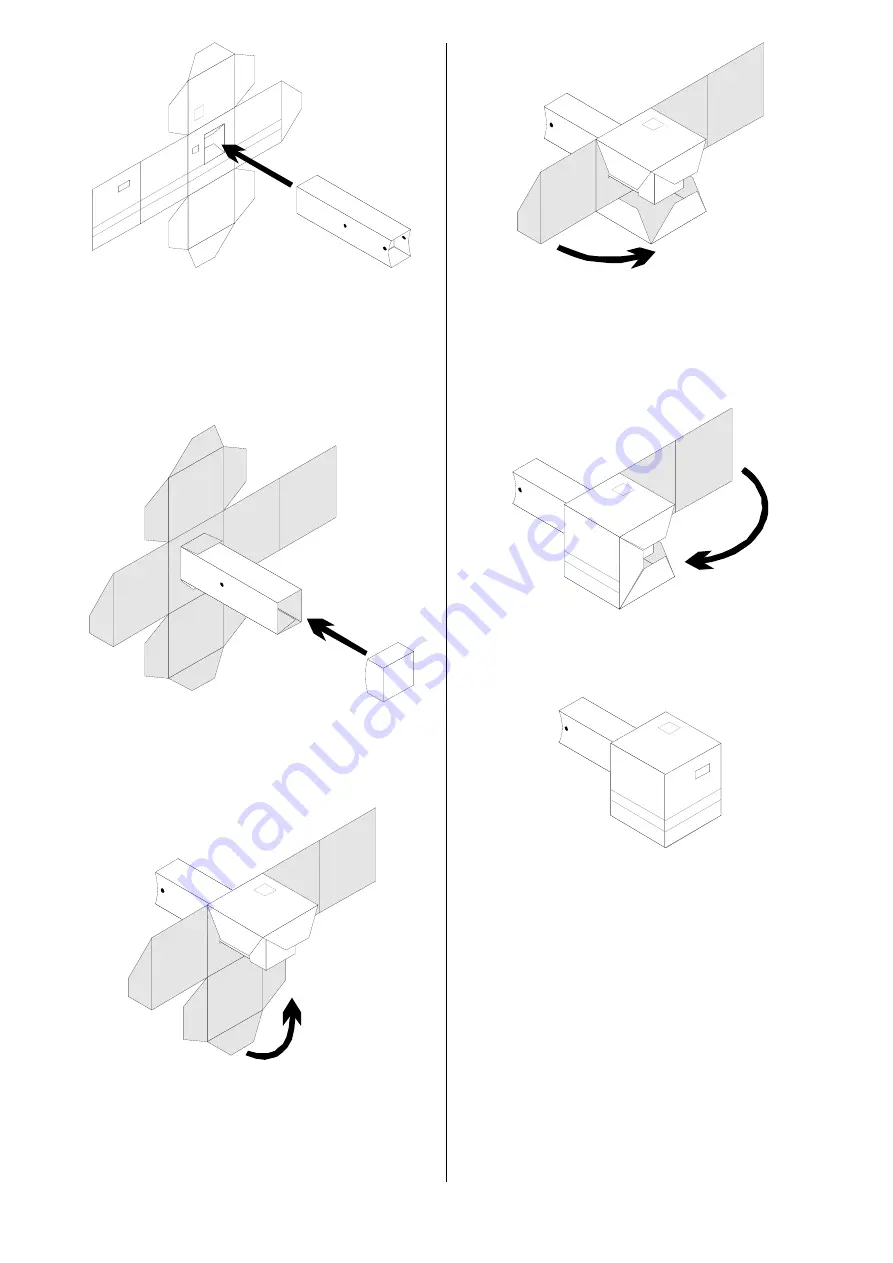
Fig 6 – Inserting the Jetway
Fold down the top, bottom and sides of the jetway end
to form an open box shape. Apply glue around the
outside of the square end of the jetway tube and fit the
end to it (see Fig 7). (The jetway end is intended to
stop the jetway itself from being pulled out of the
completed model.)
Fig 7 – Fitting the Jetway End
Fold in tabs on the sides of the roof and then fold down
the roof itself. Similarly, fold in the tabs around the
floor and then fold the floor inwards (see Fig 8).
Fig 8 – Folding the Roof and Floor
Apply glue to the first tab on the roof and floor and fit
the side wall to it (see Fig 9). Make sure the roof and
floor are flush with the top and bottom edges of the
wall. Fold in the small tab on the end of the wall.
Fig 9 – Fitting the First Wall
Apply glue to the tabs on the roof and floor at the other
end and fit the next wall to them in a similar manner
(see Fig 10). Then apply glue to the three remaining
tabs and fit the last wall. Ensure that the roof and floor
are flush with the walls all the way around.
Fig 10 – Fitting the Remaining Walls
The main walls and jetway assembly should appear as
in Fig 11.
Fig 11 – Main Walls Completed
Walkway
Fold the walkway into a box-shaped tube and glue the
long tab inside the opposite face (see Fig 12). Use a
long narrow object, such as an old chopstick, to press
the tab along the length of the walkway from the
inside, until the glue is set. Ensure that the tube does
not become twisted.


