background image

41 

Technical Support 


E-mail: 

[email protected]


Toll Free: 1-888-746-3238 


Web Site: 

www.airlink101.com


*Super G

TM

 technology (108 Mbps) can only be obtained when using products with Atheros Super G

TM

 chipset 


*Theoretical maximum wireless signal rate based on IEEE standard 802.11g specifications. Actual data throughput will vary. 
Network conditions and environmental factors, including volume of network traffic, building materials and construction, mix of 
wireless products used, radio frequency interference (e.g., cordless telephones and microwaves) as well as network overhead lower 
actual data throughput rate. 


Copyright © 2007 AirLink101. All rights reserved. AirLink101, the stylized AirLink101 logo, specific product designations, and all 
other words and logos that are identified as trademarks and/or service marks are, unless noted otherwise, the trademarks and 
service marks of AirLink101. All other product or service names are the property of their respective holders. AirLink101 products are 
protected under numerous U.S. and foreign patents and pending applications, mask work rights, and copyrights.


Summary of Contents for AR430W

Page 1: ...Super G TM Wireless Broadband Router Model AR430W User s Manual Ver 1A ...

Page 2: ...r 5 4 Configuring the Router 8 Cable Modem 9 DSL 9 5 Connecting to the Router Wirelessly 11 6 Web Configuration Utility 12 6 1 Setup 12 6 2 Wireless 16 6 3 Security 22 6 4 Access Restrictions 23 6 5 Applications Gaming 28 6 6 Administration 31 6 7 Status 37 7 Troubleshooting 40 Technical Support 41 ...

Page 3: ...irelessly to a broadband cable or DSL modem to surf the Internet Auto Sensing Ethernet Switch Equipped with a 4 port auto sensing Ethernet switch Firewall All unwanted packets from outside intruders are blocked to protect your Intranet DHCP Server Supported All of the networked computers can retrieve TCP IP settings automatically from this product Web Based Configuration Configurable through any n...

Page 4: ... Step 2 With another network cable connect one end of the cable to your computer s network card and connect the other end to one of the LAN Ethernet ports of the router Step 3 Power on the DSL Cable modem and wait for the lights on the modem to settle down Step 4 Power on the router by connecting one end of the supplied power adapter to the power jack of the router and connecting the other end to ...

Page 5: ...168 1 1 and press Enter You should get four reply responses back Step 3 If you get Request timed out or Destination host unreachable double check the network cable connection between the computer and the router and try Step 2 again If you still encounter problem go to the next step otherwise proceed to Section 3 Configure the Router Step 4 For Windows 2000 XP type ipconfig release and press Enter ...

Page 6: ...ction 3 Configure the Router If you don t get an IP address reset the router by holding in the reset button at the back of the router for 10 seconds while it is ON and try ipconfig renew again Step 6 For Windows 95 98 ME go to Start Run type winipcfg and click OK Step 7 Select your network card from the drop down menu and click Release ...

Page 7: ...click Renew You should get an IP address of 192 168 1 x where x is a number between 2 254 If you don t get an IP address reset the router by holding in the reset button at the back of the router for 10 seconds while it is ON and try Renew again ...

Page 8: ...rth America or South America and click Apply Warning This device requires that the user or installer properly selects the current region of operation before using this device This device will automatically limit the allowable channels determined by the current region of operation Incorrectly selecting the current region of operation may result in illegal operation and may cause harmful interferenc...

Page 9: ...without any configuration If your ISP has provided you with a host name enter it in the optional Host Name field If your ISP requires a registered MAC Address click on the Clone MAC Address button Click Apply and OK to save the setting If you have trouble connecting to the Internet please refer to the Troubleshooting section at the end of this guide DSL For DSL users follow the steps below to conf...

Page 10: ...10 Step 2 Enter your username and password provided by your ISP Note Depending on the ISP you may need to include the domain name with your username Example username sbcglobal net ...

Page 11: ...r You must configure your wireless network card to the same settings in order to establish a wireless connection to the router Please refer to your wireless network card s manual on how to configure these settings SSID default Operating Mode Infrastructure Authentication Open System Channel 6 WEP disabled If you want to change the router s wireless settings log in to the router and select the Wire...

Page 12: ...ility that you can use to configure the router s settings Simply log in to the router using your computer s web browser 6 1 Setup 6 1 1 Internet Setup This is the default screen when you log in to the router s web configuration utility You can setup your Internet connection here ...

Page 13: ...led in the DHCP Server drop down menu Step 2 Select a computer name from the drop down menu or enter a name associated with this Static IP Address Step 3 Enter the Static IP Address in the IP Address field Step 4 Enter the MAC address of the corresponding computer in the MAC Address field Remember to click Apply and OK to save your changes ...

Page 14: ... a registered DNS name instead of an IP address Before you enable DDNS you need to register an account with one of the DDNS providers listed in the drop down menu To Enable DDNS select the DDNS provider you have registered with and enter the required fields Click Apply and OK to save the setting ...

Page 15: ...15 6 1 4 Time Settings Time Settings allow you to configure the router clock Click Apply and OK to save the setting ...

Page 16: ... b Wireless 11b Only or Disabled to stop wireless function Network Name SSID You can change the router s SSID in this field Once you have changed the SSID your network clients need to re connect themselves using the new SSID Channel Select the desired channel All the network clients need to be using the same channel SSID Broadcast Choose to enable or disable the broadcasting of your SSID ...

Page 17: ...ust use the same security settings in order to connect to the router WEP To enable WEP select WEP from the Security Mode Authentication Type Choose Open System or Shared Key Encryption Choose from 64 bits or 128 bits Key Type Choose HEX or ASCII WEP Key 1 4 Manually assign a password for each key If you selected 64 bits encryption enter 10 HEX characters 0 F for each key If you selected 128 bits e...

Page 18: ...ck Apply and OK to save the setting WPA To enable WPA select WPA PSK or WPA2 PSK from the Security Mode Encryption Methods Select either TKIP or AES as the encryption method Passphrase Enter a passphrase between 8 to 63 characters long Key Renewal Enter the desired key renewal time in seconds Click Apply and OK to save the setting WPA with RADIUS ...

Page 19: ...ADIUS server Shared Key Enter the shared key Key Renewal Enter the desired key renewal time in seconds Click Apply and OK to save the setting WiFi Protected Setup This is an easier way to setup the wireless security for all your wireless clients This security feature only works when your wireless adapter supports this WPS PIN feature You will have to enter the Current PIN at your wireless client s...

Page 20: ...y specifying their MAC address and enabling access restriction Select Enabled from the drop down menu and choose whether the specified wireless clients will be prevented or permitted to access the wireless network Enter their MAC address in the fields below and click Apply and OK to save the setting ...

Page 21: ...rotection Mode Select from disable enable auto Beacon Interval Enter a value from the valid range of 0 to 2346 The default value is 100 Milliseconds DTIM Interval Enter a value from the valid range of 0 to 255 The default value is 1 Fragmentation Threshold Enter an even number from 256 to 2346 The default value is 2346 RTS Threshold Enter a value from the valid range of 0 to 2346 The default value...

Page 22: ... or Disable SPI Mode Select to enable or disable Stateful Packet Inspection Click Apply and OK to save the setting 6 3 2 VPN Passthrough You can select to enable or disable the passthrough of IPSec L2TP and or PPTP Click Apply and OK to save the setting ...

Page 23: ... time 6 4 1 IP Filters Set up policy based on IP addresses Description Enter a name for the policy Status Choose to enable or disable the selected policy IP Addresses Specify client by a range of IP addresses Protocol Select protocol from All TCP UDP or ICMP Port Enter a range of ports Schedule Enter a schedule time To view all the policies click the Summary button ...

Page 24: ...24 6 4 2 MAC Filters Enter Description Name Enter a name for the policy MAC Address Enter a MAC address DHCP Client Select DHCP client on your network To view all the policies click the Summary button ...

Page 25: ...25 6 4 3 URL Blocking You can block the specified clients from accessing certain websites by URL Enter the URL or the Keyword you wish to block Click Apply and OK to save the setting ...

Page 26: ...26 6 4 4 Domain Blocking Specified the domains to deny or allow internet access ...

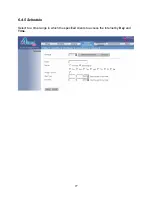
Page 27: ...27 6 4 5 Schedule Select to a time range in which the specified clients to access the Internet by Day and Time ...

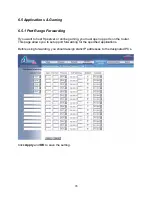
Page 28: ... host ftp server or online gaming you must open up ports on the router This page allows you to setup port forwarding for the specified applications Before using forwarding you should assign static IP addresses to the designated PCs Click Apply and OK to save the setting ...

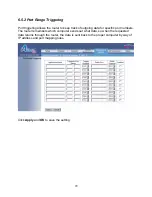
Page 29: ...of outgoing data for specific port numbers The router remembers which computer sends out what data so when the requested data returns through the router the data is sent back to the proper computer by way of IP address and port mapping rules Click Apply and OK to save the setting ...

Page 30: ...Forwarding function fails to make an application work Warning Setting your computer as a DMZ host exposes it to various security vulnerabilities This feature should be used only when needed DMZ Select to enable or disable DMZ Host IP Address Specify the host IP address Note Any DMZ host should have a new static IP address assigned to it because its IP address may change when using the DHCP functio...

Page 31: ...upgrade of the router You can allow remote management from any IP Address or a specified IP Address as well as the port number UPnP Universal Plug and Play UPnP allows Windows Me and XP to automatically configure the router for various Internet applications such as gaming and videoconferencing Backup and Restore You can choose to backup the router s settings so that you don t have to manually conf...

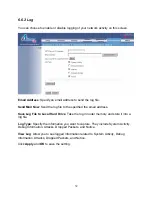
Page 32: ...he email address Save Log File to Local Hard Drive Take the log in router memory and store it into a log file Log Type Specify the information you want to capture They include System Activity Debug Information Attacks Dropped Packets and Notice View Log Allow you to see logged information related to System Activity Debug Information Attacks Dropped Packets and Notice Click Apply and OK to save the...

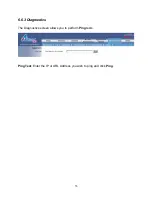
Page 33: ...33 6 6 3 Diagnostics The Diagnostics screen allows you to perform Ping tests Ping Test Enter the IP or URL Address you wish to ping and click Ping ...

Page 34: ...34 6 6 4 Factory Defaults The Factory Defaults screen allows you to set all the router s settings to the factory default Click on the Factory Defaults button to restore all the settings to default ...

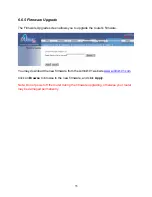
Page 35: ... the router s firmware You may download the new firmware from the Airlink101 website www airlink101 com Click on Browse to browse to the new firmware and click Apply Note Do not power off the router during the firmware upgrading otherwise your router may be damaged permanently ...

Page 36: ...36 6 6 6 Restart The Restart page allows you to restart the router without restoring the settings to factory default Click on the Restart button to restart the router ...

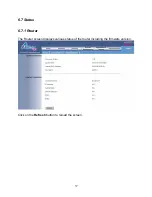
Page 37: ...37 6 7 Status 6 7 1 Router The Router screen displays various status of the router including the firmware version Click on the Refresh button to reload the screen ...

Page 38: ...38 6 7 2 Local Network The Local Network screen displays various status about your Local Area Network Click on the DHCP Client Table to display a list of DHCP clients in your network ...

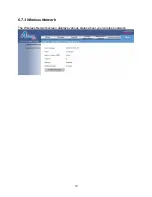
Page 39: ...39 6 7 3 Wireless Network The Wireless Network screen displays various status about your wireless network ...

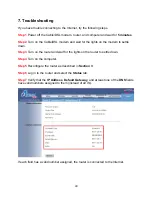
Page 40: ...ettle down Step 3 Turn on the router and wait for the lights on the router to settle down Step 4 Turn on the computer Step 5 Reconfigure the router as described in Section 3 Step 6 Log in to the router and select the Status tab Step 7 Verify that the IP Address Default Gateway and at least one of the DNS fields have valid numbers assigned to them instead of all 0 s If each field has a valid number...

Page 41: ...mix of wireless products used radio frequency interference e g cordless telephones and microwaves as well as network overhead lower actual data throughput rate Copyright 2007 AirLink101 All rights reserved AirLink101 the stylized AirLink101 logo specific product designations and all other words and logos that are identified as trademarks and or service marks are unless noted otherwise the trademar...

Reviews: