
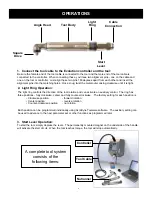

OPERATIONS
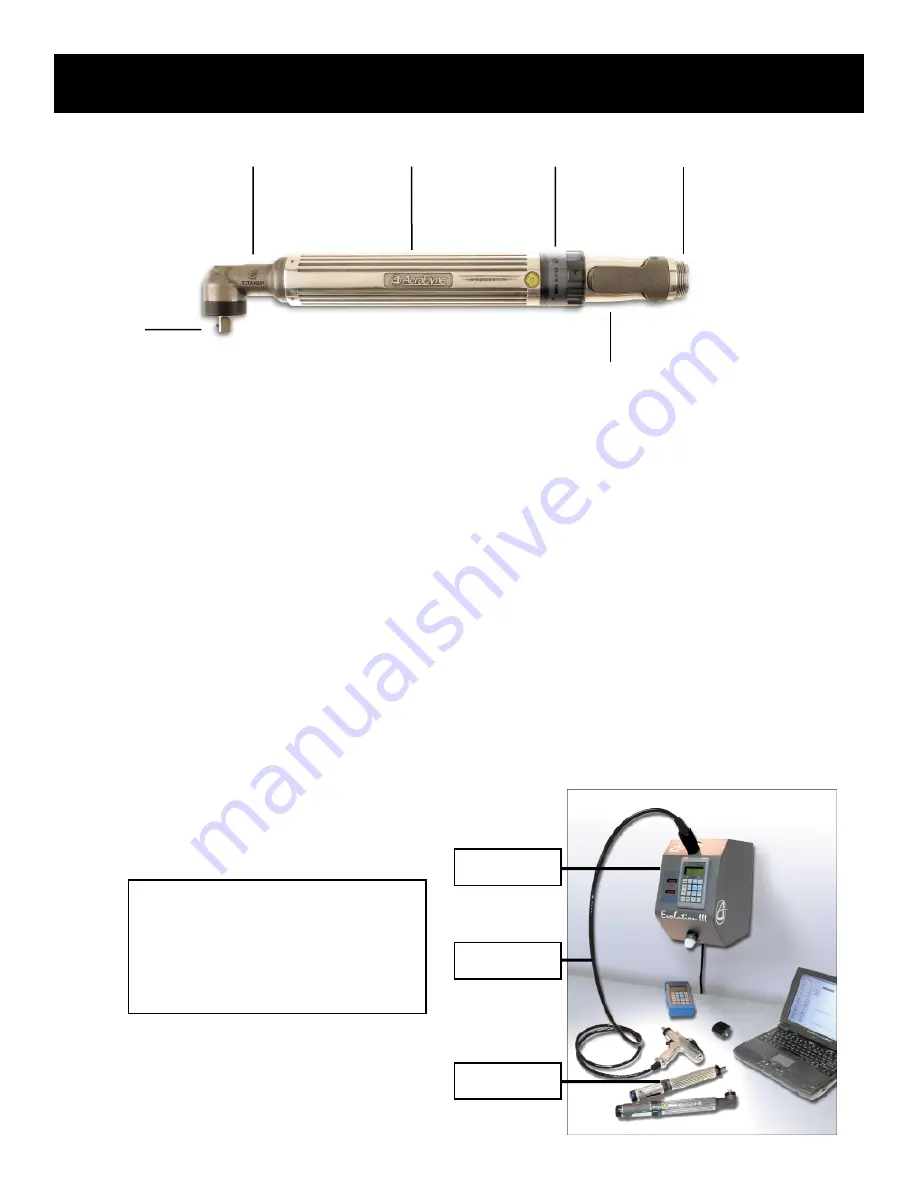
Angle Head
Tool Body
Light
Ring
Start
Lever
Cable
Connection
Square
Drive
1. Connect the tool cable to the Evolution controller and the tool:
Be sure the female end of the tool cable is connected to the tool and the male end of the tool cable is
connected to the controller. When connecting these, you'll see two alignment pins - one on the cable and
one on the tool or controller. Just align these two pins 180 degrees apart from each other and insert the
alignment pins into the matching holes. Once snug, twist the metal outer casing clockwise until it is tight.
2. Light Ring Operation:
The light ring controls the direction of the tool rotation and can activate an auxiliary control. The ring has
three positions - fully clockwise, center and fully counter-clockwise. The factory setting for each position is
• Clockwise position
- forward rotation
• Center position
- reverse rotation
• Counter-clockwise position
- no rotation
Each position can be programmed individually using AcraDyne Toolware software. The auxiliary setting can
be used to advance to the next parameter set or other functions as programmed later.
3. Start Lever Operation:
To start the tool, simply depress the lever. The permanently mounted magnet on the underside of the handle
will activate the start circuit. When the tool reaches torque, the tool will stop automatically.
A complete tool system
consists of the
following items:
Nutrunner
Controller
Tool Cable
3


