7
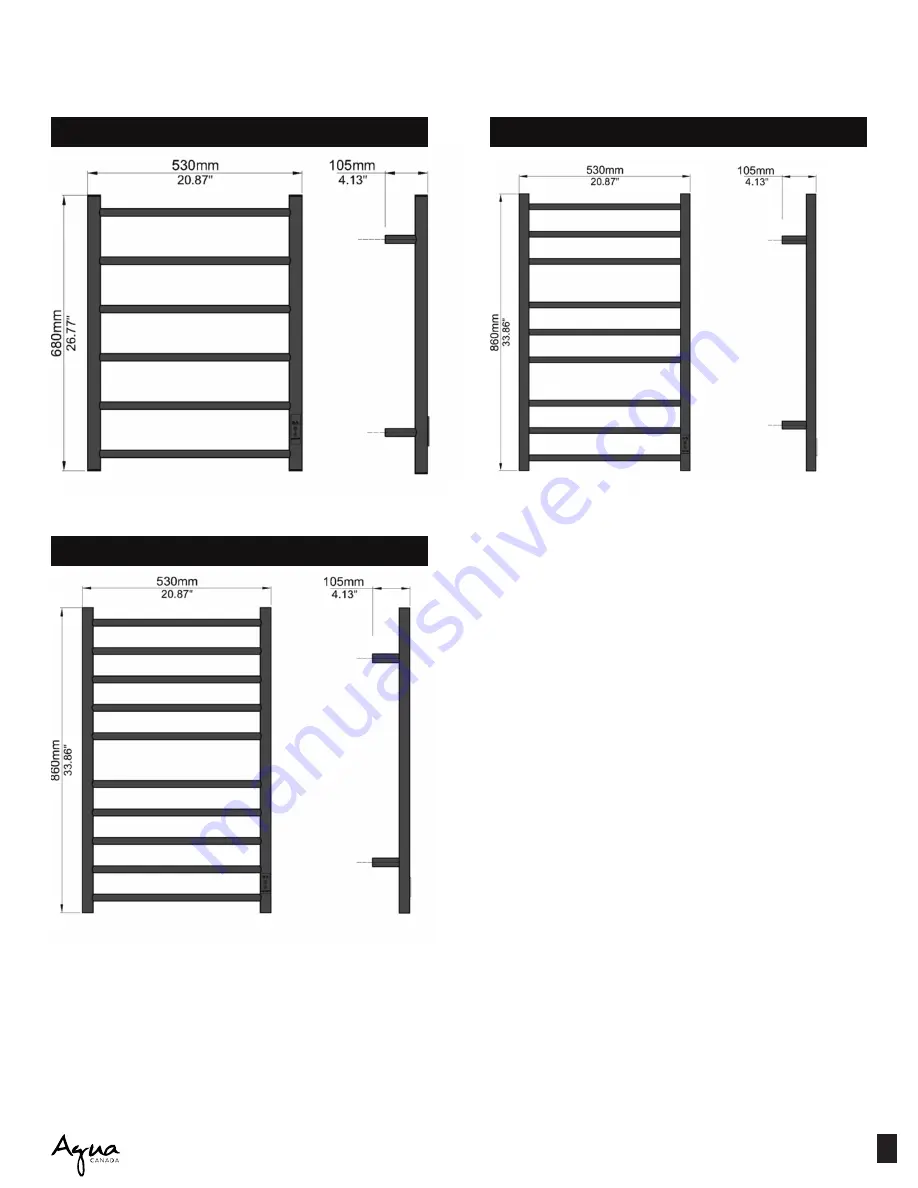
AVAILABLE MODELS & DIMENSIONS
GEORGIA
GUSTAVO
GIOVANNA
Page 1: ...1 TO W E L WARM E R INSTRUCTION MANUAL...
Page 2: ...must be used with a over current protection device 2 This product is supplied with the relevant fitted three pin socket and three wire cable to avoid any risks or danger it must be properly grounded...
Page 3: ...t 3pcs Normal wall bracket Hardwired wall bracket Hardwired wall panel 4pcs Long screw M6 x 45mm 1 pc Screw M6x10 16 mm 4pcs Tapping screw 1 pc Screw M5 x 8mm 4pcs Wall anchor 1 pc Hex key wrench 4pcs...
Page 4: ...w on the wall bracket should towards the floor when the unit is installed Use tape to measure the distance between these four holes and the data AB AC CD and BD Mark A B C D according to the distance...
Page 5: ...he wall completely Insert the tapping screw 4 through bushing 6 Then into the wall anchor 5 make sure bushing 6 is firmly connected to the wall Connect the wall bracket 1 to the bushing 6 and tighten...
Page 6: ...ll panel with screw 9 01 02 03 WARNING 1 Only use for drying textiles which have been dampened by water 2 The original wire cannot be replaced when it is unworkable the whole product should be replace...
Page 7: ...7 AVAILABLE MODELS DIMENSIONS GEORGIA GUSTAVO GIOVANNA...