background image

“ ” in the upper right corner to select to delete,

slideshow, edit, rotate, crop, set picture as, details,

print (must connect to computer with data cable

when printing).

3. Edit: Select the picture to be edited. There is a pencil

icon in the lower left corner of the screen. After

clicking, you can select the filter, picture border,

crop, graffiti, color, etc. After editing the picture,

click“Save” in the upper left corner of the screen

to save it. If you need to go back, you can click the

return icon at the top of the screen.

Calendar

1. Find the calendar icon on the main interface, click it

to view the current date.

2. Click " " at the top right corner of the screen to add

new events in the selected date, search the date

when the event was created, clear events, go to the

specified date, settings.

3. Settings: Click to enter, you will see the general

settings option, which can be set as needed.

4. Click on " " at the top right corner of the screen to

go to the current date.

Clock

1. Alarm clock: Set the alarm time according to your

need. Click “ ” to add alarm. Click “ ” in the

lower right corner to set the alarm time, alarm

volume, etc.

2. Time: Click “ ” to select the time zone that needs

to be added. Click “ ” to set the clock style and

automatic home clock.

3. Countdown: You can set the countdown time

according to your need. After setting the time, click

“ ” to start the countdown.

10

Summary of Contents for T05

Page 1: ...MP4 Music Player AGPTEK Model T05 ...

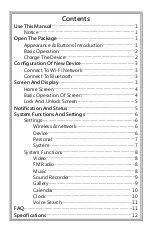
Page 2: ...i Network 3 Connect To Bluetooth 3 Screen And Display 3 Home Screen 4 Basic Operation Of Screen 4 Lock And Unlock Screen 5 Notification And Status 5 System Functions And Settings 6 Settings 6 Wireless network 6 Device 6 Personal 7 System 7 System Functions 8 Video 8 FM Radio 8 Music 8 Sound Recorder 9 Gallery 9 Calendar 10 Clock 10 Voice Search 11 FAQ 11 Specifications 12 ...

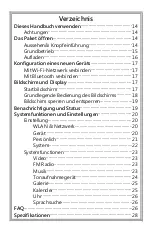
Page 3: ... verbinden 17 Bildschirm und Display 17 Startbildschirm 17 Grundlegende Bedienung des Bildschirms 18 Bildschirm sperren und entsperren 19 Benachrichtigung und Status 19 Systemfunktionen und Einstellungen 20 Einstellung 20 WLAN Netzwerk 20 Gerät 20 Persönlich 21 System 22 Systemfunctionen 23 Video 23 FM Radio 23 Musik 23 Tonaufnahmegerät 24 Galerie 25 Kalender 25 Uhr 26 Sprachsuche 26 FAQ 26 Spezif...

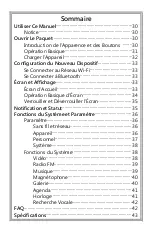
Page 4: ... Se Connecter à Bluetooth 33 Écran et Affichage 33 Écran d Accueil 33 Opération Basique d Écran 34 Verrouiller et Déverrouiller l Écran 35 Notification et Statut 35 Fonctions du Système et Paramètre 36 Paramètre 36 Sans fil et réseau 36 Appareil 36 Personnel 37 Système 38 Fonctions du Système 38 Vidéo 38 Radio FM 39 Musique 39 Magnétophone 40 Galerie 40 Agenda 41 Horloge 41 Recherche Vocale 42 FAQ...

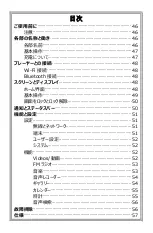
Page 5: ...て 47 プレーヤーとの接続 48 Wi Fi 接続 48 Bluetooth 接続 48 スクリーンとディスプレイ 48 ホーム界面 48 基本操作 49 画面をロックとロック解除 50 通知とステータスバー 50 機能と設定 51 設定 51 無線とネットワーク 51 端末 51 ユーザー設定 52 システム 52 機能 52 Videos 動画 52 FM ラジオ 53 音楽 53 音声レコーダー 54 ギャラリー 54 カレンダー 55 時計 55 音声検索 56 故障排除 56 仕様 57 ...

Page 6: ...ime Over voltage power cable strain bending or squeezing by heavy objects is not allowed to avoid overheating or fire disaster Do not expose the product to moisture or rain It may cause equipment failure or even hard to repair because of water and moisture penetration If the actual setting and using method of this product are inconsistent with this manual due to firmware upgrade please contact us ...

Page 7: ...rectly click the icon to enter various functions or related settings for this device 3 Volume Adjustment Press button to increase the volume Press the button to decrease the volume 4 Virtual Function Keys Operation At the bottom of the screen display the navigation bar Hide these virtual function keys icons The hidden navigation bar will appear when you set it Display background hidden file interf...

Page 8: ...ecommended that you buy a special charger for digital products Configuration Of New Device Connect To Wi Fi Network 1 Swipe down from the status bar to open the notifications bar or find Wi Fi in Settings 2 Turn on the Wi Fi switch and the system will list all detected WiFi network 3 Tap the Wi Fi network you want to connect to If you select an encrypted network you will need to enter password for...

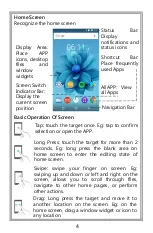
Page 9: ...Eg tap to confirm selection or open the APP Long Press touch the target for more than 2 seconds Eg long press the blank area on home screen to enter the editing state of home screen Swipe swipe your finger on screen Eg swiping up and down or left and right on the screen allows you to scroll through files navigate to other home pages or perform other actions Drag Long press the target and move it t...

Page 10: ...e status bar you can know the notification information and running status of the device in real time When there are notifications light up the device screen and swipe down from the status bar to view various messages Open notification bar Notification bar icon When the notification bar is turned on you can quickly set the screen brightness WiFi Bluetooth airplane mode do not disturb mode auto rota...

Page 11: ...VPN Device 1 Display You can set the brightness wallpaper sleep time font size and rotation 2 Navigation bar You can choose the display mode of the navigation bar 3 Sound notification You can select the mode and sound effect of the prompt tone as needed 4 Apps You can see all the software added in the device Click the corresponding software to see the related information or you can choose to unloa...

Page 12: ... and restore to the factory settings Note All data in your device will be cleared when you restore to the factory settings Please make a backup before doing that System 1 Date time The date and time can be automatically determined via connecting to network or the time and date can be set manually PS You need to connect to Wi Fi first to automatically synchronize date time Otherwise you need to set...

Page 13: ...FM Radio 1 Plug in the wired earphones find the FM radio icon on the interface click it to enter the FM radio function 2 The player will automatically search for radio stations 3 Click on the interface to adjust to the next or previous channel Click on the interface to adjust the channel by selecting up and down 4 Click on the interface to collect the channel being played 5 Click in the upper righ...

Page 14: ...the repeat mode 7 Click to select party shuffle add to playlist use as ringtone delete sound effects can set equalizer library 8 Click to quickly find music Sound Recorder 1 Find the sound recorder icon on the interface and click it to enter the recording function 2 Click to start recording 3 Click to pause the recording 4 Click to end the recording 5 Click to view the recording file Gallery 1 Fin...

Page 15: ...lick it to view the current date 2 Click at the top right corner of the screen to add new events in the selected date search the date when the event was created clear events go to the specified date settings 3 Settings Click to enter you will see the general settings option which can be set as needed 4 Click on at the top right corner of the screen to go to the current date Clock 1 Alarm clock Set...

Page 16: ...puter does not display the USB symbol when transferring files A Since the device is 32 bit Android system the computer cannot display the USB symbol However you can open Computer or My Computer in your computer to view the disk name AGP T05 and continue the transmission 2 The computer reminded that the format is not supported during the transmission of files A Due to system reason some formats may...

Page 17: ...will be appeared You can choose to exit and return 4 Some video formats cannot be opened in the built in video software A The built in video software of this device has limited decoding capability It can download third party video software for playback In addition files in rmvb format are copyright protected so this device cannot support this format Specifications Size 108 60 9mm Screen 4 screen r...

Page 18: ...ecord 12 hours FM Radio 12 hours Compatible System Android 6 0 or above Charging time 2 hours Battery Built in 1000mAh polymer battery Recommende d Charger 5 0VDC 1A Using Temperature 0 45 If you have any problems please feel free contact us E mails support agptek com Manufacturer Shenzhen Wobolin Technology Co Ltd Address Factory A No 4 Baolong 3rd Road Baolong Industrial Zone Baolong Community L...

Page 19: ...ände dürfen nicht zur Vermeidung von Überhitzung oder Brandgefahr führen Setzen Sie das Produkt weder Feuchtigkeit noch Regen aus Aufgrund des Eindringens von Wasser und Feuchtigkeit kann es zu Geräteausfällen oder sogar zu einer schwierigen Reparatur kommen Wenn die tatsächlichen Einstellungen und Verwendungsmethoden dieses Produkts aufgrund eines Firmware Upgrades nicht mit diesem Handbuch übere...

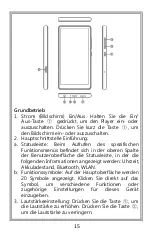
Page 20: ...ndet sich in der oberen Spalte der Benutzeroberfläche die Statusleiste in der die folgenden Informationen angezeigt werden Uhrzeit Akkuladestand Bluetooth WLAN b Funktionssymbole Auf der Hauptoberfläche werden 20 Symbole angezeigt Klicken Sie direkt auf das Symbol um verschiedene Funktionen oder zugehörige Einstellungen für dieses Gerät einzugeben 3 Lautstärkeeinstellung Drücken Sie die Taste um d...

Page 21: ... Geräts über ein Ladegerät 5 V 1A oder über die USB Schnittstelle des Computers Achtungen 1 Wenn das Gerät längere Zeit betrieben wird insbesondere in Umgebungen mit hohen Temperaturen ist es ein normales Phänomen dass die Oberfläche heiß sein kann Unterbrechen Sie den Ladevorgang wenn Sie das Gefühl haben dass es heiß ist schalten Sie einige Funktionen aus und bringen Sie das Gerät an einen kühle...

Page 22: ...sseltes Netzwerk auswählen müssen Sie ein Kennwort für die Zugriffsverbindung eingeben Mit Bluetooth verbinden 1 Wischen Sie in der Statusleiste nach unten um das Benachrichtigungsfeld zu öffnen oder suchen Sie in den Einstellungen nach Bluetooth 2 Schalten Sie den Bluetooth Schalter ein Rufen Sie die Bluetooth Einstellungsoberfläche auf und suchen Sie nach der Bluetooth Adresse 3 Tippen Sie auf d...

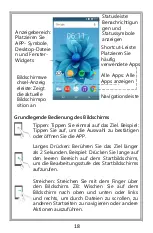
Page 23: ... und Fenster Widgets Bildschirmwe chsel Anzeig eleiste Zeigt die aktuelle Bildschirmpo sition an Shortcut Leiste Platzieren Sie häufig verwendete Apps Navigationsleiste Tippen Tippen Sie einmal auf das Ziel Beispiel Tippen Sie auf um die Auswahl zu bestätigen oder öffnen Sie die APP Streichen Streichen Sie mit dem Finger über den Bildschirm ZB Wischen Sie auf dem Bildschirm nach oben und unten ode...

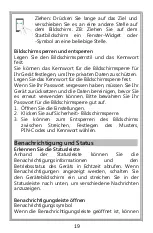
Page 24: ...perren des Bildschirms zwischen Streichen Festlegen des Musters PIN Codes und Kennwort wählen Benachrichtigung und Status Erkennen Sie die Statusleiste Anhand der Statusleiste können Sie die Benachrichtigungsinformationen und den Betriebsstatus des Geräts in Echtzeit abrufen Wenn Benachrichtigungen angezeigt werden schalten Sie den Gerätebildschirm ein und streichen Sie in der Statusleiste nach un...

Page 25: ...d Screenshot zu erstellen Systemfunktionen und Einstellungen Einstellungen Suchen Sie das Einstellungssymbol auf dem Hauptbildschirm und klicken Sie darauf um die Einstellungsfunktion aufzurufen WLAN Netzwerk 1 Drahtloses Netzwerk Nach dem Einschalten von Wi Fi sucht das Gerät automatisch nach einem verbindbaren drahtlosen Netzwerk 2 BBluetooth Nach dem Einschalten von Bluetooth sucht das Gerät au...

Page 26: ...ie können den verwendeten Speicher und den von Apps belegten Speicherplatz anzeigen 6 Batterie Sie können den intelligenten Energiesparmodus einstellen und den Stromverbrauch überprüfen 7 Arbeitsspeicher Sie können den Arbeitsspeicher des Geräts und den durchschnittlichen Arbeitsspeicherbedarf jeder Anwendung überprüfen Persönlich 1 Sprache Eingabe Sprache und Eingabemethoden können eingestellt we...

Page 27: ...it und Datum können manuell eingestellt werden PS Sie müssen zuerst eine Wi Fi Verbindung herstellen um Datum und Uhrzeit automatisch zu synchronisieren Andernfalls müssen Sie es manuell einstellen Klicken Sie auf Automatisches Datum und Uhrzeit und wählen Sie Aus um mit dem Einstellen von Datum und Uhrzeit fortzufahren 2 Ein Ausschalten nach Zeitplan Sie können die Ein und Ausschaltzeit nach Beda...

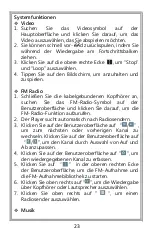
Page 28: ...oberfläche und klicken Sie darauf um die FM Radio Funktion aufzurufen 2 Der Player sucht automatisch nach Radiosendern 3 Klicken Sie auf der Benutzeroberfläche auf um zum nächsten oder vorherigen Kanal zu wechseln Klicken Sie auf der Benutzeroberfläche auf um den Kanal durch Auswahl von Auf und Ab anzupassen 4 Klicken Sie auf der Benutzeroberfläche auf um den wiedergegebenen Kanal zu erfassen 5 Kl...

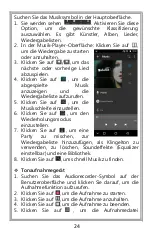
Page 29: ...5 Klicken Sie auf um die Musikschleife einzustellen 6 Klicken Sie auf um den Wiederholungsmodus einzustellen 7 Klicken Sie auf um eine Party zu mischen zur Wiedergabeliste hinzuzufügen als Klingelton zu verwenden zu löschen Soundeffekte Equalizer einstellbar und eine Bibliothek 8 Klicken Sie auf um schnell Musik zu finden Tonaufnahmegerät 1 Suchen Sie das Audiorecorder Symbol auf der Benutzeroberf...

Page 30: ...en linken Ecke des Bildschirms befindet sich ein Stiftsymbol Nach dem Klicken können Sie Filter Bildränder Zuschnitte Graffiti Farben und mehr auswählen Klicken Sie nach dem Bearbeiten des Bildes auf Speichern in der oberen linken Ecke des Bildschirms um es zu speichern Wenn Sie zurückgehen müssen können Sie oben auf dem Bildschirm auf das Zurück Symbol klicken Kalender 1 Suchen Sie das Kalendersy...

Page 31: ...um den Uhrstil und die automatische Heimatuhr einzustellen 3 Countdown Sie können die Countdown Zeit nach Bedarf einstellen Klicken Sie nach dem Einstellen der Uhrzeit auf um den Countdown zu starten 4 Stoppuhr Klicken Sie auf oder den kreisförmigen Bereich auf dem Bildschirm um die Zeitmessung zu starten oder anzuhalten Klicken Sie auf um das Timing neu zu starten Klicken Sie auf um die Timing Er...

Page 32: ...bertragen von Dateien das Fenster Format nicht unterstützt öffnet Tatsächlich können sie unterstützt werden Wenn dieses Fenster erscheint wählen Sie bitte Ja und Vorgang für alle Dateien ausführen Die Übertragung wird fortgesetzt ohne dass dieses Fenster angezeigt wird 3 Die Navigationsleiste verschwindet nach dem Öffnen einiger Anwendungen A Wenn die Navigationsleiste ausgeblendet wird können Sie...

Page 33: ...anbietern zur Wiedergabe herunterladen Außerdem sind Dateien im RMVB Format urheberrechtlich geschützt sodass dieses Gerät dieses Format nicht unterstützt Spezifikationen Abmessung 108 60 9mm Bildschirm 4 Bildschirm Auflösung 960 480 Interne Speicher 1G 8G Detaillierte Informationen sind in Übereinstimmung mit dem Endprodukt Musikformat MP3 OGG FLAC AAC WMA WAV APE Einige Formate erfordern APP Unt...

Page 34: ...les System Android 6 0 oder höher Ladezeit 2H Batterie Eingebaute 1000mAh Polymerbatterie Empfohlenes Ladegerät 5 0VDC 1A Temperatur beim verwenden 0 45 Wenn Sie irgendwelche Probleme haben wenden Sie sich bitte an uns E mails support agptek com Hersteller Shenzhen Wobolin Technology Co Ltd Adresse Factory A No 4 Baolong 3rd Road Baolong Industrial Zone Baolong Community Longgang Street Longgang D...

Page 35: ...t pas autorisés afin d éviter une surchauffe ou un incendie N exposez pas le produit à l humidité ou à la pluie Cela pourrait provoquer une panne de l équipement ou même des réparations difficiles en raison de la pénétration d eau et d humidité Si le réglage actuel et la méthode d utilisation de ce produit ne concordent pas avec ce manuel en raison de la mise à niveau du firmware veuillez nous con...

Page 36: ...cifique la colonne supérieure de l interface est la barre d état qui affiche ces informations Heure Niveau de La Batterie Bluetooth WiFi b Icônes de Fonctions Dans l interface principale le système est livré avec 20 icônes Cliquez directement sur l icône pour entrer diverses fonctions ou paramètres associés pour ce dispositif 3 Réglage du Volume Appuyez sur le bouton pour augmenter le volume et le...

Page 37: ...ia le port USB de l ordinateur Remarques 1 Après une longue période d utilisation de l appareil en particulier dans un environnement à haute température il est normal que la surface soit chaude Lorsque vous sentez qu il fait chaud arrêtez de charger désactivez certaines fonctions et déplacez l appareil dans un endroit frais Évitez le contact prolongé avec la surface chaude 2 Si vous n utilisez pas...

Page 38: ...ctionnez un réseau crypté vous devrez entrer un mot de passe pour la connexion d accès Se Connecter à Bluetooth 1 Faites glisser vers le bas à partir de la barre d état pour ouvrir le panneau des notifications ou recherchez Bluetooth dans Paramètres 2 Activez le commutateur Bluetooth Entrez l interface de paramètres Bluetooth et recherchez l adresse Bluetooth 3 Appuyez sur le nom de l adresse Blue...

Page 39: ...ônes d état Zone d Affichage Placer les icônes de l application les fichiers du bureau et les widgets de fenêtre Barre d Indicateur de Commutation d Écran Afficher la position actuelle de l écran Barre de Raccourcis Placer les Apps fréquemment utilisées Barre de Navigation Glisser Faites glisser votre doigt sur l écran P ex glisser vers le haut et le bas ou vers la gauche et la droite sur l écran ...

Page 40: ... Schéma Code PIN ou Mot de passe pour déverrouiller l écran Notification et Statut Reconnaître la barre d état Selon la barre d état vous pouvez connaître les informations de notification et l état de fonctionnement du périphérique en temps réel Lorsqu il y a des notifications allumez l écran du périphérique et balayez la barre d état vers le bas pour afficher divers messages Ouvrir la barre de no...

Page 41: ...eau 1 Réseau sans fil Une fois le Wi Fi activé l appareil recherchera automatiquement le réseau sans fil pouvant être connecté 2 Bluetooth Après avoir activé le Bluetooth l appareil recherchera automatiquement les dispositifs Bluetooth pouvant être connectés Connectez uniquement les haut parleurs Bluetooth et les écouteurs Bluetooth 3 Mode Avion Le réseau sera automatiquement désactivé une fois le...

Page 42: ...yenne de la mémoire de chaque application Personnel 1 Langue et saisie La langue et les méthodes d importation peuvent être définies 2 Localisation La localisation peut être ouverte ou non selon les exigences du logiciel 3 Sécurité Vous pouvez définir le mode de verrouillage de l écran et l administration du dispositif pour définir les autorisations des applications Vous pouvez également définir l...

Page 43: ... régler la date et l heure 2 Programmation mise en marche arrêt Vous pouvez régler l heure de mise sous tension et hors tension selon vos besoins Une fois le réglage terminé cliquez sur OK en haut à droite de l écran 3 Accessibilité Vous pouvez définir le sous titre des gestes d agrandissement des grands caractères du texte avec contraste élevé ka rotation automatique de l écran des mots de passe ...

Page 44: ... et bas 4 Cliquez sur sur l interface pour collecter le canal en cours de lecture 5 Clicquez sur dans le coin supérieur droit de l interface pour choisir de démarrer l enregistrement FM et la bibliothèque d enregistrements FM 6 Clicquez sur dans le coin supérieur droit pour choisir de jouer avec un casque ou un haut parleur 7 Cliquez sur dans le coin supérieur droit pour sélectionner une station d...

Page 45: ... la musique Magnétophone 1 Recherchez l icône Magnétophone sur l interface et cliquez dessus pour accéder à la fonction d enregistrement 2 Cliquez sur pour commencer l enregistrement 3 Cliquez sur pour mettre en pause l enregistrement 4 Cliquez sur pour terminer l enregistrement 5 Cliquez sur pour voir les fichiers d enregistrement Galerie 1 Trouvez l icône Galerie sur l interface principale et cl...

Page 46: ...da sur l interface principale cliquez dessus pour afficher la date du jour 2 Cliquez sur dans le coin supérieur droit de l écran pour ajouter de nouveaux événements à la date sélectionnée recherchez la date de création de l événement effacez les événements accédez à la date spécifiée puis paramétrez 3 Paramètres Cliquez pour entrer vous verrez l option des paramètres généraux qui peut être définie...

Page 47: ...gle Chrome FAQ 1 L ordinateur n affiche pas le symbole USB lors du transfert de fichiers A Étant donné que l appareil est un système Android 32 bits l ordinateur ne peut pas afficher le symbole USB Cependant vous pouvez ouvrir Ordinateur ou Mon ordinateur sur votre ordinateur pour afficher le nom du disque AGP T03S et poursuivre la transmission 2 L ordinateur a rappelé que le format n est pas pris...

Page 48: ...cendre de la barre d état pour ouvrir la barre de notification La barre de navigation s affichera Vous pouvez choisir de sortir et de revenir 4 Certains formats de vidéo ne peuvent pas être ouverts dans le logiciel vidéo intégré A Le logiciel vidéo intégré à cet appareil a une capacité de décodage limitée Il peut télécharger un logiciel vidéo tiers pour la lecture De plus les fichiers au format rm...

Page 49: ...S Certains formats nécessitent une prise en charge d applications tierces Format d Image JPG BMP GIF PNG Format de Lyric LRC Ebook PDF TXT EPUB FB2 Connectivité USB TYPE C Expansion de la Carte Carte TF extension jusqu à 32G Durée Musique Casque 30 heures Haut par leur 6 5 heures Vidéo Casque 2 heures Haut par leur 1 5 heures Enregistr ement 12 heures Radio FM 12 heures Système Compatible Android ...

Page 50: ...ature d Utilisation 0 45 Si vous avez des problèmes n hésitez pas à nous contacter E mails support agptek com Fabricant Shenzhen Wobolin Technology Co Ltd Adresse Usine A N 4 3ème Rue Baolong Zone Industrielle Baolong Communauté Baolong Avenue Longgang District Longgang Shenzhen 45 ...

Page 51: ...み下 さい この取扱説明書のすべての図は参照用であり 実際の製品 に準じてください 注意 本機に保管されている個人情報を速やかにバックアップすること をお勧めします 火災等の原因となりますので 本機に過負荷電源を使用した り 強く曲げたり 重い物で電源コードを絞ったりしないでくださ い 機器の故障等の原因となりますので 湿気 ほこりの多いところ に置かないでください ファームウェアのアップグレードの原因で この製品の実際の設定 と使用方法がこの取扱説明書と一致しない場合は お問い合 わせください 各部の名称と働き 各部名前 46 ...

Page 52: ...ス バ ー で あ り 情 報 時 間 バ ッ テ リ ー 情 報 Bluetooth Wi Fi 等が表示されます b 機能アイコン ホーム界面には デフォルトで 20 個のアイコンが あります アイコンをクリックして その機能にアクセスします 3 音量調整 ボタン を押して音量を上げます ボタン を押し て 音量を下げます 4 非表示の機能ボタン 非表示のナビゲーションバーが画面の下部に表示されます 非表示の機能ボタンを隠します 設定すると 非表示のナビゲ ーションバーが表示されます バックグラウンドの隠しファイル界面を表示します メインメニュー界面に戻ります 前の画面に戻ります 充電について 電量不足した時に プレーヤーは低電力の提示を表示します その 時 すぐに充電してください 充電器 5V 1A またはコンピューターの USB インターフェイスを 介して本機を充電できます ご注意...

Page 53: ...電器を購入されることをお勧めします プレーヤーとの接続 Wi Fi 接続 1 ステータスバーから下にスワイプして通知表示を開くか 設定 で Wi Fi を見つけます 2 Wi Fi 機能を開く 検索された Wi Fi ネットワークがリストと して表示されます 3 接続したい Wi Fi ネットワークを選択してください 暗号化され たネットワークを選択した場合は アクセスパスワードを入力する 必要があります Bluetooth 接続 1 ステータスバーから下にスワイプして通知表示を開くか 設定 で Bluetooth を見つけます 2 Bluetooth 機能を開く Bluetooth の設定界面に入り 使 用可能なデバイスを検索します 3 接続したい Bluetooth デバイスを選択し ペアリングしてくださ い スクリーンとディスプレイ ホーム界面 48 ...

Page 54: ...置 ナビゲーションバー クリック ターゲットを 1 回クリックします 例えば クリッ クして選択を確認するか アプリを開きます 長押し ターゲットに 2 秒以上触れます 例えば ホ ーム画面の空白領域を長押しして ホーム画面の編集 状態に入ります スワイプ 画面上で指をスライドさせます 例えば 画 面上で指を上下または左右にスワイプすると ドキュメン トをスクロールしたり 他のホームページに移動したり 他の操作を実行したりできます ドラッグ ターゲットを長押しして 画面上の別の場所 に移動します 例えば ホーム画面で ウィジェットま たはアイコンを任意の場所にドラッグします 49 全てのアプリ 本機に全 ての アプリを表示さ れます ...

Page 55: ...ステータスバーについて ステータスバーを使用すると 本機の通知と動作ステータスをリアルタ イムで確認できます 通知リマインダーがある場合は 画面を照ら し ステータスバーから下にスライドしてさまざまなメッセージを表示し ます 通知とステータスバーを開く ステータスアイコン ステータスアイコンを通じて ネットワーク接続 信号強度 バッテリー レベル 時間などの情報をすばやく知ります 通知パネルのアイコン 通知パネルをオンを通じて 画面の明るさ ワイヤレスネットワーク Bluetooth 機内モード 縦向き 現在地 Screenshot スクリ ーンショット 等を設定できます スクリーンショット 1 メイン界面の上部が下にスライドし 通知パネルを開いて Screenshot をクリックしてスクリーンショットを撮ります 2 指でボリューム下げのボタンと電源ボタンを同時に押し 画面を クリックして...

Page 56: ...み接続できます 3 機内モード 機内モードを ON にすると ネットワークを自動的 に切ります 4 もっと見る VPN とデータ使用量を表示します 端末 1 ディスプレイ 明るさのレベル 壁紙 スリープ時間 フォントサイ ズ 端末が回転等を設定できます 2 Navigation bar ナビゲーションバー ナビゲーションバー の表示方法を選択できます 3 音と通知 必要に応じて 着信音のタイプと音声強化を選択 します 4 アプリ 本機内で全てのアプリを表示されています その一つの アプリをクリックして アプリの情報を表示されています 一部のア プリはアンインストールを実行できます でも このプレーヤーに付 属のアプリはアンインストールできません 5 ストレージと USB 内部ストレージと各アプリが使用したストレ ージを表示されます 6 電池 電量使用情報を表示されます 省電力モードを設定で...

Page 57: ...ットワーク設定のレ セット DRM リセット データの初期化を設定できます 注意 データの初期化にすると 本機ですべてのデータが消去され ます その前にデータをバックアップしてください システム 1 日付と時刻 ネットワークから提供された日付と時刻を使用し て自動設定できます 時刻と日付を手動で調整することもでき ます 注意 現地時間はデフォルトで日本の東京時間に設定されて います 必要な時間を設定したい場合は 対応するタイムゾー ンを手動で選択し wifi に接続した後に自動的に時間を更新 されます 2 電源 ON OFF のスケジュール設定 必要に応じて 電源 ON OFF 時間を設定できます 3 ユーザー補助 字幕 拡大操作 大きい文字サイズ 高コント ラストテキスト 画面の自動回転 パスワードの音声出力 テキ スト読み上げの出力 色反転 色補正等を設定できます 4 端末情報 本機で...

Page 58: ...ム界面で FM ラジオ を見つけて その機能にアクセスします 2 本機は自動的に放送局を検索できます 3 画面で をクリックして 次または前のチャンネルに調整 します 画面で をクリックして そのチャンネルの上下の 周波数を調整できます 4 画面で をクリックして お気に入るチャンネルを保存できま す 5 画面の右上隅で をクリックして 録音開始 または 保存 済みの録音 を表示されます 6 画面の右上隅で をクリックして イヤホン或いはスピーカー で再生することを選択します 7 画面の右上隅で をクリックして ラジオステーションを選択 できます 音楽 ホーム界面で 音楽 を見つけます 1 画面で アーティスト アルバム 曲 プレイリスト を表示されます 2 音楽再生中画面で をクリックして一時停止 再生にしま す 3 画面で をクリックして 次の曲 前の曲を再生します 4 画面で をクリ...

Page 59: ...索します 音声レコーダー 1 ホーム界面で 音声レコーダー を 見つけて その機能にアクセスします 2 画面で をクリックして 録音を開始します 3 画面で をクリックして 録音を一時停止します 4 画面で をクリックして 録音完了します 5 画面で をクリックして 録音ファイルを表示されます ギャラリー 1 ホーム界面で ギャラリー を見つけて ダウンロードした画像を表 示されます 2 画像を閲覧されている時に 右上隅で をクリックして 削 除 スライドショー 編集 左に回転 右に回転 トリミング 登 録 詳細情報 印刷 等の選択しを表示されます 印刷したい 場合は 充電ケーブルを使用してパソコンに接続する必要があ ります 3 編集 まずは編集したい画像を選択してくだい 画面の左下 隅に鉛筆のアイコンがあります クリックした後 フィルター 画像 54 ...

Page 60: ...3 設定 全般設定の内容 カレンダーについて情報を表示されま す 4 画面の右上隅の をクリックして 現在の日付に移動できま す 時計 1 目覚まし時計 必要に応じてアラームの時間を設定します 画 面で をクリックしすると 目覚まし時計を追加できます 右 下隅の をクリックすると アラームの時間と音量等を設定で きます 2 時刻 画面で をクリックして 追加するタイムゾーンを選択 します 画面で をクリックすると 時刻のスタイルを設定した り 自宅の時刻を自動的に表示したりを設定します 3 カウントダウン 必要に応じて カウントダウンの時間を設定しま す 時間を設定したら をクリックして カウントダウンを開 始します 4 ストップウォッチ 画面上の円形の領域をクリックして タイミング を開始 一時停止します 画面で をクリックして 再び計 時を開始できます 画面で をクリックして 計時結果...

Page 61: ... USB アイコン を表示できません PC で コンピューター を開いてディスク AGP T03S を表示されます 転送を続行す ることができます 2 ファイル転送中 コンピューターで 当該フォーマットはサポート されていません という表記があります システム上の理由により 一部のフォーマットでは ファイル転送 中時にコンピューターが 当該フォーマットはサポートされていませ ん ウィンドウを表示される場合があります 実際 サポート可能 です このウィンドウがポップアップしたら はい を選択して すべ てのファイルを実行 をチェックしてください その時に データ転送 が引き続くことができます 3 一部のアプリが開いたらナビゲーションバーが消えてしまっ た ナビゲーションバーが消えたら ナビゲーションバーが非表示にな 56 ...

Page 62: ...の内蔵ビデオアプリは デコード機能に制限があり サード パーティ製のビデオアプリをダウンロードしてください また rmvb 形式のファイルは著作権のため 本機はこの形式をサポ ートできません 仕様 寸法 108mm 60mm 9mm スクリーン 4 インチのディスプレイ 解像度 960 480 内蔵容量 1G 8G 詳細情報は最終製品と一 致 音楽フォーマット MP3 OGG FLAC AAC WMA WAV APE 一部のフォーマットではサードパーティの APP サポートが必要です 動画フォーマット RM AVI RMVB 3GP FLV MP4 DAT MKV MPG MOV TS 一部のフォーマットではサードパーティの APP サポートが必要です 画像フォーマット JPG BMP GIF PNG 歌詞フォーマット LRC 57 ...

Page 63: ... 時間 FM ラジオ 12 時間 システム Android システム 6 0 以降 充電時間 2 時間 電池 ポリマー 1000mAh 電池内蔵 充電器規格 5 0VDC 1A 使用環境 0 から 45 まで 若し何か問題がございましたら お気軽にお問い合わせください メールボックス support agptek com メーカー Shenzhen Wobolin Technology Co Ltd アドレス Factory A No 4 Baolong 3rd Road Baolong Industrial Zone Baolong Community Longgang Street Longgang District Shenzhen 58 ...

Reviews: