background image

7

5.

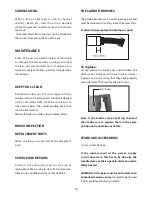
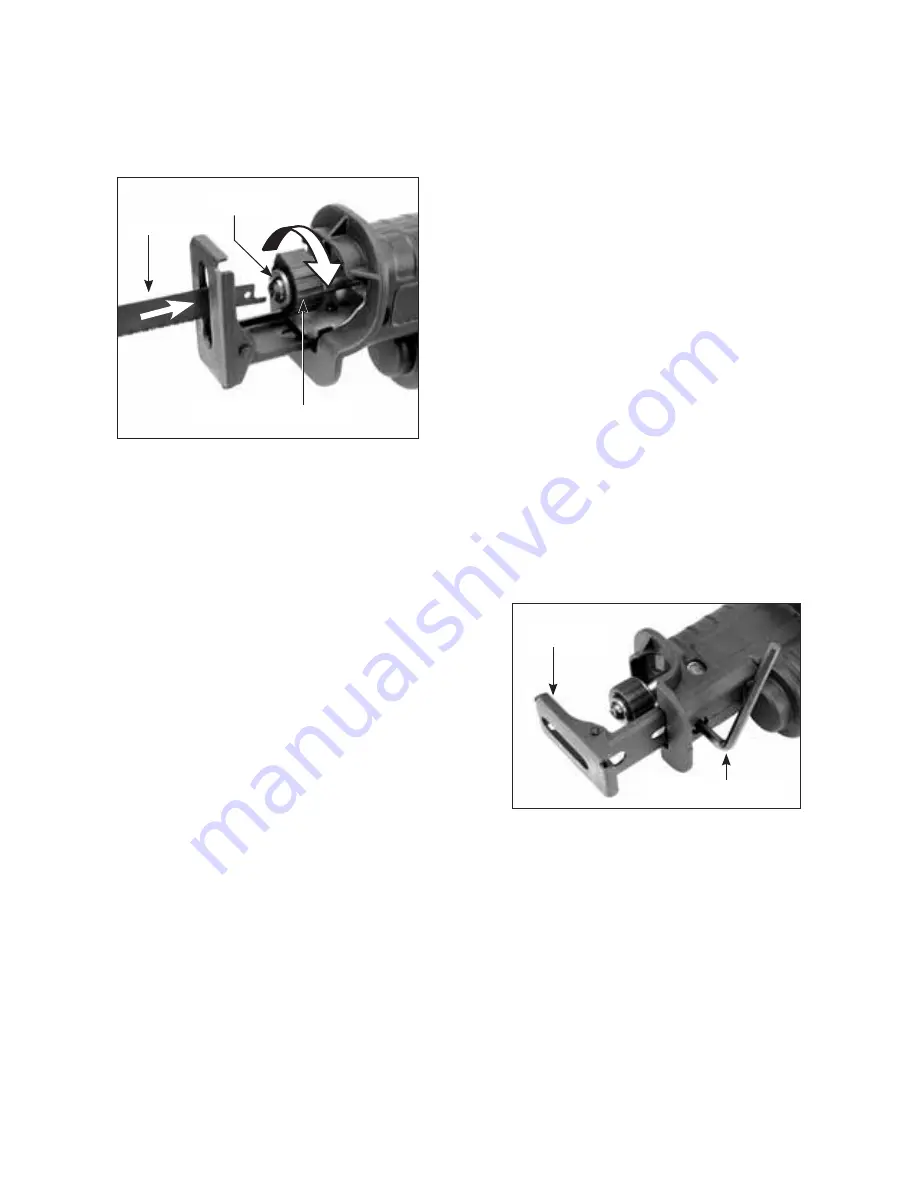
  Sometimes you need to turn the quick-

release collar as shown  to ensure the blade is 
mounted appropriately when there is dust or 
dirt accumulated on the quick-release collar.

Removing the blade

WARNING: Make sure to unplug the power cord 
when mounting or removing the blade.

1.

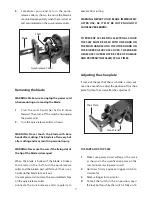
  Press the switch and the shaft will move 

forward. Then turn off the switch and unplug 
the power cord.

2.


Turn the quick-release collar as shown .

WARNING: Never touch the blade with bare 
hands after cutting. The blade is often very hot 
after cutting and may result in personal injury.

WARNING: Never use the saw if the fixing slot of 
the tip of the blade is damaged. 

When the blade is broken If the blade is broken 
and remains in the shaft, turn the quick-release 
collar and the broken part will fall out. If not, use a 
tip of another blade to take it out.
Use compressed air to clean the accumulated chips 
on the quick-release collar.
Lubricate the quick-release collar regularly to 

prevent from rusting.

WARNING: NEVER TOUCH BLADE IMMEDIATELY 
AFTER USE, AS IT MAY BE HOT ENOUGH TO 
CAUSE SEVERE BURNS.

TO PREVENT ACCIDENTAL ELECTRICAL SHOCK 
THE SAW MUST BE HELD WITH ONE HAND ON 
THE MAIN HANDLE AND THE OTHER HAND ON 
THE RUBBER GEARCASE COVER. THE RUBBER 
GEARCASE COVER MUST BE FREE OF DAMAGE 
AND PROPERLY INSTALLED AT ALL TIMES.

Adjusting the shoe plate

If some of the teeth of the saw balde is worn out, 
use a hex wrench to adjust the position of the shoe 
plate. Tighten the screw after the adjustment.


TO START AND STOP SAW

1.

  Make sure power circuit voltage is the same 

as shown on the specification plate on the 
saw. Connect saw to power circuit.

2.

  Hold saw firmly. Squeeze trigger switch to 

start motor.

3.


Release trigger to stop motor.

4.

  To lock the switch in the on position, press 

the lock button while the switch is fully on. To 

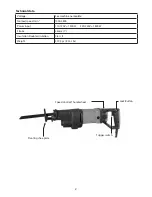
 Blade

Shaft

Quick-release Collar

Hex. Wrench

Shoe Plate

Summary of Contents for RS130B

Page 1: ...R FUTURE REFERENCE INSTRUCTION MANUAL Warning Tools equipped with over load protection when motor has been cut off due to over load always switch on machine with no load for at least 20 seconds to reduce temperature before switch on again to avoid burn out to the motor Version 20130628 ...

Page 2: ...ine nameplate No load speed min 1 1000 2800 Power input 110 120V 1300W 220 240V 1600W Stroke 26mm 1 Insulation Double insulation Class II Weight 3 70 Kgs 8 14 Lbs Trigger switch Speed Control Thumbwheel Lock Button Pivoting shoe plate ...

Page 3: ... When operating a power tool outdoors use an extension cord suitable for outdoor use Use of a cord suitable for outdoor use reduces the risk of electric shock f If operating a power tool in a damp location is unavoidable use an earth leakage circuit breaker Use of an earth leakage circuit breaker reduces the risk of electric shock 3 PERSONAL SAFETY a a Stay alert watch what you are doing and use c...

Page 4: ...ged have the power tool repaired before use Many accidents are caused by poorly maintained power tools f Keep cutting tools sharp and clean Properly maintained cutting tools with sharp cutting edges are less likely to bind and are easier to control g Use the power tool accessories and tool bits etc in accordance with these instructions taking into account the working conditions and the work to be ...

Page 5: ...ution when blind cutting Be certain that there are no foreign objects such as electrical wire conduit plumbing pipes etc that may come into contact with the blade 7 Wear eye and hearing protection Always use safety glasses Everyday eyeglasses are NOT safety glasses USE CERTIFIED SAFETY EQUIPMENT Eye protection equipment should comply with ANSI Z87 1 standards Hearing equipment should comply with A...

Page 6: ...is Reciprocating Saw is designed for cutting metal up to 20mm 3 4 thick wood up to 300mm 12 thick depending on the blade and various other materials such as plastics fiberglass hard rubber etc SELECTING THE BLADE For best performance longer blade life and smoother cut select the proper blade for the job When cutting metal always select a blade which will allow at least three teeth to be engaged in...

Page 7: ... Use compressed air to clean the accumulated chips on the quick release collar Lubricate the quick release collar regularly to prevent from rusting WARNING NEVER TOUCH BLADE IMMEDIATELY AFTER USE AS IT MAY BE HOT ENOUGH TO CAUSE SEVERE BURNS TO PREVENT ACCIDENTAL ELECTRICAL SHOCK THE SAW MUST BE HELD WITH ONE HAND ON THE MAIN HANDLE AND THE OTHER HAND ON THE RUBBER GEARCASE COVER THE RUBBER GEARCA...

Page 8: ...efore excessive downforce will defeat this function Allow the tool to do the cutting Excessive downforce will not speed cutting it will only cause premature blade wear lost teeth narrowing kerf and blade overheating SOFT START FUNCTION The motor has soft start function so that it starts up slowly and builds up to full speed after a few seconds This allows the operator to rest the blade on the inte...

Page 9: ...established SAWING WOOD Remember that because the blade cuts on the up stroke pull instead of the down stroke push as in the case of the hand saw the good or finish side of the work should face down away from the machine during cutting PLUNGE CUTS Caution Do not plunge cut metal materials This machine can be used for plunge cutting wood plywood drywall and plastic materials Clearly mark line of cu...

Page 10: ...only identical replacement parts SERVICE AND REPAIRS All tools will eventually require servicing or replacement of parts due to wear from normal use Always use a qualified service center SERVICE THE CARBON BRUSHES The carbon brushes are a normal wearing part and must be replaced when they reach their wear limit Caution Always replace the brushes as a pair To replace simply remove the brush caps an...

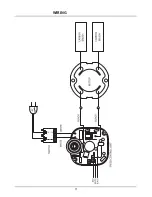
Page 11: ...11 WIRING ...

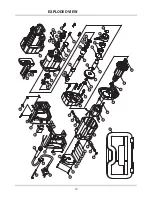
Page 12: ...18 06 16 27 24 29 23 30 13 14 25 26 22 21 21 22 23 17 20 06 34 35 39 28 36 38 11 10 07 05 06 10 12 09 02 04 03 01 43 41 45 46 47 42 49 48 50 51 52 53 54 31 32 42 44 37 59 55 60 61 66 15 62 64 33 63 65 08 42 28 58 57 33 56 ...

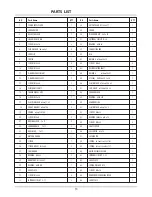
Page 13: ...1 31 GEAR PLATE 1 32 SCREW M5 x 45 4 33 INTERNAL CIRCLIP S 17 2 NO Parts Name Q TY 34 OUTPUT GEAR M1 25 x 47T 1 35 CRANK 1 36 WOODRUFF KEY 5 x 5 x 10 1 37 EXTERNAL CIRCLIP R 35 1 38 BEARING 6003 zz 2 39 CONNECTING ROD 1 40 N A 41 BUSHING ø16 x ø22 x 12 1 42 SCREW M5 x 8 5 43 RECIPROCATING SHAFT 1 44 BUSHING ø16 x ø28 x 27 1 45 OIL SEAL UOR 16 x 25 5 x 3 4 1 46 FLATWASHER ø16 5 x ø25 4 x 1 1 47 FEL...

Page 14: ......

Page 15: ......

Page 16: ......

Reviews: