

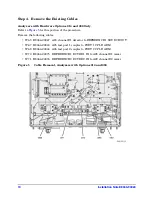


22
Installation Note E8364-90024
NOTE
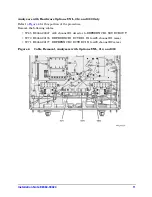
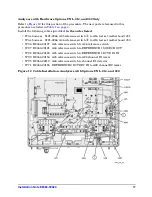
The previous figure and the figure below show the E8363/4B front panel
and floppy disk drive. The E8363/4C front panel has a slightly different
appearance and does not include a floppy disk drive.
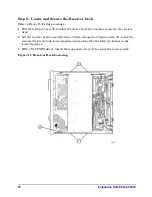
Step 11. Reinstall the Outer Cover
CAUTION
This procedure is best performed with the analyzer resting on its front handles
in the vertical position.
Do not place the analyzer on its front panel without the
handles
. This will damage the front panel assemblies.
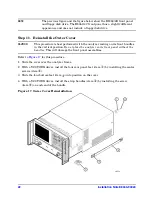
Refer to
for this procedure.
1. Slide the cover over the analyzer frame.
2. With a T-20 TORX driver, install the four rear panel feet (item
①
) by installing the center
screws (item
②
).
3. Slide the four bottom feet (item
③
) into position on the cover.
4. With a T-20 TORX driver, install the strap handles (item
④
) by installing the screw
(item
⑤
) on each end of the handle.
Figure 17 Outer Cover Reinstallation


