background image

49

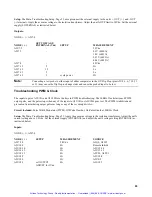
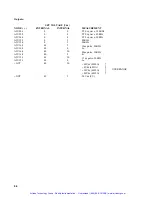
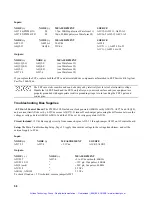
Table 3-6.  Front Panel Address Latches and Decoders

 (A8U6 = P/N 5080-2160 REV A.00.00, A.00.01, A.00.02 and A.00.04 Inputs)

Inputs:
Node

Measurements

U14-26

Toggling (unstable)

U14-35

37F8

U14-38

1ABC

U15-9, U17-3,6

Cycle power to unit--Lo to Hi after approx. 160 ms

U17-4,5

Cycle power to unit--Hi to Lo after approx. 160 ms

Outputs:

U13-1, U14-1, U15-3

969U

U14-5, U16-6

F615

U16-5, U17-12

9C3C

U13-2, U14-2, U15-4

C7AA

U14-13

Toggling

U16-12, U17-8

4056

U13-3, U14-3, U15-5

A372

U14-14

5AHH

U16-13, U17-10

Toggling

U13-4, U14-4, U17-11

Toggling

U14-15

HU9C

U17-1

37F8

U13-5, U16-3

5C91

U15-1, U17-2

6H15

U17-2

U13-6, U14-6, U17-9

1ABC

U15-2

+5V

U13-7

8U73

U15-3

U13-9

5730

U15-6, U16-2, U17-3

FlP6

U13-10

PHFF

U15-8, U16-11

P62F

U13-11

51U7

U15-10, U16-1,4,10

9H84

U13-12

AH52

U13-13

6F42

U13-14

50A9

U13-15

F05U

Artisan Technology Group - Quality Instrumentation ... Guaranteed | (888) 88-SOURCE | www.artisantg.com

Summary of Contents for 6030A

Page 1: ...s underutilized and idle equipment along with credit for buybacks and trade ins Custom engineering so your equipment works exactly as you specify Critical and expedited services Leasing Rentals Demos In stock Ready to ship TAR certified secure asset solutions Expert team I Trust guarantee I 100 satisfaction All trademarks brand names and brands appearing herein are the property of their respective...

Page 2: ...odel 6031A Serials US38310376 and above Agilent Model 6032A Serials US38321026 and above Agilent Model 6035A Serials US38320281 and above For instruments with higher serial numbers a change page may be included 5 Agilent Part No 5959 3344 Printed in USA Microfiche Part No 5959 3345 September 2000 Artisan Technology Group Quality Instrumentation Guaranteed 888 88 SOURCE www artisantg com ...

Page 3: ...Technologies shall pay for return of products to Customer Warranty services outside the country of initial purchase are included in Agilent Technologies product price only if Customer pays Agilent Technologies international prices defined as destination local currency price or U S or Geneva Export price If Agilent Technologies is unable within a reasonable time to repair or replace any product to ...

Page 4: ...y qualified service personnel Do not replace components with power cable connected Under certain conditions dangerous voltages may exist even with the power cable removed To avoid injuries always disconnect power discharge circuits and remove external voltage sources before touching components DO NOT SERVICE OR ADJUST ALONE Do not attempt internal service or adjustment unless another person capabl...

Page 5: ...History The edition and current revision of this manual are indicated below Reprints of this manual containing minor corrections and updates may have the same printing date Revised editions are identified by a new printing date A revised edition incorporates all new or corrected material since the previous printing date Changes to the manual occurring between revisions are covered by change sheets...

Page 6: ...ro Calibration 18 Constant Current Zero Calibration 18 Current Monitor Full Scale Calibration 19 Constant Current Full Scale Calibration 19 Power Limit Calibration 20 Resistance Programming Full Scale Calibration 21 Performance Tests 21 Measurement Techniques 21 Constant Voltage CV Tests 22 Constant Current CC Tests 28 Initialization Procedure 31 Troubleshooting 33 Introduction 33 Initial Troubles...

Page 7: ...rcuit 62 Troubleshooting PWM Clock 63 Principles of Operation 65 Introduction 65 GPIB Board 65 Primary Microprocessor 65 Address Switches 65 EEPROM 67 Isolation 67 Secondary Microprocessor 67 Digital to Analog Converters 67 Analog Multiplexer 67 Status Inputs 67 Front Panel Board 68 Address Latches and Decoders 68 Volts and Amps Output Ports and Displays 68 RPG and Latches 68 Front Panel Switches ...

Page 8: ...ter 2 Manual Changes 119 Chapter 3 Manual Changes 123 Chapter 4 Manual Changes 123 Chapter 5 and 6 Manual Changes 123 Blank Front Panel Option 001 125 Introduction 125 Troubleshooting 125 Chapter 2 Manual Changes 125 Chapter 3 Manual Changes 126 Chapter 5 and 6 Manual Changes 126 Artisan Technology Group Quality Instrumentation Guaranteed 888 88 SOURCE www artisantg com ...

Page 9: ...Artisan Technology Group Quality Instrumentation Guaranteed 888 88 SOURCE www artisantg com ...

Page 10: ...ocedures are also given in this section Principles of Operation Provides block diagram level descriptions of the supply s circuits The primary interface secondary interface and the power mesh and control circuits are described These descriptions are intended as an aid in troubleshooting Replaceable Parts Provides a listing of replaceable parts for all electronic components and mechanical assemblie...

Page 11: ...yellow Manual Change sheet may be supplied with the manual It defines the differences between your unit and the unit described in this manual The yellow change sheet may also contain information for correcting errors in the manual Note that because not all changes to the product require changes to the manual there may be no update information required for your version of the supply Older serial nu...

Page 12: ...ing the USE column of the table Operation Verification Tests To assure that the unit is performing properly without testing all specified parameters first perform the turn on checkout procedure in the Operating Manual Then perform the following performance tests in this section Voltage Programming And Readback Accuracy Current Programming And Readback Accuracy CV Load Effect CC Load Effect Calibra...

Page 13: ...C Guildline 9230 15 0 01Ω 0 04 100A 100W Guildline 9230 100 0 001Ω 0 04 300A 100W Guildline 9230 300 Power Resistors 6030A 3 5Ω 40Ω 1 1000 W min P C 6031A 0 069Ω 0 04Ω 1 1000W min 6032A 0 4Ω 3 5Ω 1 1000W min 6035A 40Ω 250Ω 1 1000W min Calibration and Test Resistors Value 100Ω 5 1W 1Ω 5 W 1KΩ 5 W 2KΩ 0 01 W C T Terminating Resistors 2 Value 50Ω 5 noninductive P Blocking Capacitors 2 Value 0 01µF 10...

Page 14: ...ant Current Zero Calibration Current Monitor Full Scale Calibration Constant Current Full Scale Calibration A2 Control Board Power Limit Comparator All Power Limit Calibration A2 Control Board Bias Power Supplies All All Calibration procedures 15V Supplies A8 GPIB Board Voltage Monitor Buffer All Voltage Monitor Zero Calibration Remote Readback Zero Calibration Constant Voltage Full Scale Calibrat...

Page 15: ...tput terminals f Connect power supply for local sensing and ensure that MODE switches are set as shown below g Connect a GPIB controller to the power supply h Reconnect line cable and turn on ac power i Allow unit to warm up for 30 minutes with the internal cover on The cover should remain in place during all calibrations j When attaching the DVM the minus lead of the DVM should be connected to th...

Page 16: ...t external power supply with its lead to S and its lead to Out See Figure 2 1 f Adjust A2R21 CV LOAD REG to Initial Reading 20µV 6030A 80µV 6031A 20µV 6032A 40µV 6035A g Replace local sense straps after removing external power supply Note Common mode calibration is not required for Agilent Model 6035A Remote Readback Zero Calibration Note This procedure and the following three procedures must be d...

Page 17: ... adjusting A8R51 you must continue the calibration procedure through to the completion of Constant Voltage Zero Calibration Remember to disconnect the external power supply and resistor Figure 2 1 Common Mode Setup Figure 2 2 Remote Readback Zero And CV Zero Calibration Setup Artisan Technology Group Quality Instrumentation Guaranteed 888 88 SOURCE www artisantg com ...

Page 18: ...t Voltage Full Scale Calibration a Attach the DVM from M on the rear panel to A2J7 pin 3 V MON buffered See DVM connection in Figure 2 1 b Send string VSET 200 ISET 5 OUT ON 6030A VSET 20 ISET 5 OUT ON 6031A VSET 60 ISET 5 OUT ON 6032A VSET 500 ISET 5 OUT ON 6035A c Adjust A8R75 V MON F S to 5 000625V 100µV d Disconnect the DVM e Enter and run the following program and begin noting the controller ...

Page 19: ...T 0 OUT OFF b Connect a short across power supply output terminals c Attach the DVM from M to IM on the rear panel d Allow several minutes 3 or more to ensure thermal settling e Adjust A2R8 I MON ZERO to 0 100µV Constant Current Zero Calibration a Connect the test setup shown in Figure 2 3 b Send string VSET 5 ISET 0 OUT ON c Allow several minutes 3 or more to ensure thermal settling d Adjust A8R2...

Page 20: ... S to 0 034 initial reading 33 5µV 6030A 0 024 initial reading 80 0µV 6031A 0 100 initial reading 0 4mV 6032A 0 100 initial reading 67 0µV 6035A Constant Current Full Scale Calibration Note This procedure requires that CC PROG ZERO A8R29 and I MON F S A2R9 be adjusted within specifications If they are not perform Constant Current Zero and or Current Monitor Full Scale Calibration before proceeding...

Page 21: ...r 17 amperes 6030A 120 amperes 6031A 51 amperes 6032A 5 amperes 6035A in the constant Current mode c Turn A2R25 LOWER KNEE fully counterclockwise d Turn on power supply and send string VSET 65 ISET 17 4 OUT ON 6030A VSET 8 ISET 121 OUT ON 6031A VSET 22 ISET 51 OUT ON 6032A VSET 200 ISET 5 1 OUT ON 6035A e Adjust A2R25 LOWER KNEE clockwise until CV LED on front panel turns on Power supply output sh...

Page 22: ...out of specification performance The performance test specifications are listed in the Performance Test Record in Appendix C through F You can record the actual measured values in the columns provided Measurement Techniques Setup For All Tests Measure the output voltage directly at the S and S terminals Connect unit for local sensing and ensure that MODE switches are set as shown below Select an a...

Page 23: ...tly at the monitoring resistor element Note A current monitoring resistor with 1 accuracy is suitable for all tests except current programming accuracy and current readback accuracy For these tests use the shunt listed in Table 2 1 Figure 2 4 Current Monitoring Resistor Setup GPIB Controller Most performance tests can be performed using only front panel controls However a GPIB controller is requir...

Page 24: ...35A Note the reading i Run the program listed in step e The value displayed by the controller should be the value noted in step h 0 240Vdc 6030A 0 023 Vdc 6031A 0 068 Vdc 6032A 2 700 Vdc 6035A Load Effect Load Regulation Constant voltage load effect is the change in dc output voltage Eo resulting from a load resistance change from open circuit to full load Full load is the resistance which draws t...

Page 25: ...lting from a change in ac input voltage from the minimum to the maximum value as specified in Input Power Requirements in the Specifications Table in the Operating Manual Proceed as follows a Connect the test equipment as shown in Figure 2 5 Operate the load in constant resistance mode Amps Volt and set resistance to maximum b Connect the unit to the ac power line through a variable autotransforme...

Page 26: ...tage difference between the voltmeter s case and the unit s case connect both to the same ac power outlet or check that the two ac power outlets used have the same earth ground connection Use the common mode choke as shown to reduce ground loop currents from interfering with measurement Reduce noise pickup on the test leads by using 50Ω coaxial cable and wind it five turns through the magnetic cor...

Page 27: ...oscope case and to each other at the other ends Proceed as follows a Connect the test equipment as shown in Figure 2 7 Operate the load in constant resistance mode Amps Volt and set resistance to maximum b Turn the unit s power on and using DISPLAY SETTINGS pushbutton switch turn up current setting to full output c Turn up output voltage to 60Vdc 6030A 7Vdc 6031A 20Vdc 6032A 200 Vdc 6035A d Turn u...

Page 28: ...5 Operate the load in constant current mode and set for minimum current b Turn the unit s power on and using DISPLAY SETTINGS pushbutton switch turn up current setting to full output c Turn up output voltage to 60Vdc 6030A 7Vdc 6031A 20 0Vdc 6032A 200Vdc 6035A as read on the digital voltmeter d Set the load to vary the load current between 15 3 and 17Adc 6030A 108 and 120Adc 6031A 45 and 50Adc 603...

Page 29: ...be used for this test The accuracy of the current shunt resistor Rm must be 0 02 or better Proceed as follows a Connect test setup shown in Figure 2 5 except replace the load with a short circuit b Turn on ac power to the power supply c Send string VSET 200 ISET 0 5 6030A VSET 20 ISET 0 5 6031A VSET 60 ISET 0 5 6032A VSET 500 ISET 0 10 6035A d Check that the voltage across Rm is in the range 4 75 ...

Page 30: ...6030A 50Adc 6031A 16 5Adc 6032A 2 0Adc 6035A d Increase the load resistance until the output voltage at S and S decreases to 200Vdc 6030A 20Vdc 6031A 60Vdc 6032A 500Vdc 6035A Check that the CC LED is lighted and AMPS display still reads current setting e Short circuit the load and allow the voltage across Rm to stabilize f Record voltage across Rm g Disconnect short across load h When the reading ...

Page 31: ...n a frequency range 20Hz to 20MHz with the unit in CC operation To avoid incorrect measurements with the unit in CC operation caused by the impedance of the electronic load at noise frequencies use a 3 5Ω 6030A 0 069Ω 6031A 0 4Ω 6032A 40Ω 6035A load resistor that is capable of safely dissipating 1000 watts Proceed as follows a Connect the test equipment as shown in Figure 2 9 Note For Agilent 6031...

Page 32: ... the GPIB assembly in the unit 2 Turn the power on and depending on your unit s model number send string EEINIT 6030 EEINIT 6031 EEINlT 6032 or EEINIT 6035 3 Turn the power off wait 5 seconds then turn the power back on 4 If the GPIB assembly has been replaced calibrate the unit Artisan Technology Group Quality Instrumentation Guaranteed 888 88 SOURCE www artisantg com ...

Page 33: ...Artisan Technology Group Quality Instrumentation Guaranteed 888 88 SOURCE www artisantg com ...

Page 34: ... be defective replace it and re conduct the performance test When a component is replaced refer to Calibration Procedure Chapter 2 It may be necessary to perform one or more of the adjustment procedures after a component is replaced Initial Troubleshooting Procedures If a problem occurs follow the steps below in sequence a Check that input power is available and check the power cord and rear panel...

Page 35: ... wrist strap when working with potentials in excess of 500 volts the one megohm resistor will provide insufficient current limiting for personal safety g All grounding device being repaired test equipment soldering iron work surface wrist strap etc should be done to the same point h Do not wear nylon clothing Keep clothing of any kind from coming within 12 inches of static sensitive devices i Low ...

Page 36: ...des an inside cover which secures the vertical board assemblies Remove the inside cover for repair but not for calibration Remove the nine mounting screws Pozidriv M4x 7 two on the left side three on the right side four on top Remove the inside cover by lifting at the front edge When installing the inside cover insert it first at the right side While holding it tilted up at the left reach through ...

Page 37: ...rst removing the entire front panel assembly You do not need to remove the top cover Follow this procedure a Remove the top plastic insert by prying up with a flat blade screwdriver b Remove the four front panel assembly mounting screws Pozidriv M4 on the top and bottom at the comers c Gently pull the front panel assembly away from the unit as far as permitted by the connecting cables d Note the l...

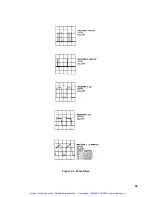
Page 38: ...ion procedures to guide you either to the appropriate circuit or to one of the detailed troubleshooting procedures in this section The purpose of the flowchart is only to isolate the problem to a specific area of the power supply If you have already isolated the problem proceed directly to the applicable troubleshooting section Table 3 1 lists the error codes that may appear on the front panel whe...

Page 39: ...38 Figure 3 1 Troubleshooting Isolation Artisan Technology Group Quality Instrumentation Guaranteed 888 88 SOURCE www artisantg com ...

Page 40: ...39 Figure 3 1 Troubleshooting Isolation continued Artisan Technology Group Quality Instrumentation Guaranteed 888 88 SOURCE www artisantg com ...

Page 41: ...Check U2 7 64 69 ERROR 14 Voltage DAC Full Scale High Check U2 7 64 69 ERROR 15 Voltage DAC Zero Low Check U2 7 64 69 ERROR 16 Voltage DAC Zero High Check U2 7 64 69 ERROR 17 Current DAC Full Scale Low Check U9 65 68 ERROR 18 Current DAC Full Scale High Check U9 65 68 ERROR 19 Current DAC Zero Low Check U9 65 68 ERROR 20 Current DAC Zero High Check U9 65 68 Go to Secondary SA Troubleshooting Prima...

Page 42: ...ly Node Measurement A0 to A15 Toggling D0 to D7 Toggling Secondary Interface Troubleshooting Secondary interface troubleshooting checks the operation of the voltage current and readback DACs as well as analog multiplexer and secondary microprocessor The analog multiplexer is checked in the Readback DAC troubleshooting procedure The secondary microprocessor can only be checked using secondary SA re...

Page 43: ...42 Figure 3 3 Clock and Primary SA Waveforms Artisan Technology Group Quality Instrumentation Guaranteed 888 88 SOURCE www artisantg com ...

Page 44: ...k DAC from the front panel if the unit has failed selftest place jumper A8J5 in the skip selftest position see Table 3 2 This lets you operate the unit even though it fails the internal selftest Use the front panel controls to vary the output voltage from zero to full scale output to obtain the waveforms at U67 6 These waveforms check the operation of the readback DAC To check the multiplexer use ...

Page 45: ...44 Figure 3 4 Readback and Secondary SA Waveforms Artisan Technology Group Quality Instrumentation Guaranteed 888 88 SOURCE www artisantg com ...

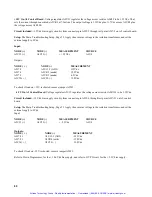
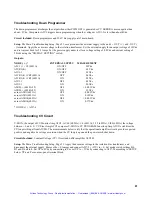
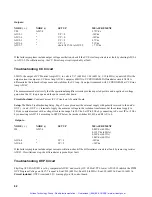
Page 46: ...ce output of previous I C check for printed circuit and soldering discontinuity 6 An incorrect signature at an output could be caused by a faulty component producing that output or a short circuit in another component or on the board could be loading down that node Tables 3 2 and 3 3 show the primary front panel and secondary signature analyzer connections that are required to perform the SA tests...

Page 47: ...TIONS CLOCK START STOP GROUND A8J5 pin 8 A8U37 pin 16 A8U37 pin 16 A8J5 pin 5 A8J5 in SA mode A8J5 JUMPER POSITIONS Jumpering pins 1 and 2 skips the internal selftest when the unit is turned on Jumpering pins 3 and 4 places U37 in SA mode Jumpering pins 5 and 6 is the normal operating position of the jumper Table 3 3 Secondary Signature Analyzer Test Setups SIGNATURE ANALYZER INPUT EDGE SETTING SE...

Page 48: ...8P2 48P2 U14 60 U16 9 U6 13 U8 13 U12 22 U17 12 D 1 HU9O 6O84 6O84 6O84 U14 59 U16 8 U6 14 U8 14 U12 21 U17 13 D 2 U665 74UH 96C5 HA6P U14 58 U16 7 U6 15 U8 15 U12 20 U17 14 D 3 53PP 16A9 UH79 8OC2 U14 57 U16 6 U6 17 U8 17 U12 19 U17 15 D 4 C9C2 196F AA13 U64C U14 56 U16 5 U6 18 U8 18 U12 18 U17 16 D 5 C27C 132C 8A9F 89AP U14 55 U16 4 U6 19 U8 19 U12 17 U17 17 D 6 HO18 4387 497F 2C5F U14 54 U16 3 ...

Page 49: ...KKKKK KKKKKKKKK KKKKKKK KKKKKKKKK U1 U2 U3 U4 U5 U6 U7 U8 U9 U10 pin 3 5AHH 102A 4A3F 5AHH 5AHH 4U91 7499 5AHH CHP5 0000 pin 4 5AHH 92FF C665 5AHH 5AHH 31U5 4475 5AHH P3PP 0000 pin 5 5AHH 4FUC 5526 5AHH 5AHH 739H P7AH 5AHH H8HC 0000 pin 6 5AHH 94F0 C4A9 5AHH 5AHH 5724 OUC4 5AHH 84PU 0000 pin 10 5AHH 102A A73P 5AHH 5AHH 4U91 1467 5AHH 5UAU 0000 pin 11 5AHH 92FF PFP6 5AHH 5AHH 31U5 U810 5AHH U7A8 00...

Page 50: ...5 3 969U U14 5 U16 6 F615 U16 5 U17 12 9C3C U13 2 U14 2 U15 4 C7AA U14 13 Toggling U16 12 U17 8 4056 U13 3 U14 3 U15 5 A372 U14 14 5AHH U16 13 U17 10 Toggling U13 4 U14 4 U17 11 Toggling U14 15 HU9C U17 1 37F8 U13 5 U16 3 5C91 U15 1 U17 2 6H15 U17 2 U13 6 U14 6 U17 9 1ABC U15 2 5V U13 7 8U73 U15 3 U13 9 5730 U15 6 U16 2 U17 3 FlP6 U13 10 PHFF U15 8 U16 11 P62F U13 11 51U7 U15 10 U16 1 4 10 9H84 U1...

Page 51: ...ressed U11 3 Hi U11 7 U16 8 9 Toggling S4 DISPLAY SETTINGS released U11 4 Lo U11 7 U16 9 Lo U16 8 Hi S4 DISPLAY SETTINGS depressed U11 4 Hi U11 7 U16 8 9 Toggling S5 FOLDBACK released U11 5 Lo U11 7 U16 9 Lo U16 8 Hi S5 FOLDBACK depressed U11 5 Hi U11 7 U16 8 9 Toggling U12 5 Node toggles when RPG is rotated clockwise U12 9 Node toggles when RPG is rotated in either direction Set scope for dual tr...

Page 52: ...ts and gives the components which are the sources of the signals Tables 3 10 and 3 11 describe possible symptoms in the power section Both give lists of circuit blocks or components which can cause the symptoms shown The appropriate assembly is also given If the supply exhibits a symptom given in Table 3 10 or 3 11 go to the block which pertains to that symptom If the exact symptom seen is not in ...

Page 53: ...graph 3 82 The external power supply provides the unit s internal bus voltage The ac mains connects directly to the unit s A1T3 bias transformer via the isolation transformer thereby energizing the bias supplies but it does not connect to the input rectifier and filter to create the bus voltage With the external supply the unit operates as a dc to dc converter The supply biases A4Q1 A4Q2 A4Q3 and ...

Page 54: ...at left side just behind relay at front left corner and remove white brown gray wire from terminal L Connect external dc power supply to terminals N and L Either polarity is correct OR 2 Ensure that the rear panel circuit breaker is on Connect external dc power supply to ac input terminals N and L Either polarity is correct e Complete the setup of Figure 3 5 by attaching an ac mains cord to test p...

Page 55: ...roubleshooting based on your measurements and Table 3 11 which provides direction based on the status of the PWM OFF and PWM ON signals Figure 3 6 Modified Mains Cord Set For Troubleshooting Power Section Blocks This section contains the blocks referenced in Tables 3 10 and 3 11 Artisan Technology Group Quality Instrumentation Guaranteed 888 88 SOURCE www artisantg com ...

Page 56: ...z A2U15 1 18 Ip MONITOR 1V pk sawtooth 20KHz A2CR27 cathode at full power only 8 INHIBIT TTL Hi if not remotely inhibited A2U18 9 15 DOWN PROGRAM 1 2 3 0 while not down programming A2CR17 CR31 anode 7 OVP PROGRAM 1 100 OVP 6030A e g 2 Vdc if OVP set to full 1 10 OVP 6031A voltage output A3R72 wiper 1 30 OVP 6032A 1 250 OVP 6035A 5 OV CLEAR 5V inverted OV reset line A8U4 35 19 PCLR 5V if 5V bias OK...

Page 57: ...e 3 11 No Output Failures Bias supplies and AC turn on circuit functioning Status of FET On Off Pulses PWM ON A2J7 26 PWM OFF A2J7 25 DEFECTIVE BOARD CHECK FUNCTIONAL CIRCUITS Lo Lo A2 Control ckts CV CC thru On Off Pulse Oneshots Lo Hi A2 A4 PWM and DC to DC Converter A4 PFETS probably failed Hi Lo A2 A4 PWM and DC to DC Converter A4 PFETS probably failed Hi Hi A2 A4 PWM and DC to DC Converter A4...

Page 58: ...15 cycle power one 840ms pulse then Hi at 2 5 sec A2U9 14 cycle power three 420 ms pulses then Hi at 2 9 sec A2U9 1 cycle power transition Lo to Hi at 1 7 s A2U15 10 cycle power transition Lo to Hi at 2 9 s AC FAULT A2Q7 C cycle power transition 5 0 to 0 3Vdc at 2 5 sec RELAY ENABLE Node A2J7 4 Troubleshooting DC To DC Converter Parallel NOR gates A4U1 A4U2 and A4U3A act as drivers and switch on F...

Page 59: ...rounding straps Avoid touching the FET s gate and source pins Troubleshooting Bias Supplies 5V On A2 Control Board The PWM A2U22 includes a clock generator 40KHz set by A2R170 A2C79 and A2Q10 and a current limit 2Adc set by 0 15Vdc across A2R172 It turns off each output pulse using the difference between the voltage at voltage divider A2R161 A2R163 and the 2 5Vdc set by voltage regulator A2U21 Cir...

Page 60: ...59 Figure 3 7 Waveforms Artisan Technology Group Quality Instrumentation Guaranteed 888 88 SOURCE www artisantg com ...

Page 61: ...3 anode 6 2Vdc A2C50 A2C50 13 8Vdc To check if load on 15V is shorted remove jumper A2W1 15 V On A2 Control Board Voltage regulator A2U12 regulates the voltage across resistor A2R103 to be 1 25Vdc Circuit Included 15 Vdc bias supply circuitry from connector pin A2J5 6 through test point A2J7 21 on A2 control board Setup The Main Troubleshooting Setup Page 53 Apply the ac mains voltage to the isola...

Page 62: ...A5R20 6030A 35 ON 1 5Vdc across A5R1 6031A OFF 0 001Vdc across A5R1 6031A ON 0 10Vdc across A5R14 6032A OFF 0 001Vdc across A5R14 6032A ON 0 17Vdc NODE A2J7 4 Troubleshooting CV Circuit V MON the output of CV Monitor Amp A2U2 is 1 40 6030A 1 4 6031A 1 12 6032A l l00 6035A the voltage between S and S CV Error Amp A2U3 compares V MON to CV PROGRAM Innerloop Amp A2U5A stabilizes the CV loop with inpu...

Page 63: ...board Setup The Main Troubleshooting Setup Page 53 except connect the external supply with polarity reversed to the unit s OUT and OUT terminals Apply the ac mains voltage to the isolation transformer Set the external supply to 3 0Adc constant current with a voltage limit in the range 5 to 20Vdc Set IP to 0Vdc by connecting to P or set IP to 5Vdc by connecting to A2J7 24 according to SETUP below S...

Page 64: ...re the keys to PWM troubleshooting The 20KHz Clock starts each PWM output pulse and the pulse stops when any of the inputs to A2U18A or A2U18B goes low The PWM is inhibited and prevented from initiating output pulses as long as any of the seven inputs is low Circuit Included Pulse Width Modulator PWM Off Pulse Oneshot On Pulse Oneshot 20KHz Clock Setup The Main Troubleshooting Setup Page 53 Apply ...

Page 65: ...A2U19 5 0 2 20KHz A2U19 6 0 2 20KHz A2U16 5 40 2 10µs pulse 20KHz A2U16 5 40 0 Lo A2U16 4 40 20 48µs pulse 20KHz A2U16 4 40 0 hi A2U15 1 40 20 1 7µs pulse 20KHz A2U15 1 40 0 Lo OUT 40 20 40Vdc 6030A 8Vdc 6031A 14Vdc 6032A 80Vdc 6035A OVERRANGE OUT 40 2 2 0Vdc CV Artisan Technology Group Quality Instrumentation Guaranteed 888 88 SOURCE www artisantg com ...

Page 66: ...ibe the GPIB and the front panel board These circuits provide the interface between the power mesh circuits and the controller and or operator The GPIB and front panel boards are referenced to earth common Isolation is achieved by optical isolators on the GPIB board Data is sent between boards serially GPIB Board Circuits on the GPIB board see Figure 4 1 provide the interface between the power sup...

Page 67: ...66 Figure 4 1 GPIB Block Diagram Artisan Technology Group Quality Instrumentation Guaranteed 888 88 SOURCE www artisantg com ...

Page 68: ...er The secondary microprocessor programs the output of the readback DAC starting with the MSB and continuing down to the LSB Each bit is programmed either on or off until the output of the DAC is closest to the unknown voltage output of the multiplexer At this point the microprocessor returns the programmed value of the readback DAC Analog Multiplexer The analog multiplexer selects one of five inp...

Page 69: ... the voltage display will switch from actual value to the voltage limit Pressing the DISPLAY OVP switch causes the voltage display to show the OVP trip voltage that has been set The microprocessor also uses the readout to display the GPIB address switch settings self test error messages and readback overrange conditions RPG and Latches When rotated the RPG products two pulse trains that are 90 deg...

Page 70: ...69 Figure 4 2 Front Panel Block Diagram Artisan Technology Group Quality Instrumentation Guaranteed 888 88 SOURCE www artisantg com ...

Page 71: ... or more switch selectable voltage current ranges within the maximum power output capability as shown in Figure 4 3b An autoranging power supply provides maximum output power over a wide and continuous range of voltage and current combinations as shown in Figure 4 3c without the operator having to select the proper output range The unit is a flyback type switching power supply so called from the f...

Page 72: ...ol Signals Timing Diagram Power Mesh Figure 4 5 is a block diagram of the power mesh These circuits convert the ac input power to approximately 320Vdc and convert this dc voltage to the proper dc output voltage Artisan Technology Group Quality Instrumentation Guaranteed 888 88 SOURCE www artisantg com ...

Page 73: ... to the amount of current flow through the T2 primary therefore it represents the amount of energy being stored in the field around T2 It is this ramp voltage that is compared to a control voltage to determine when the FETs should be turned off Off pulses turn on Q5 and Q6 which discharge the FET gates thereby turning the FETs off When the FETs are turned off the collapsing magnetic field reverses...

Page 74: ...l brownout 15V Bias Supply This circuit produces the 15V and 5 9V bias voltages It also produces the reference voltage used by the CC and CV Current Sources Time Delay Circuit This circuit generates the signal that delays RELAY ENABLE for approximately 2 seconds after cessation of an ac fault Dropout or High AC The AC FAULT signal is extended for the duration of the time delay and supplied to the ...

Page 75: ... allows the power supply output voltage to be lowered more rapidly than if the output filter capacitors had to be discharged solely through the load CC And CV Current Sources This circuit generates constant currents that are connected to front panel VOLTAGE and CURRENT potentiometers of non GPIB units to develop the CC and CV programming voltages Mode Switches The rear panel mode switches select t...

Page 76: ...uce 40KHz 20KHz and 1 25KHz signals Both the 320KHz and 20KHz signals are supplied to the PWM with the 20KHz signal controlling the repetition rate of the PWM The 40 KHz signal is supplied to the 5V Bias Supply Circuit to synchronize the PWM in that circuit to the main power supply PWM The 1 25KHz output is supplied to the Time Delay Circuit for generating the time delay used to control the power ...

Page 77: ...76 Figure 4 5 Power Mesh Block Diagram Artisan Technology Group Quality Instrumentation Guaranteed 888 88 SOURCE www artisantg com ...

Page 78: ...77 Figure 4 6 Control Board Block Diagram Artisan Technology Group Quality Instrumentation Guaranteed 888 88 SOURCE www artisantg com ...

Page 79: ...Artisan Technology Group Quality Instrumentation Guaranteed 888 88 SOURCE www artisantg com ...

Page 80: ...fied by reference designator are listed at the end of Table 5 4 under Mechanical and or Miscellaneous Table 5 1 Reference Designators A Assembly B Blower C Capacitor CR Diode DS Signaling Device light F Fuse FL Filter G Pulse Generator J Jack K Relay L Inductor Q Transistor RT Thermistor Disc S Switch T Transformer TB Terminal Block TS Thermal Switch U Integrated Circuit VR Voltage Regulator Zener...

Page 81: ...e Gauge BUFF Buffer CER Ceramic COMP Carbon Film Composition CONV Converter DECODER DEMULTI Decoder Demultiplexer ELECT Electrolytic EPROM Erasable Programmable Read Only Memory FET Field Effect Transistor FF Flip Flop FXD Fixed IC Integrated Circuit INP Input LED Light Emitting Diode MET Metalized MOS Metal Oxide Silicon OP AMP Operational Amplifier OPTO Optical OVP Over Voltage Protection PCB Pr...

Page 82: ...904 cap 0 05µF 1KV C20 6030A 35A 0160 6392 cap 0 047µF 20 6031A 0180 0291 cap 1µF 35V 6032A 0160 7732 cap 0 47µF C21 6030A 35A 0160 6392 cap 0 047µF C22 6030A 35A 0160 6392 cap 0 047µF 20 6031A 0160 5377 cap 2 2µF 10 63V 6032A 0160 7732 cap 0 47µF C23 6030A 35A 0160 6392 cap 0 047µF 6031A 0160 7732 cap 0 47µF C24 6032A 0160 4281 cap 2200pF 20 C25 6030A 0160 0269 cap 0 047µF 20 6031A 0160 5377 cap ...

Page 83: ...035A 5080 2131 output choke 18µH 5A L4 6031A 9170 1267 magnetic core jumper 5080 2040 Q1 6030A 31A 32A 1855 0456 MOSFET N chan 6035A 1855 0456 MOSFET N chan Q2 all 1855 0665 MOSFET N chan R1 4 all 0811 1866 res 10K 1 5W R5 all 0757 0418 res 619 1 1 8W R7 all 0698 5525 res 6 8 5 1 2W R8 all 0757 0765 res 36 5K 1 1 8W R9 all 0811 3700 res 20 10 20W R10 all 0811 3699 res 6 10 20W R11 6030A 35A 5080 2...

Page 84: ...0 1 1 8W S1 all 3101 2046 switch DPDT slide S2 all 3101 1914 switch 2 DPDT slide T1 all 9100 4350 current transformer T2 6030A 06030 80090 power transformer 6031A 06011 80090 power transformer 6032A 06032 80090 power transformer 6035A 9100 4827 power transformer T3 all 9100 4864 bias transformer U1 all 1906 0389 rectifier bridge U3 all 1826 0393 IC voltage regulator 1 2 37V U5 all 1826 0643 IC vol...

Page 85: ...5 6030A 32A 35A 0160 4812 cap 220pF 5 100V C26 all 0160 4807 cap 33pF 5 100V C27 6030A 32A 35A 0160 5892 cap 0 22µF 10 6031A 0160 5534 cap 0 1µF 10 63V C28 6030A 32A 35A 0160 4834 cap 0 047µF 10 100V 6031A 0160 4833 cap 0 022µF 10 100V C29 all 0160 5422 cap 0 047µF 20 50V C30 all 0160 4807 cap 33pF 5 100V C31 all 0160 5422 cap 0 047µF 20 50V C32 6030A 32A 35A 0160 5644 cap 0 033µF 10 50V 6031A 016...

Page 86: ...0V C73 all 0180 3407 cap 2200µF 35V C74 75 all 0160 5098 cap 0 22µF 10 50V C76 all 0160 4835 cap 0 1µF 10 50V C77 all 0160 4833 cap 0 022µF 10 100V C78 all 0160 4832 cap 0 01µF 10 100V C79 all 0160 4830 cap 2200pF 10 100V C80 all 0160 4813 cap 180pF 5 100V C81 all 0160 5422 cap 0 047µF 20 50V C82 all 0160 4812 cap 220pF 5 100V C83 all 0160 5422 cap 0 047µF 20 50V C84 all 0160 4812 cap 220pF 5 100V...

Page 87: ...8 3433 res 28 7 1 1 8W R11 12 6030A 32A 35A 0757 0465 res 100K 1 1 8W R13 6030A 35A 0698 3430 res 21 5 1 1 8W 6032A 0757 0379 res 12 1 1 1 8W R14 15 all 0686 5125 res 5 1K 1 2W R16 all 0683 2015 res 200 5 1 4W R17 all 0698 7082 res 100K 1 1 8W R18 all 0683 1025 res 1K 5 1 4W R19 all 0757 0442 res 10K 1 1 8W R20 6030A 35A 0686 5135 res 51K 5 1 2W 6031A 32A 0686 1025 res 1K 5 1 4W R21 6030A 35A 2100...

Page 88: ...all 0757 0199 res 21 5K 1 1 8W R45 all 0698 8816 res 2 15 1 1 8W R46 6030A 32A 35A 0683 1255 res 1 2M 5 1 4W 6031A 0698 4539 res 402K 1 1 8W R47 6030A 32A 35A 0757 0470 res 162K 1 1 8W 6031A 0757 0458 res 51 1K 1 R48 all 0757 0458 res 51 1K 1 R49 6030A 0699 1745 res 560K 0 1 1 4W 6031A 7175 0057 jumper 6032A 0698 7496 res 20K 0 1 1 4W 6035A 0698 6369 2 resistors 1M 1 assembled in series R50 6030A ...

Page 89: ...3 1015 res 100 5 1 4W R70 all 0757 0449 res 20K 1 1 8W R71 all 0698 0085 res 2 61K 1 1 8W R72 all 0757 0452 res 27 4K 1 1 8W R73 6030A 35A 0757 0289 res 13 3K 1 1 8W 6031A 0757 0442 res 10K 1 1 8W 6032A 0757 0461 res 68 1K 1 1 8W R74 all 0757 0460 res 61 9K 1 1 8W R75 all 0698 8827 res 1M 1 1 8W R76 all 0757 0438 res 5 11K 1 1 8W R77 all 0683 4715 res 470 5 1 4W R78 all 0698 6322 res 4K 1 1 8W R79...

Page 90: ... res 130 5 1 4W 6031A 32A 0683 1815 res 180 5 1 4W R110 all 0683 5105 res 51 5 1 4W R111 all 0683 2035 res 20K 5 1 4W R112 all 0757 0199 res 21 5K 1 1 8W R113 all 0757 0283 res 2K 1 1 8W R114 all 0683 2225 res 2 2K 5 1 4W R115 all 0757 0280 res 1K 1 1 8W R116 117 all 0757 0346 res 10 1 1 8W R118 all 0698 3498 res 8 66K 1 1 8W R119 all 0757 0438 res 5 11K 1 1 8W R120 all 0683 4725 res 4 7K 5 1 4W R...

Page 91: ...2 all 0757 0442 res 10K 1 1 8W R163 all 0757 0283 res 2K 1 1 8W R164 all 0757 0434 res 3 65K 1 1 8W R165 all 0683 1035 res 10K 5 1 4W R166 167 all 0686 1315 res 130 5 1 2W R168 all 0683 1515 res 150 5 1 4W R169 all 0757 0124 res 39 2K 1 1 8W R170 all 0698 3136 res 17 8K 1 1 8W R171 all 0757 0280 res 1K 1 1 8W R172 all 0811 3174 res 0 07 5 5W R173 all 0683 2225 res 2 2K 5 1 4W R174 all 0683 3625 re...

Page 92: ...l 1200 0485 IC socket S1 all 1200 0181 insulator Q8 all 0360 2195 terminal block 6 position all 0360 2192 terminal block 2 position A3 all 06031 60020 Front Panel Board C1 4 all 0160 5422 cap 0 047µF 20 50V C5 all 0180 0374 cap 10µF 20 C6 9 all 0160 5422 cap 0 047µF 20 50V C10 all 0180 0374 cap 10µF 20 C11 13 all 0160 5422 cap 0 047µF 20 50V DS1 6 all 1990 0835 LED DS7 12 all 1990 0831 LED DS13 15...

Page 93: ...18 power rectifier 600V CR5 11 all 1901 0050 diode switching 80V 200mA F1 2 all 2110 0671 fuse 125mAM 125V L14 all 9100 1610 coil 0 15µH 20 P1 all 1252 1053 connector 64 pin Q1 4 all 1855 0473 FET N channel Q5 6 all 1854 0585 transistor NPN Si R1 4 all 0811 1065 res 150 5 10W R5 8 all 0698 3609 res 22 5 2W R9 11 all 0698 5139 res 3 9 5 5W R12 all 0757 0466 res 110K 1 1 8W R13 16 all 0698 3609 res ...

Page 94: ...0 5166 cap 0 015µF 10 100Vdc CR1 6030A 32A 35A 1901 0050 diode switching 80V 200ma 6031A 1901 1127 power rectifier 150V 70A CR2 6030A 32A 35A 1901 0731 power rectifier 400V lA 6031A 1901 0050 diode switching 80V 200ma CR3 all 1901 0050 diode switching 80V 200mA CR4 6030A 1901 1542 power rectifier 400V 50A 6031A 1901 0731 power rectifier 400V lA 6032A 1901 0887 power rectifier 300V 50A 6035A 1901 1...

Page 95: ...es 1M 1 1 8W 6031A 0757 0447 res 16 2K 1 1 8W R9 6030A 0698 8144 res 787K 1 1 8W 6031A 0757 0428 res 1 62K 1 1 8W 6032A 0757 0480 res 432K 1 1 8W 6035A 0683 2055 res 2M 5 R10 6030A 35A 0698 3512 res 1 8K 1 1 8W 6031A 0698 3601 res 10 5 2W 6032A 0698 4196 res 1 07K 1 1 8 W R11 6031A 0698 3601 res 10 5 2W 6032A 0686 1005 res 10 5 1 2W R12 6030A 32A 35A 0757 0447 res 16 2K 1 1 8W 6031A 0698 3609 res ...

Page 96: ...6032A 1251 7600 socket pin Q2 2 6032A 0380 1524 standoff hex 4 6032A 06032 00017 bracket CR4 Q2 heatsink A6 6030A 31A 32A 5060 3522 AC Input Filter 6035A 06011 60028 C101 6030A 31A 32A 0160 4355 cap 0 01µF 10 250Vac 6035A 0160 4048 cap 0 022µF 10 250Vac C102 6030A 31A 32A 0160 4281 cap 2200pF 20 250Vac 6035A 0160 4439 cap 0 0047µF 10 250Vac C103 6030A 31A 32A 0160 4355 cap 0 01µF 10 250Vac 6035A 0...

Page 97: ... 047µF 20 50V C41 42 all 0160 4820 cap 1800pF 5 100V C43 47 all 0160 5422 cap 0 047µF 20 50V C48 all 0180 0116 cap 6 8µF 10 35V C49 51 all 0160 5422 cap 0 047µF 20 50V C52 all 0160 4822 cap 1000pF 100V C53 58 all 0160 5422 cap 0 047µF 20 50V C59 60 all 0160 4822 cap 1000pF 100V C61 all 0160 4830 cap 2200pF 10 250V C62 63 all 0160 4807 cap 33pF 5 100V C64 all 0160 5422 cap 0 047µF 20 50V C65 all 01...

Page 98: ...R29 all 2100 3353 trimmer 20K 10 R30 all 0699 0642 res 10K 0 1 1 10W R32 all 0757 0457 res 47 5K 1 1 8W R33 all 0698 6360 res 10K 0 1 1 8W R34 all 0757 0401 res 100 1 1 8W R35 all 0699 0059 res 5K 0 1 1 10W R36 all 0757 0316 res 42 2 1 1 8W R37 all 0699 0642 res 10K 0 1 1 10W R39 all 0757 0270 res 249K 1 1 8W R40 all 2100 3353 trimmer 20K 10 R41 all 0757 0401 res 100 1 1 8W R42 all 0757 0411 res 3...

Page 99: ...2 terminal block 4 contact U1 all 1826 0468 IC MC3423P1 0V level detect U2 all 5080 2157 IC GAL programmed U4 all 1820 8773 IC 80C51 microprocessor U5 all 1826 1369 IC LT1021 voltage regulator 10V U6 all 5080 2624 IC EPROM AM27512 U7 all 1826 2187 IC converter PM 7545 U8 all 1818 4134 IC RAM MCM6164C55 U9 all 1826 2187 IC converter PM 7545 U11 all 1826 2187 IC converter PM 7545 U12 all 1820 3210 I...

Page 100: ...ap 10000µF 40V output board 6032A 0180 3491 cap 2600µF 75V output board CB1 all 3105 0126 circuit breaker 25A 250Vac L4 all 5080 2307 choke input line 380µH S3 all 3101 0402 switch DPST on off W1 all 06032 60003 ribbon cable A3 to A8 W2 all 8120 4352 cable assembly 3 pin A1 to A8 W3 all 06032 60002 cable assembly 5 pin A2 to A3 W5 6 all 8120 4356 ribbon cable A2 to A8 Chassis Mechanical all 06032 ...

Page 101: ... rear panel ground all 0400 0086 insulated bushing under A6 2 all 5001 6739 cover top all 5001 6738 cover bottom all 06032 00024 cover internal lettered all 5040 1626 cover dc output all 5040 1627 cover ac input all 5040 1625 strain relief line cord all 5062 3703 strap handle 2 all 5041 8819 handle retainer front 2 all 5041 8820 handle retainer back 2 all 5041 8801 foot 4 Artisan Technology Group ...

Page 102: ...ts list provides power rating and tolerance for all resistors 5 Unless otherwise noted capacitor values are in microfarads 6 Square p c pads indicate one of the following a pin 1 of an integrated circuit b the cathode of a diode or emitter of a transistor c the positive end of a polarized capacitor 7 Schematic components marked with an asterisk indicate that different values are used in each model...

Page 103: ...s marked with a dot For integrated circuit packages pin 1 is either marked with a dot or pin 1 is to the left as viewed from top of indentation on the integrated circuit package except for A8U6 and A8U8 Artisan Technology Group Quality Instrumentation Guaranteed 888 88 SOURCE www artisantg com ...

Page 104: ...103 Figure 6 1 Top View Top Covers Removed Artisan Technology Group Quality Instrumentation Guaranteed 888 88 SOURCE www artisantg com ...

Page 105: ...104 Figure 6 2A 6030A 35A Main Board A1 and Output Filter Component Location Artisan Technology Group Quality Instrumentation Guaranteed 888 88 SOURCE www artisantg com ...

Page 106: ...105 Figure 6 2B 6031A Main Board A1 and Output Filter Component Location Artisan Technology Group Quality Instrumentation Guaranteed 888 88 SOURCE www artisantg com ...

Page 107: ...106 Figure 6 2C 6032A Main Board A1 and Output Filter Component Location Artisan Technology Group Quality Instrumentation Guaranteed 888 88 SOURCE www artisantg com ...

Page 108: ...107 Figure 6 3 Control Board A2 Component Location Figure 6 4 Front Panel Board A3 Component Location Artisan Technology Group Quality Instrumentation Guaranteed 888 88 SOURCE www artisantg com ...

Page 109: ...108 Figure 6 5 FET Board A4 Component Location Artisan Technology Group Quality Instrumentation Guaranteed 888 88 SOURCE www artisantg com ...

Page 110: ...09 Figure 6 6A 6030A 35A Diode Board A5 Component Location Figure 6 6B 6031A Diode Board A5 Component Location Artisan Technology Group Quality Instrumentation Guaranteed 888 88 SOURCE www artisantg com ...

Page 111: ...110 Figure 6 6C 6032A Diode Board A5 Component Location Figure 6 7 AC Input Filter A6 Component Location Artisan Technology Group Quality Instrumentation Guaranteed 888 88 SOURCE www artisantg com ...

Page 112: ...111 Figure 6 8 GPIB Board A8 Component Location Artisan Technology Group Quality Instrumentation Guaranteed 888 88 SOURCE www artisantg com ...

Page 113: ...112 Figure 6 9 6035A Output Board A9 Component Location Artisan Technology Group Quality Instrumentation Guaranteed 888 88 SOURCE www artisantg com ...

Page 114: ...Artisan Technology Group Quality Instrumentation Guaranteed 888 88 SOURCE www artisantg com ...

Page 115: ...Artisan Technology Group Quality Instrumentation Guaranteed 888 88 SOURCE www artisantg com ...

Page 116: ...Artisan Technology Group Quality Instrumentation Guaranteed 888 88 SOURCE www artisantg com ...

Page 117: ...Artisan Technology Group Quality Instrumentation Guaranteed 888 88 SOURCE www artisantg com ...

Page 118: ...Figure 6 13A GPIB Board Schematic Diagram Artisan Technology Group Quality Instrumentation Guaranteed 888 88 SOURCE www artisantg com ...

Page 119: ...Figure 6 13B GPIB Board Schematic Diagram Artisan Technology Group Quality Instrumentation Guaranteed 888 88 SOURCE www artisantg com ...

Page 120: ... changes pertaining to Option 100 and how they affect the other portions of this manual Unless otherwise specified in Appendix A all other portions of the annual apply to both the standard unit and the Option 100 unit Suggestions for Using Appendix A The Option 100 changes are listed sequentially starting with Chapter 1 in the main body of the manual and working back through Chapter 6 It is recomm...

Page 121: ...ohm 1500 W 6030A 0 05 ohm 1500 W 6031A 0 29 ohm 1500 W 6032A 32 ohm 1500 W 6035A On Page 20 in Power Limit Calibration step e change the VSET values to VSET 50 6030A VSET 6 6031A VSET 14 5 6032A VSET 163 6035A On Page 20 in Power Limit Calibration step f change the output values to 50 1V 6030A 6 0 08V 6031A 14 5 0 1V 6032A 163 1V 6035A On Page 20 in Power Limit Calibration step g change the curren...

Page 122: ...ramming and Readback Accuracy step i change the values to 0 216Vdc 6030A 0 060Vdc 6032A 2 325Vdc 6035A On Page 23 in Load Effect Load Regulation step c change the output voltage to 42Vdc 6030A 5 2Vdc 6031A 13 5Vdc 6032A 150Vdc 6035A On Page 24 in Load Effect Load Regulation step h change the values to 0 009Vdc 6030A 0 0035Vdc 6031A 0 006Vdc 6032A 0 028Vdc 6035A On Page 24 in Source Effect Line Reg...

Page 123: ...e 30 in Source Effect Line Regulation step d change the output current to 17Adc 6030A 120Adc 6032A 50Adc 6035A 5Adc 6035A On Page 30 in Source Effect Line Regulation step e change the output voltage to 42Vdc 6030A 5 2Vdc 6031A 13 5Vdc 6032A 150Vdc 6035A On Page 30 in PARD Ripple and Noise make the following resistor changes from 3 5 to 2 4 ohms 6030A from 0 069 to 0 043 ohms 6031A from 0 4 to 0 27...

Page 124: ...On Page 91 and on the schematic diagram Figure 6 10 change R81 to 1 82K 1 1 8W Agilent P N 0757 0429 6030A 6035A only 1 78K 1 1 8W Agilent P N 0757 0278 6032A only On Page 92 and on the schematic diagram Figure 6 10 change R92 to 10K 1 1 8W Agilent P N 0757 0442 6030A 6035A only 34 8K 1 1 8W Agilent P N 0757 0123 6031A only 11 5K 1 1 8W Agilent P N 0698 5383 6032A only On Page 94 add option 100 la...

Page 125: ...Artisan Technology Group Quality Instrumentation Guaranteed 888 88 SOURCE www artisantg com ...

Page 126: ... power supply If you know which section of the supply is defective simply go to that section in the troubleshooting procedure and troubleshoot as described in Chapter 3 To help you isolate the problem to a specific area of the supply use the flowchart provided in this section If you cannot isolate the problem using the flowchart you could replace the blank front panel of your supply with a standar...

Page 127: ...o 2100 4060 On Page 102 under Chassis Electrical add Neon Pilot Light P N 1450 0647 Also add OVP Cable R72 P N 06032 60004 Under Chassis Mechanical change screened front panel to 06030 00010 6030A 06031 00011 6031A 06032 00021 6032A On Figure 6 9 add the neon pilot light in series with R8 33K across pins 4 and 5 of transformer T3 On Figure 6 12 the only part that applies to the Option 001 unit is ...

Page 128: ...127 Figure 3 1 Troubleshooting Isolation option 001 Artisan Technology Group Quality Instrumentation Guaranteed 888 88 SOURCE www artisantg com ...

Page 129: ...Artisan Technology Group Quality Instrumentation Guaranteed 888 88 SOURCE www artisantg com ...

Page 130: ...________________________________________________________________________________________ ____________________________________________________________________________________________ ____________________________________________________________________________________________ ____________________________________________________________________________________________ Test Equipment Used Description ...

Page 131: ...24 Source Effect 200V VOUT 0 011 _______mV VOUT 0 011 350µV 25 26 PARD Ripple and Noise RMS Peak to Peak 0 0 _______mV _______mV 0 022 0 050 3 3mV 1 5mV 27 Transient Recovery 90 to 100 Full Load 0 _______mV 0 150 2ms 18mV Constant Current Tests 28 Current Programming and Readback Low Current 0 50A Front Panel Display GPIB Readback 0 475 IOUT 0 017 IOUT 0 017 ________A ________A ________A 0 525 IOU...

Page 132: ...__________________________________________ ____________________________________________________________________________________________ ____________________________________________________________________________________________ ____________________________________________________________________________________________ Test Equipment Used Description Model No Trace No Cal Due Date 1 AC Source ___...

Page 133: ...Source Effect 20 0V VOUT 0 004 _______mV VOUT 0 004 20µV 25 26 PARD Ripple and Noise RMS Peak to Peak 0 0 _______mV _______mV 0 008 0 050 1 2mV 1 5mV 27 Transient Recovery 90 to 100 Full Load 0 _______mV 0 100 2ms 12mV Constant Current Tests 28 Current Programming and Readback Low Current 0 50A Front Panel Display GPIB Readback 0 248 IOUT 0 303 IOUT 0 102 ________A ________A ________A 0 751 IOUT 0...

Page 134: ...__________________________________________ ____________________________________________________________________________________________ ____________________________________________________________________________________________ ____________________________________________________________________________________________ Test Equipment Used Description Model No Trace No Cal Due Date 1 AC Source ___...

Page 135: ... Source Effect 60 0V VOUT 0 009 _______mV VOUT 0 009 40µV 25 26 PARD Ripple and Noise RMS Peak to Peak 0 0 _______mV _______mV 0 006 0 040 900µV 1 2mV 27 Transient Recovery 90 to 100 Full Load 0 _______mV 0 100 2ms 12mV Constant Current Tests 28 Current Programming and Readback Low Current 0 50A Front Panel Display GPIB Readback 0 414 IOUT 0 041 IOUT 0 036 ________A ________A ________A 0 586 IOUT ...

Page 136: ...________________________________________________________ ____________________________________________________________________________________________ ____________________________________________________________________________________________ ____________________________________________________________________________________________ Test Equipment Used Description Model No Trace No Cal Due Date 1...

Page 137: ... 350µV 24 Source Effect 500V VOUT 0 063 _______mV VOUT 0 063 800µV 25 26 PARD Ripple and Noise RMS Peak to Peak 0 0 _______mV _______mV 0 050 0 160 7 5mV 4 8mV 27 Transient Recovery 90 to 100 Full Load 0 _______mV 0 200 5ms 24mV Constant Current Tests 28 Current Programming and Readback Low Current 0 10A Front Panel Display GPIB Readback 0 015 IOUT 0 060 IOUT 0 050 ________A ________A ________A 0 ...

Page 138: ...21A 02561 02650 1 3 7 9 12 14 3302A 02651 02690 1 3 7 9 12 3304A 02691 02700 1 3 7 9 11 3313A 02701 02760 1 3 7 9 10 3325A 02761 02920 1 3 7 9 3416A 02921 02990 1 3 7 3429A 02991 03020 1 3 6 3440A 03021 03110 1 3 5 3506A 03111 03280 1 3 4 3543A 03281 03890 1 3 US3543 0101 0340 1 3 US3831 0341 0375 1 __________________________________________ Prefix Serial Number Make Changes 6032A 3004A 05881 0588...

Page 139: ...60 3305 CHANGE 8 Under A1 Main Board change K1 K2 to p n 0490 1746 Change R47 and R48 150 ohms p n 0761 0035 CHANGE 9 Under A2 Control Board For Model 6035A only Change R40 to 95k p n 0699 1211 and 1 21M p n 0699 1271 Change R41 to 200k p n 0698 6376 CHANGE 10 Under A3 Front Panel change G1 to p n 06032 60005 On page 5 18 under Chassis Mechanical change Knob to p n 0370 1303 Delete Spacer p n 2190...

Page 140: ...0 and R23 1 ohm p n 0699 0208 CHANGE 13 Under A8 GPIB Board change U8 to p n 1818 4111 CHANGE 14 Under A1 Main Board change C11 12 to 0 047uF p n 0160 5895 On page 5 3 change R12 and R13 to 2 2 ohms p n 0699 0188 CHANGE 15 Under A8 GPIB Board delete D22 CHANGE 16 Under A5 Diode Board delete L3 CHANGE 17 Under A1 Main Board change U1 to p n 1906 0218 CHANGE 18 Under A6 AC Input Filter change L1 to ...

Page 141: ...tes have been made to this manual since the print revision indicated on the title page 4 07 04 Pages 38 104 105 106 and 107 have been corrected Artisan Technology Group Quality Instrumentation Guaranteed 888 88 SOURCE www artisantg com ...
Page 142: ...quipment Have surplus equipment taking up shelf space We ll give it a new home Learn more Visit us at artisantg com for more info on price quotes drivers technical specifications manuals and documentation Artisan Scientific Corporation dba Artisan Technology Group is not an affiliate representative or authorized distributor for any manufacturer listed herein We re here to make your life easier How...

Reviews: