background image

AgfaPhoto DuoScan 100 


28 

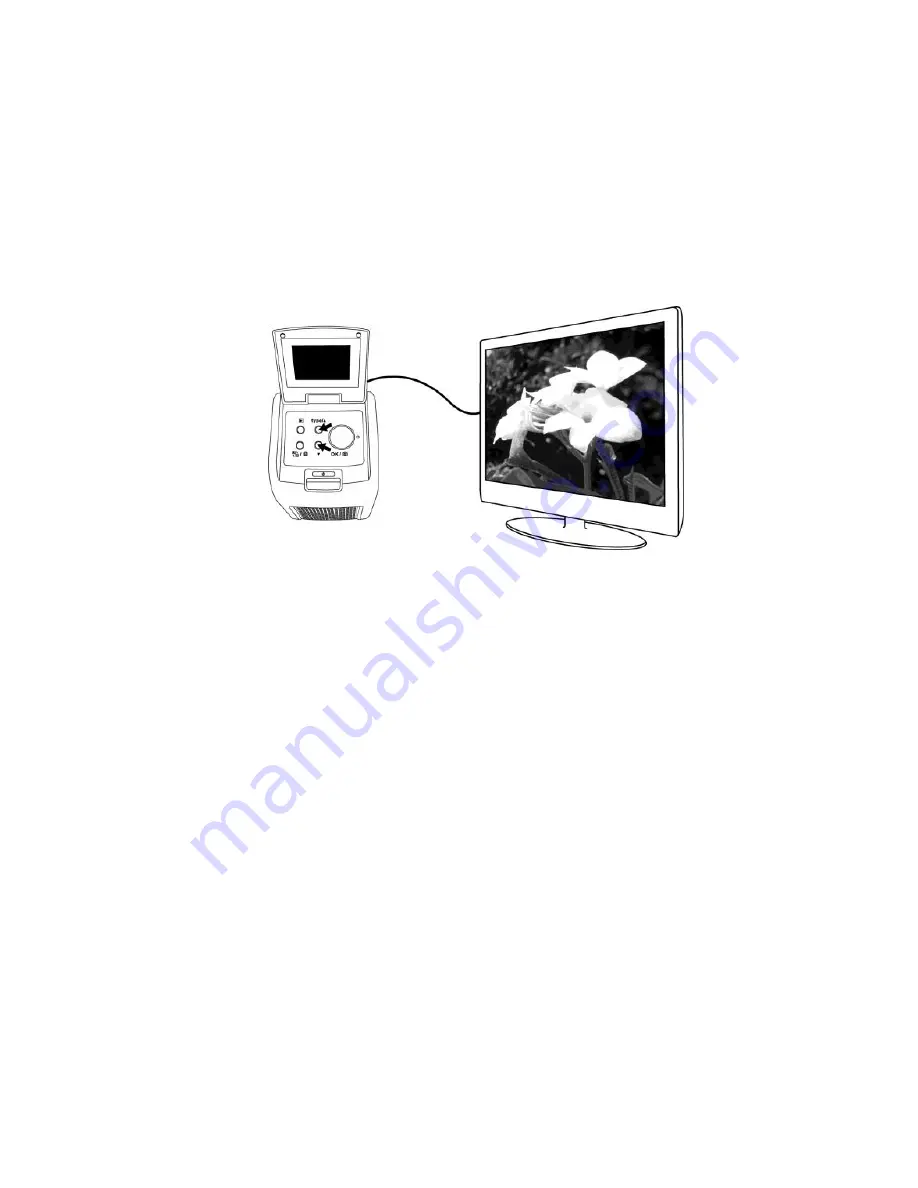
3.  Press the Up button to view images forwards. Press the Down button to 

view images backwards. 


4.  Press the Playback mode button once more to view pictures as a slide 

show on the TV screen. The images will continue frame by frame 

automatically at a rate of 5 seconds per frame. The slide show can be 

stopped by pressing the Up or Down button. The slide show can be 

resumed by pressing the Playback mode button. 

5.  Press the Playback mode button once more during the slide show to 

terminate TV mode and film scanning. You may unplug the TV cable 

now. 

6.  Press the Power On/Off button to turn off the film scanner power when it 

is not is use. 


Summary of Contents for DuoScan 100

Page 1: ...DuoScan 100 User manual...

Page 2: ...nt by Users in Private Households in the European Union 4 1 Safety and Handling Precautions 6 2 Introduction 8 Package Contents 8 DuoScan 100 Views 9 Inserting the Battery 11 Charging the Battery 12 S...

Page 3: ...p 31 1 5 Straighten 31 1 6 Blur Background 31 2 Retouch 32 2 1 Healing Brush 32 2 2 Clone 33 2 3 Lighten Darken 33 2 4 Smudge 33 2 5 Sharpen 33 2 6 Blur 34 2 7 Paint Brush 34 2 8 Line 34 2 9 Eraser 34...

Page 4: ...its are designed to provide reasonable protection against harmful interference in a residential installation This equipment generates uses and can radiate radio frequency energy If not installed and u...

Page 5: ...s in the European Union This symbol on the product or on its packaging indicates that this product must not be disposed of with your other household waste Instead it is your responsibility to dispose...

Page 6: ...can 100 5 For more information about where you can drop off your waste equipment for recycling please contact your local city office your household waste disposal service or the shop where you purchas...

Page 7: ...er away from water and other liquids Do not use the Digital Image Scanner with wet hands Never use the Digital Image Scanner in the rain or snow Moisture creates the danger of fire and electric shock...

Page 8: ...AgfaPhoto DuoScan 100 7 If the exterior of the Digital Image Scanner needs cleaning wipe it with a soft dry cloth...

Page 9: ...AgfaPhoto DuoScan 100 8 2 Introduction Package Contents DuoScan 100 Quick Guide CD Rom Slide Holder Film Holder 110 Film Holder Lithium Battery Cleaning Brush Adaptor Optional USB Cable TV Cable...

Page 10: ...AgfaPhoto DuoScan 100 9 DuoScan 100 Views...

Page 11: ...Image Scanner slot and clean the glass surface to ensure a clear image Always make sure your film negatives mounted slides and cover trays are clean before inserting into the Digital Image Scanner Dus...

Page 12: ...over by lightly pressing down and sliding it back as shown 2 Insert the supplied battery Make sure the battery label is facing upwards and the and ends of the battery match the polarities indicated in...

Page 13: ...the scanner it is recommended that you recharge it as soon as possible 1 Insert the battery into the battery compartment see page 11 2 You may charge the battery in 2 ways Plug the USB mini B of the...

Page 14: ...least 2 5 3 hours 3 The red LED will light during charging When the battery is fully charged the red LED will turn off and you can disconnect the charging connections Status LED Red The Image Scanner...

Page 15: ...Slide into the Holder 1 Keep the glossy surface facing upwards Open the negative positive slide holder as Illustrated 2 Place a positive slide negative film 110 film into the holder as shown 3 Close...

Page 16: ...gfaPhoto DuoScan 100 15 4 Getting Started 1 Insert the SD card into the SD card slot 2 Press the Power button to power on Press the Power button to power off if you do not want to use the Image Scanne...

Page 17: ...aPhoto DuoScan 100 16 3 Insert the loaded film slide holder correctly into the slot according to the or sign shown on the Image Scanner and film holder Insert through front slot Insert through rear sl...

Page 18: ...ngular white frame If the picture is not properly positioned the black edges of the film holder may be scanned If the black border of a slide film is at the top or bottom of the LCD display tilt the s...

Page 19: ...oto DuoScan 100 18 4 Press the Film type button to select the film types on the screen 135 positive slide 135 negative 135 black white 110 film Note Incorrect selection of Film type may produce poor r...

Page 20: ...rightness until it becomes stable This normally take 3 4 seconds depending on the brightness of your film Note To save power the scanner will automatically turn to the sleep condition if you do not us...

Page 21: ...AgfaPhoto DuoScan 100 20 6 Moving the film holder for the next picture 7 Press the Flip button to rotate image 180 degrees if the slide is accidentally loaded into the film holder upside down...

Page 22: ...AgfaPhoto DuoScan 100 21 5 Playback Mode 1 Press the Playback button to play back the digital image 2 Press the Up button to review forwards Press the Down button to review backwards...

Page 23: ...an 100 22 6 Delete Mode 1 In Playback mode press the Delete button once to delete the current image Press the OK button to confirm 2 Press the Delete button twice to delete all images Press the OK but...

Page 24: ...s the Delete button three times to format the SD card Press the OK button to confirm Note Formatting the SD card will delete all files on the card Download the files from the SD card onto your compute...

Page 25: ...faPhoto DuoScan 100 24 7 Connection to a PC 1 Plug the USB cable into the scanner and computer 2 Turn the power on 3 Press the Up button to select SD to PC to YES and then press the OK button to confi...

Page 26: ...AgfaPhoto DuoScan 100 25...

Page 27: ...he SD card will be imported to your computer automatically for reviewing Copy the images from the SD card to the designated folder or album on your computer Note The bundled MediaImpression is only fo...

Page 28: ...et the TV to Video mode and plug the TV cable to the TV out Connector of your film scanner and the Video connector of your TV set Turn your film scanner on by pressing the Power On Off button 2 Press...

Page 29: ...continue frame by frame automatically at a rate of 5 seconds per frame The slide show can be stopped by pressing the Up or Down button The slide show can be resumed by pressing the Playback mode butto...

Page 30: ...ow to fill the computer screen In addition to the large photo workspace the Photo Editing Tools module includes five distinct sets of controls 9 1 Adjust 9 1 1 Enhance The Enhance feature includes two...

Page 31: ...to reveal details hidden in a dark photo or to the right to make a faded photo look new again 3 Click Apply if you like the result Click Cancel if you do not 9 1 3 Red Eye This feature makes it easy f...

Page 32: ...de will be trimmed away 6 Click Undo if you make a mistake or don t like the result 9 1 5 Straighten This feature enables you to fix photos that appear to be tilted How to use Straighten 1 Move the sl...

Page 33: ...one Click Close to exit the Photo Editing Module 9 2 Retouch 9 2 1 Healing Brush The Healing Brush is good for fixing dust scratches and removing skin blemishes How to use the Healing Brush to fix a...

Page 34: ...ush size so the cursor circle is only slightly larger than the widest part of the telephone pole 3 Click and hold your mouse button and carefully paint over the telephone pole Do not release the mouse...

Page 35: ...2 8 Line Draws a straight line in the photo Click and drag the sliders below to change the line width and transparency 9 2 9 Eraser Simulates an eraser removing the image by painting with a paintbrush...

Page 36: ...film 36mm x 24mm 110 film 17mm x 13mm Support film type auto converting Slide Color Negative Film Black White Negative Film Focus Range Fixed focus PC Interface USB 2 0 TV Out PAL Image Format 135 Fi...

Page 37: ...Delete One Battery 2 3 Delete All Battery 1 3 Format SD card Battery Empty Yes Slide No Color Film Card Error B W Film Card Full 110 Film Card Lock Playback Mode PC SD card selection Wait PC SD card...

Page 38: ...ternal memory minimum 500MB free hard disk space 800 x 600 pixel color monitor CD ROM drive Windows 7 XP Service Pack II Vista 32 64 bits Mac System Requirements PowerPC G4 800 MHz or Intel processor...

Page 39: ...UK 44 1908 488676 info allmondegroup com Service Support Hotline Germany 0900 1000 042 1 49 euro min from a German landline only Online Service International contact support apdc plawa com Service Rep...

Page 40: ...ufacture this product or provide any product warranty or support For service support and warranty information contact the distributor or manufacturer All other brands and product names are registered...

Page 41: ...Photo Holding GmbH www agfaphoto com Manufactured by plawa feinwerktechnik GmbH Co KG www plawa com AgfaPhoto is used under license of Agfa Gevaert NV Co KG or Agfa Gevaert NV Neither Agfa Gevaert NV...

Reviews: