RailDriver’s
CabController
Aerosoft
GmbH 2013
12
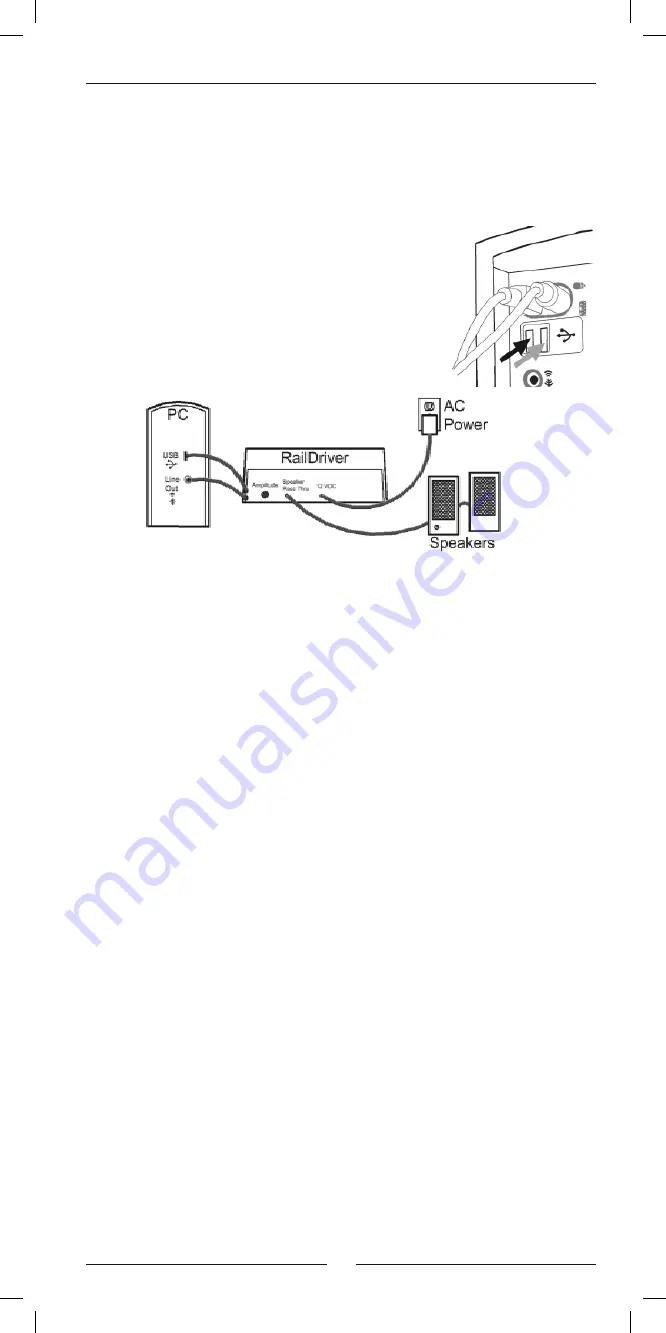
Connecting the CabController
with your omputer
Plug in the RailDriver’s USB connector and turn on
the computer.
Windows will recognize new hardware .
The following steps are required to enable the
RailDriver internal sub-woofer. Power and audio
connections are not required for operation of
the RailDriver controls, but they do enhance the
driving experience.
1.
Plug the RailDriver Controller into the line out sound port on your computer.
2.
Plug the speakers (which were in the sound port) into the RailDriver pass
through sound port.
3.
Connect the 12 VDC Power Supply.
4.
Set the Amplitude control to mid level (adjust setting when RailDriver is
running with your train simulation software).
Note:
The RailDriver Desktop contains a speaker which has been magnetically
shielded to prevent color distortion on video displays. Exposing magnetic media
(floppy disk, memory stick, or digital tape) to magnetic materials may cause data loss.
Operating your RailDriver
CabControl Unit
The rapid evolution of train simulator software applications prohibits us from
keeping the most current and relevant instructions in a paper manual. Please
see the readme.txt file on the RailDriver installation CD and the “Help” files in
our software for the latest notes on operating RailDriver controls, or visit the
Technical Support Page on www.raildriver.com
After you have installed the RailDriver CabController software and connected
the CabController to your system you can now start operating it in MSTS. Here’s
how to do it:
1.
Start the RailDriver Manager by double clicking on the symbol.
The calibration setup will start automatically. Calibrate your CabController.
There’s no need to calibrate your CabController again.
2.
Select the locomotive you want to use from the list. For example „Dash 9“.
3.
In the list „Cab Maker Files“ you can find the file with the default settings.
4.
Click on „play“. The MSTS will start automatically.
5.
Select your desired route, activity or locomotive in Train Simulator and start as
usual.
6.
Press the button „Start/Stop RailDriver“ on the CabController. It is the func
-
tion button on the far left in the lower row of the function buttons. The HUD
(Heads Up Display) is now being shown in Train Simulator and the actual speed
is being displayed on the CabController (if you train is standing, it should be 0).
Summary of Contents for Rail Driver's Cab Controller
Page 19: ......


