background image


USING THE VG SYSTEM 


The Combat VG system uses a reduction system of pulleys between the central part of the crossbar and the hang 

point tower channel to enable a wide VG range. The change in airframe nose angle from VG loose to tight is over 2 
degrees. Tightening the VG increases the spanwise tension which the airframe places on the sail, reducing the spanwise 
twist and the sail elasticity. The result is an increase in L/D performance and a reduction in roll control authority and roll 
control response. 


The VG is activated by pulling on the VG rope and then moving the rope to set the rope in the cleat. The 

recommended procedure for increasing VG tension is to grasp the rope firmly at the cleat, and pull straight along the 
basebar. 


VG full loose is for maximizing roll control authority and roll rate. 


Between VG full loose and VG one half, the glider retains good lateral control authority and response. 


Tighter than VG one half, the glider’s roll pressures increase significantly and the roll rate becomes significantly 

slower. Tight VG settings are recommended for straight line gliding, or for flying in smoother conditions when well clear of 
both the terrain and of other gliders. The stall characteristics of the Combat at tighter VG settings are more abrupt and 
less forgiving and the glider is more susceptible to spinning. Full breaking stalls and accelerated stalls at tighter VG 
settings are not recommended. 


LANDING THE COMBAT 


Under ideal conditions, landing approaches are best done so as to include a long straight final into the wind at a 

speed above best L/D speed. In a very limited field, or a field which slopes slightly downhill, when landing in light wind, 
you may need to make your final approach at a slower speed, perhaps as slow as minimum sink, in order to be able to 
land within the field. 


In winds of less than 5 km/h (3 mph), if the landing area slopes down hill at more than 10:1, you should seriously 

consider landing downwind and uphill; or crosswind, across the slope. Landing attempts, which require slow speed 
approaches, maneuvering around obstacles or into a restricted area, or downwind or crosswind landings are not 
recommended for pilots below an advanced skill level. 


We recommend that you make your approach with the VG set between full loose and 1/2 on. A full loose VG setting 

will reduce glide performance, making it easier to land on a target or within a small field. It will also ensure maximum 
control authority during the approach, and especially when flying very slowly on final. At VG full loose, however, there is 
some loss of aerodynamic efficiency and flare authority, For this reason, in very light winds, at higher wing loadings or at 
higher density altitudes, it is recommended that a setting of VG 1/3 – 1/2 ore more be used. A full loose VG setting will 
also increase the glider’s roll sensitivity, and some pilots have had difficulty with roll / yaw oscillations on final. The best 
way to avoid this is to fly your entire approach at a constant airspeed, and to control your touchdown point by making 
adjustments to the shape of your pattern. You


should choose your approach speed based on the amount of wind and 

turbulence present - in stronger wind and more turbulent air, fly faster. In any case, however, try to fly a constant airspeed 
throughout the approach. 


Once established on a straight final approach, with wings level and flying directly into the wind, you should fly the 

glider down to where the basetube is between 1 and 2 m (3-6 ft) off the ground. At this altitude, let the control bar out just 
enough to “round out” so that your descent is arrested and your flight path parallels the ground. The remainder of your 
approach will consist of bleeding off excess speed while paralleling the ground and keeping the wings level and the nose 
pointed in your direction of flight until it is time to “flare” for landing. 
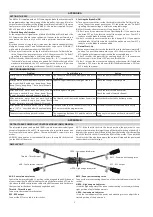
 

Fig. 22

Prior to the landing flare your body position should be 

generally upright, but slightly inclined forward, with your 
head and shoulders forward of your hips and your legs and 
feet trailing slightly behind. 


Many pilots make the mistake of trying to get too 

upright at this stage of the landing, which actually reduces 
your flare authority and makes it harder to land on your 
feet. Your hands should be at shoulder width and shoulder 
height on the uprights (

Fig.22)


You should be relaxed, with a light grip on the bar, and 

your weight should be fully supported in your harness and 
not at all by your arms. (If your harness does not allow you 
to hang in the proper semi-upright landing position “hands 
off,” without supporting your weight on the control bar, you 
will have a lot more difficulty making good landings). 


We wish you many happy landings! 

 14

Summary of Contents for COMBAT-09

Page 1: ...______________ Date of production ___________________ Serial number ___________________ Manufactured by AEROS Ltd Post Volynskaya St 5 Kiev 03061 UKRAINE Tel 380 44 455 41 18 Fax 380 44 455 41 16 E ma...

Page 2: ...1...

Page 3: ...6 Preflight procedure 11 Laying the glider down flat 12 Launching and flying the Combat 13 Aerotowing 13 Using the VG system 14 Landing the Combat 14 Safety in turbulance 15 Combat breakdown 15 Remov...

Page 4: ...safety and comfort Please read and be sure you thoroughly understand this manual before flying your Combat Be sure you are thoroughly familiar with the set up break down preflight and maintenance proc...

Page 5: ...ot clip weight km h mph 29 31 18 19 29 31 18 19 29 31 18 19 29 31 18 19 29 31 18 19 Max airspeed with optimal pilot clip weight km h mph 110 69 110 69 110 69 110 69 110 69 Min clip pilot weight kg lb...

Page 6: ...rotating as necessary until the button spring in the rear leading edge engages securely into the holes in the front leading edge When the rear leading edge is fully engaged you will not be able to rot...

Page 7: ...d the rear of the leading edge tubes 2 to prevent sail damage during transportation 5 Carefully fold the rear of the sail over against the front place velcro ties around the glider and put on the glid...

Page 8: ...ot be any deviation of more than 3mm 1 8 from one batten to the other along the full length of the battens Aeros convention is that green blue marked battens go in the right wing and red marked batten...

Page 9: ...resistance in the pockets Fig 12 9 Spread the wings all the way and check all cables for any twisted thimbles or tangled cables At the rear of the keel find the shackle of the sweep wire Pull the sha...

Page 10: ...n the batten completely 9 Fig 13 Fig 14 12 Install the bottom surface battens Fig 14 13 The next step is to deploy both the inboard sprogs and the outboard sprogs and secure them in position Before do...

Page 11: ...that it lies flat on the top and bottom of the sail Fig 17 Fig 17 Don t fly without the nosecone 15 Attach plastic winglets Put front part of the winglet between the sail and the outer part of the lea...

Page 12: ...form before plastic winglets have been installed Look into the sail from the wing tip Tip folded batten must be rested on the batten stop The washout tip must be installed Check for any evidence of de...

Page 13: ...does not slide past the rear edge of the transverse battens or the system could malfunction Check the crossbar center plates assembly including the sweep wire X bar junction all bolts are in places s...

Page 14: ...p to 110 km h 69 mph being essentially roll neutral with no tendency to yaw The pitch bar pressure decreases with the VG on being light when flying close to the trim speed but progressive and consiste...

Page 15: ...VG set between full loose and 1 2 on A full loose VG setting will reduce glide performance making it easier to land on a target or within a small field It will also ensure maximum control authority d...

Page 16: ...tely or to VG when expecting a strong turbulence While in turbulence make sure you keep a very firm grip on the speedbar and do not sacrifice this strong grip to release the VG It is best to wait for...

Page 17: ...the Mylar or leading edge sail material Fig 25 11 Working from the trailing edge roll the sail tightly to the leading edge and install the tip cover bags 12 Secure the sail with the velcro sail ties...

Page 18: ...Make sure the surface is clean If it is abrasive you should our sail er bag Untie the velcro ties remove the basebar winglets on bag m the sail Dismount the sail from the front leading edge by bing v...

Page 19: ...13 Attach the rear wires to the rear of the keel 14 Set the glider up onto the control bar 15 Spread the wings slowly and carefully making sure that the sail rides forward as necessary at the nose wit...

Page 20: ...ions and immediate maintenance of any items on the glider which require it Safety requires that your glider be fully airworthy for every flight Nuts and bolts must always be secure safeties must alway...

Page 21: ...L 15 Co onsists of visual inspection mbat L 07 12 Combat L07 13 Combat L07 14 Combat L07 15 and c 1 General inspection T alls he crossbeam should be free of visible defects damage of the bearing struc...

Page 22: ...nt is the location along the keel of your hang point The fa especially in turbulent air and when the nose pitches up on entering a strong thermal On the Combat hang loop fore and aft position is adjus...

Page 23: ...e sprog To raise the sprog turn the end of the sprog threaded adjuster counter clockwise To lower the sprog turn it clockwise 3 Re install the pin to the sprog threaded adjuster zip the access zipper...

Page 24: ...ected by e twisting the sail up at position using the first start to correct it as it Fig 31 cause a significant increase in trim s cause excessive pitch bar pressure at in any case should be performe...

Page 25: ...crease batten tension rotate the threaded lever batten tip adjuster clockwise is not bent to one side Check that the crossbar neither cracks nor any visible damage Check the battens for symmetrical sh...

Page 26: ...experience Remember that ultimately your safety is your responsibility Fly only in places that are suitable for hang gliding With proper care and maintenance your glider will retain a high level of a...

Page 27: ...26...

Page 28: ......

Page 29: ......

Page 30: ......

Page 31: ......

Page 32: ......

Page 33: ......

Page 34: ......

Page 35: ...0 STL 154 000 Blind Rivet d4x10 A2 Washer M6 DIN 125 CBT07 13 637 000 STD 0033 C 15 0020 414 003 Washer M6 DIN 125 Nut M6 self locking DIN 985 Washer M8 DIN 125 DSC14A 114 000 STL 181 000 Nut M8 self...

Page 36: ......

Page 37: ...2 14 9 1 CBT09 110 001 AD Tube 2 Assembled Right show CBT09 110 002 AD Tube 2 Assembled Left mirror reflection Tapping Screw 2 2x6 5 Washer M3 DIN 125 A2 CBTL 13 114 000 CBTL 13 114 000 Safety Ring S...

Page 38: ......

Page 39: ...T07 142 000 AD CBT2 13 144 000 FT300 19 9 5 40 FT300 19 9 5 110 Safety Ring SBR1011 CBT2 13 204 000 Safety Ring SBR1011 CBT07 141 000 AEROS 10 02 10 0 255 Combat09 12 8 13 2 13 7 14 2 14 9 1 2 Sprog O...

Page 40: ...9 12 8 13 2 13 7 14 2 14 9 1 2 5 Sprog Internal CBT07 160 000 AD 3 1 1 2 PBF D 25 4 125 Safety Ring SBR1011 CBT07 163 000 AD STL 244 003 PBF D 25 4 30 Safety Ring SBR1011 Pin 4 28 26 CBTL 13 164 000 S...

Page 41: ...Keel Tube Assembled 10 02 10 1 AEROS 2 40 Combat09 12 8 13 2 13 7 14 2 14 9 CBT09 189 000 AD 3 1 5 1 1 CBT09 190 000 AD STL 101 005 CBT09 191 000 AD DSC14B 193 000 AD CBT09 13 189 003 WD...

Page 42: ......

Page 43: ......

Page 44: ......

Page 45: ......

Page 46: ......

Page 47: ......

Page 48: ......

Reviews: