


Aerohive Networks
10
Using the Virtual Access Console
A HiveAP connected directly to the network is called a portal. You can also place a HiveAP within radio range of a
portal so that it forms a wireless link through the portal to the wired network. If the HiveAP forms a CAPWAP
connection with the Aerohive redirection server and its serial number has been entered in an ACL, the redirection
server automatically redirects the CAPWAP connection the corresponding HiveManager Online VHM (virtual
HiveManager). The redirection server sends the HiveAP the HiveManager domain name of IP address as its new
CAPWAP server and the name of the appropriate VHM. If the HiveAP is currently using HTTP, the redirection server
includes the configuration needed for the HiveAP to continue using it. Similarly, if the HiveAP is configured to access
the public network through an HTTP proxy server, the redirection server saves the relevant settings on the HiveAP so
it will continue using the HTTP proxy server when connecting to HiveManager.
If the redirection server does not have the HiveAP serial number, the ACL ignores the CAPWAP connection attempts,
and the HiveAP repeats the connection cycle shown in
.
Figure 6
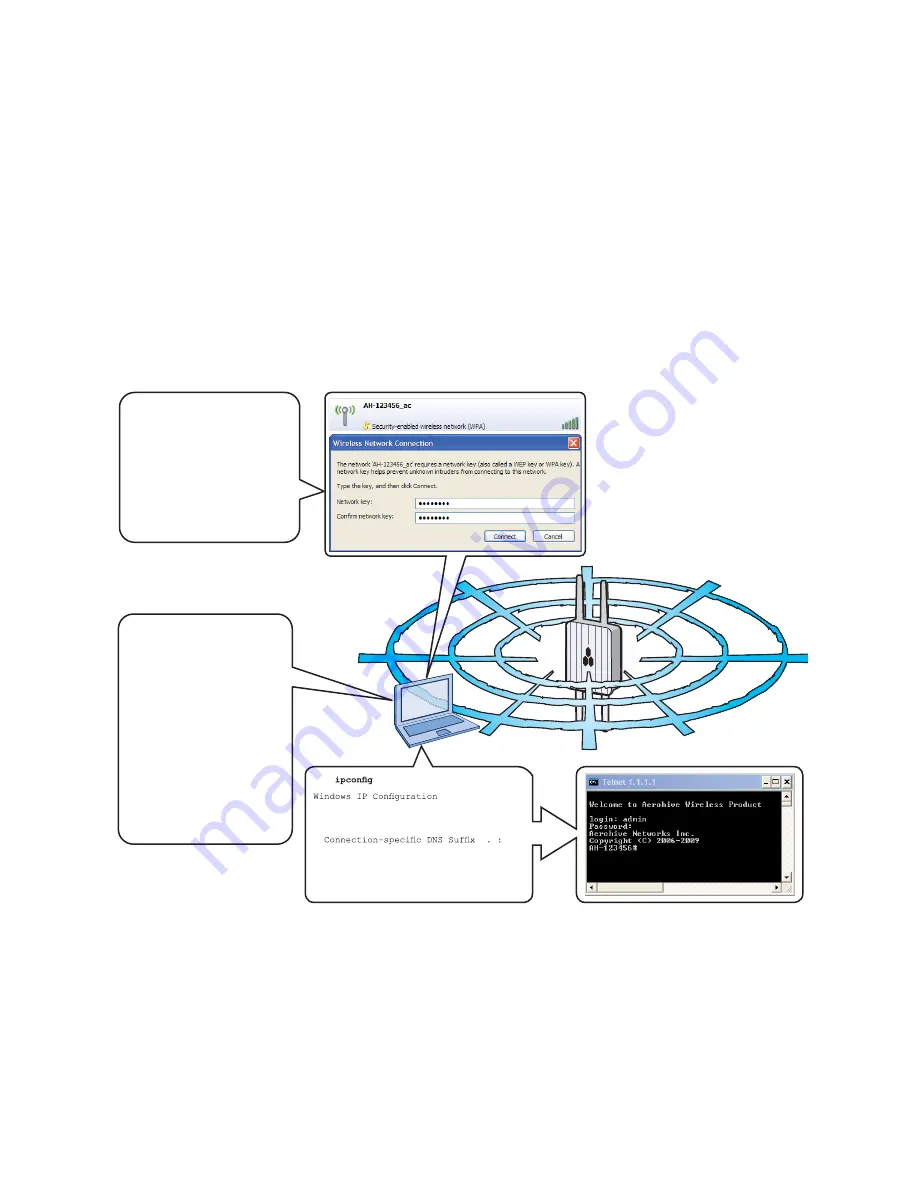
Accessing the virtual console
C:\>
Ethernet adapter Wireless
Network Connection:
IP Address. . . . . . : 1.1.1.2
Subnet Mask . . . . . : 255.255.255.0
Default Gateway . . . : 1.1.1.1
C:\>
telnet 1.1.1.1
Using your wireless client,
scan for wireless networks.
If you are within range, an
SSID such as
“AH 123456_ac” appears.
Select the SSID, and when
prompted to enter a network
key, type
aerohive
, and then
click Connect.
Wireless Client
Beacons
Beacons
Check the IP address of
the default gateway that
the DHCP server on the
HiveAP assigned to your
client. Then make an SSH
or Telnet connection to the
HiveAP at that IP address.
(Note that the Telnet
connection is protected by
WPA2 security mecha
nisms.) When prompted to
enter your credentials,
enter the default Aerohive
login name (
admin
) and
password (
aerohive
)


