It allows to activate a short operation cycle of the fans at 100% speed for twice in a day.
Press OK to enter.
Choose NO or YES using
or
.
Factory setting (DEFAULT): NO.
If “YES” the following submenu items are displayed:
1 Periodic purge length
It allows to set the purge duration.
Press Ok to select.
The setting range is: 1 ÷ 5 minutes.
Increase/decrease the minutes using
or
.
Press OK to confirm.
Factory setting (DEFAULT): 2 minutes.
2 Activation time
It allows to set two times to activate the cycle.
Press OK to select.
Increase/decrease the hours/minutes using
or
.
Press Ok to switch from hours to minutes.
Press OK to confirm.
Factory setting (DEFAULT): ore 8:00 (8 a.m.) e ore 20:00 (8 p.m.).
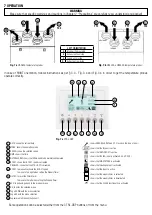
When activated, the BOOST word flushes on the LCD. (Fig. 7c - ).
Press ESC to go back to the previous menu.
Installer Menu
15 Constant Pressure
17 Periodic purge
18 Working Hours Counter
19 ModBus settings
20 Save settings
The system keeps trace of the actual working hours of the unit. This value cannot be changed.
Data is saved both on the motherboard and on the control panel CTRL-DSP, to be safe in case
of fault.
The counter stops if the unit is powered OFF and if the Weekly Timer is OFF .
Press OK to enter.
Press ESC to go back to the previous menu.
Installer Menu
15 Constant Pressure
17 Periodic purge
18 Working Hours Counter
19 ModBus settings
20 Save settings
The unit can be controlled via ModBus (ModBus RTU over RS485).
For specification, contact our customer service.
Installer Menu
15 Constant Pressure
17 Periodic purge
18 Working Hours Counter
19 ModBus settings
20 Save settings
It allows to save the setting of the installation #1 (prototype) in the internal memory of the
CTRL-DSP to be loaded afterwards on other units.
Press OK to enter.
Choose the position where to save the setting using
or
.
Up to 8 differrent settings can be saved.
Press OK to select.
Press OK to confirm.
Press ESC to go back to the previous menu.
Installer Menu
15 Constant Pressure
17 Periodic purge
18 Working Hours Counter
19 ModBus settings
20 Save settings
It allows to load the saved setting on the next unit.
Press OK to enter.
Choose the desiderd saved setting using
or
.
Press OK to select.
Press OK to confirm.
Press ESC to go back to the previous menu.
Installer Menu
21 Load Settings
22 Restore Default Settings
23 Contrast
24 Debug page
It allows to restore all the factory settings (DEFAULT).
Press OK to enter.
Press OK to confirm.
Installer Menu
21 Load Settings
22 Restore Default Settings brica
23 Contrast
24 Debug page
g
Summary of Contents for QR280A
Page 1: ...QR280A QR400A QR550A aL ...


