background image

English

57

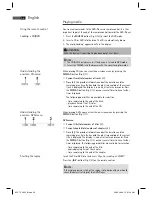
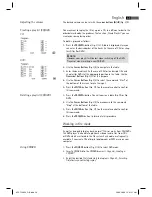
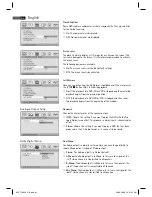
Interrupting the replay

Changing Audio-Language/

Audio-Mode 

Showing subtitles 

Stopping the replay 

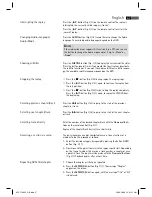
Selecting previous chapter/track 

Selecting next chapter/track

Selecting track directly 

Accessing a section via menu

Repeating DVD-title/chapter 

Press the „

II“-button (Fig. 3/21) on the remote control. The replay is 

interrupted, the currently visible image is „frozen“. 

Press the „

II“-button (Fig. 3/21) on the remote control to restart the 

„normal“ replay. 

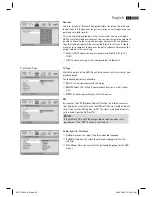
Press the AUDIO-button (Fig. 3/18) several times to change the Audio 
language. The available audio languages depend on the DVD. 

 NOTE:

If the medium does not support this function (e.g. a CD), you can use 
this button to change the Audio mode and set it e.g. to „Mono“ or 
„Stereo“. 

Press the SUBTITLE-button (Fig. 3/5) to display the current subtitle status. 
Press the button several times if you would like to activate or deactivate 
the subtitle function or if you want to choose a diff erent subtitle langua-
ge. The available subtitle languages depend on the DVD. 


Press the „

“-button (Fig. 3/20) during replay. The replay stops. 


Press the „

II“-button (Fig. 3/21) again, to continue the replay from 

the last position. 


Press the „

“-button (Fig. 3/20) twice to stop the replay completely. 

Press the „

II“-button (Fig. 3/21) again, to replay the CD/DVD from 

the beginning.

Press the I

 button (Fig 3/25) to jump to the start of the previous 

chapter or track. 

Press the 

button (Fig 3/26) to jump to the start of the next chapter 

or track. 

Enter the number of the desired chapter/track with the Numerical But-
tons 
on the remote control (Fig. 3/3). 

Replay of the chapter/track starts after a short while. 

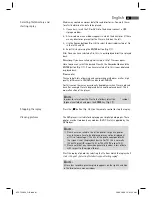
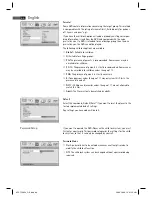
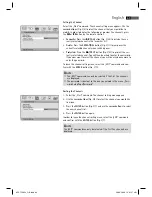
The on-screen menu enables comfortable access to any sections of a 
medium. To do this, proceed as follows: 

1.  Select the desired category by repeatedly pressing the button GOTO 

button (Fig. 3/17).

2.   Now move to the point from which the replay should start. Depending 

on the type of medium this may be a track number, a chapter or even 
a point in time. The input must be made with the Numerical Buttons 
(Fig. 3/3). Playback begins after a short time.

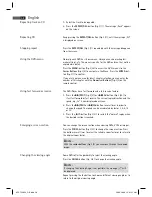
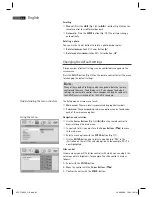
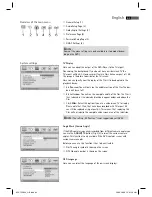
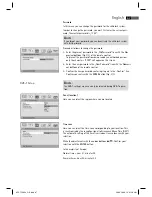
1.   Choose the chapter or title to be repeated.

2.  Press the REPEAT/DEL-button (Fig. 3/11). The message “Chapter” 

appears on the screen. 

3.  Press the REPEAT/DEL-button again, until the message “Title” or “All” 

is displayed. 

05-CTV 48

_GB.indd   57

05-CTV 48

94

_GB.indd   57

20.03.2008   12:01:11 Uhr

20.03.2008   12:01:11 Uhr

Summary of Contents for CTV 4878

Page 1: ...B T DVD LCD Fernseher DVD Player mit DVB T Receiver LCD TV DVD Player with DVB T Receiver Bedienungsanleitung Garantie Instruction Manual 05_ tel indd 1 05_CTV 4894_Titel indd 11 18 19 09 2008 12 00 00 Uhr_TH 94 ...

Page 2: ...Seite 4 Technische Daten Seite 6 38 English Contents Overview of the Components Page 3 Instruction Manual Page 42 Technical Data Page 44 Inhalt Contents 05_CTV 48 _Titel indd 2 05_CTV 4894_Titel indd 2 20 03 2008 12 03 05 Uhr 20 03 2008 12 03 05 Uhr Garantiebedingungen Seite ...

Page 3: ...Übersicht der Bedienelemente 3 Overview of the Components Abb Fig 1 Abb Fig 2 Abb Fig 3 05_CTV 48 _Titel indd 3 05_CTV 4894_Titel indd 3 20 03 2008 12 03 05Uhr 20 03 2008 12 03 05 Uhr ...

Page 4: ...nünavigation CH CH 10 Taste MODE 11 Taste Suchlauf SCAN 12 Taste Quelle SOURCE 13 ANT Antennenanschluss 14 Schalter AV IN OUT 15 AV Ein Ausgangsbuchsen VIDEO AUDIO L AUDIO R 16 VGA Anschluss 17 Kopfhöreranschluss 18 DC IN 9V Buchse 19 CHARGE Indikator 20 Ein Aus Schalter POWER I O 21 SD MMC MS Kartenleser Anschluss 22 USB Anschluss 23 Tragegriff Geräteteile Abb 1 Abb 2 05 CTV 48 _D indd 4 05 CTV 4...

Page 5: ...atzes sowie Datum Uhrzeit und Audio Drücken Sie die Taste erneut wird Ihnen die Signalstärke und Signalqualität angezeigt Erneutes Drücken blendet die Information wieder aus 14 SOURCE Zur Auswahl zwischen analog TV DVD USB CARD und DVB T 15 EJECT CD DVD auswerfen 16 10 Zur Auswahl der Kapitel Tracks über 9 Erneuter Druck erhöht um jeweils 10 Im DVB T analog TV Modus zur Anwahl der Programme über 9...

Page 6: ... P 75 Ω Analoger Audio Ausgang 1 4 V rms Betriebsumgebung 0 C bis 40 C ebener Untergrund Kompatible Medien ACHTUNG Mit diesem Gerät können nur 12 cm Disks abgespielt werden DVD Video DVD Disc DVD R RW MPEG 4 Video von CD DVD Disc DVD R RW CD R RW Audio CD von CD Disc CD R RW Video CD von CD Disc CD R RW MP3 files von CD DVD Disc DVD R RW CD R RW Regionalcode 2 Europa Grönland Südafrika Ägypten und...

Page 7: ...irmeinstellungen verändern 16 Über den DVD Player 17 Medien wiedergeben 18 Im Dateimodus arbeiten 22 Voreinstellungen ändern 25 Über den DVB T Empfänger 33 Über den analogen TV Empfänger 34 Fehlerbehebung 36 Entsorgung 37 38 Konformitätserklärung 39 OSD Menu Übersicht 40 Inhaltsverzeichnis 05 CTV 48 _D indd 7 05 CTV 4894_D indd 7 20 03 2008 12 02 06 Uhr 20 03 2008 12 02 06 Uhr Garantiebedingungen ...

Page 8: ...nd zeigt mögliche Verlet zungsrisiken auf ACHTUNG Weist auf mögliche Gefährdungen für das Gerät oder andere Gegen stände hin HINWEIS Hebt Tipps und Informationen für Sie hervor Bei technischen Fragen oder Problemen mit dem Gerät die Sie mit Hilfe dieser Bedienungsanleitung nicht lösen können wenden Sie sich bitte an unsere Service Hotline Telefon 4921522006666 ETV Elektro technische Vertriebsgesel...

Page 9: ...t grund sätzlich die Gefahr eines elektrischen Schlags Achten Sie daher besonders auf Folgendes Fassen Sie den Stecker niemals mit nassen Händen an Wenn Sie den Stecker aus der Steckdose herausziehen wollen ziehen Sie immer direkt am Stecker Ziehen Sie niemals am Kabel es könnte reißen Achten Sie darauf dass das Stromkabel nicht geknickt eingeklemmt überfahren wird oder mit Hitzequellen in Berühru...

Page 10: ...chützen Sie das Gerät vor mechanischen Erschütterungen Stellen Sie das Gerät immer auf eine feste ebene Unterlage Schützen Sie die Fernbedienung vor Witterungseinflüssen Feuchtig keit und hohen Temperaturen z B durch direktes Sonnenlicht Das Gerät nicht während der Fahrt in einem Kfz nutzen Das Gerät kann ein Standbild unbeschränkte Zeit auf dem Fernseh schirm Bildschirm anzeigen Hierbei können Sc...

Page 11: ...en versenden Sie das Gerät grundsätzlich immer in der Originalverpackung damit es keinen Schaden nimmt Heben Sie dazu die Verpackung auf Entsorgen Sie nicht mehr benötigtes Verpackungs material entsprechend der in Ihrem Land geltenden Vorschriften HINWEIS Sollten Sie einen Transportschaden bemerken wenden Sie sich umge hend an Ihren Händler 1 Stellen Sie das Gerät auf eine stabile waagerechte und ...

Page 12: ...enden Batterien kann lagerungsbedingt verkürzt sein 1 Öffnen und entfernen Sie den Batteriefachdeckel 2 Legen Sie zwei Batterien Typ AAA R03 1 5 V polaritätsrichtig und in das Batteriefach ein Beginnen Sie jeweils mit dem negativen Polende 3 Setzen Sie den Batteriefachdeckel auf und schließen Sie ihn HINWEIS Die Signale der Fernbedienung werden mit Infrarotlicht an den DVD Player übertragen Achten...

Page 13: ... nicht während der Fahrt nutzen Stellen Sie sicher dass das Gerät gut befestigt bzw verstaut ist und bei einem Unfall nicht in das Fahrzeug fallen kann Beim Fahren im Straßenverkehr ist das Hantieren am Gerät und Anschauen von Videos DVDs verboten Wenn der Zigarettenanzünder verschmutzt ist wird der Anschluss durch schlechtes Leiten heiß Sicherstellen dass der Adapter nur an einen sauberen Zigaret...

Page 14: ...I 0 Schalter einschalten 2 Das Fernsehgerät einschalten und die mit dem Fernsehgerät gelieferte Anweisung befolgen HINWEIS Sicherstellen dass das richtige Audio Videokabel verwendet wird ein falsches Kabel ergibt ein schwaches Signal DVDs sind kopiergeschützt und können nicht kopiert werden Beim Kopieren einer DVD auf eine Videokassette erhalten Sie ein unscharfes Bild mit schlechtem Sound Daran i...

Page 15: ...enneneingang Abb 2 13 HINWEIS Bitte stellen Sie sicher das ein Empfang von DVB T Signalen in Ihrem Wohngebiet zur Verfügung steht Informationen zum Sendegebiet erhalten Sie im Internet unter http www ueberallfernsehen de oder bei Ihrem Fachhändler Dieses Gerät verfügt über einen eingebauten DVB T Empfänger Um mit dem eingebauten DVB Empfänger digitale terrestrische Pro gramme empfangen zu können m...

Page 16: ... Richtungstasten Abb 3 8 die Option aus Mit den Richtungstasten nehmen Sie die Einstellung vor Bild Im Menü Bild können Sie Helligkeit Kontrast Farbsättigung und OSD Sprache einstellen Ebenfalls können Sie mit Reset die Einstellungen wieder auf die werkseitigen Werte zurücksetzten Lautstärke Hier können Sie die Lautstärke einstellen Auswahl Hier können Sie Einstellungen zum Bildmodus einstellen Bi...

Page 17: ...blematisch sein CDs oder DVDs abzuspielen die auf einem Computer erzeugt wurden z B Urlaubsbilder Überprüfen Sie im Falle von Problemen die Einstellungen des DVD Brenn programmes auf Ihrem Computer Stellen Sie insbesondere sicher dass die DVD finalisiert wurde Weitere Informationen hierzu finden Sie in der Bedienungsanleitung Ihres Aufnahmegerätes Eingabe nicht möglich Ist eine von Ihnen gewählte ...

Page 18: ...gabedauer des aktuellen Tracks angezeigt Die Anzeige erfolgt in Stunden Minu ten und Sekunden Drücken Sie einmal oder mehrfach auf die Taste DISPLAY Abb 3 13 der Fernbedienung um sich weitere Zeitanzeigen anzeigen zu lassen Folgende Möglichkeiten stehen zur Auswahl verbleibende Zeit bis zum Track Ende bisherige Wiedergabedauer der CD verbleibende Zeit bis zum CD Ende Verwenden Sie DVDs so können S...

Page 19: ...e mit dieser Taste den Audiomodus ändern und diese z B auf Mono oder Stereo einstellen Drücken Sie mehrfach auf die Taste SUBTITLE Abb 3 5 wenn Sie die Untertitelausgabe aktivieren deaktivieren oder wenn Sie eine andere Un tertitelsprache auswählen wollen Die zur Auswahl stehenden Untertitel Sprachen sind abhängig von der DVD Drücken Sie während der Wiedergabe auf die Taste Abb 3 20 Die Wiedergabe...

Page 20: ...bis auf dem Bildschirm die Meldung Alle erscheint Drücken Sie so oft auf die Taste REPEAT DEL Abb 3 11 bis auf dem Bildschirm keine Meldung mehr erscheint Normalerweise weist jede DVD ein eigenes Menü auf Hier können Sie Kapitel auswählen Einstellungen vornehmen etc Dieses Menü ist DVD spezifisch und kann daher hier nicht näher beschrieben werden Drücken Sie auf die Taste MENU Abb 3 24 um das DVD ...

Page 21: ...ichtungstasten Abb 3 8 ein Unter Umständen möchten Sie die Titel z B einer CD nicht in der vom Hersteller vorgegebenen Reihenfolge hören Mit der Funktion Playlist erstellen können Sie sich eine eigene Wiedergabereihenfolge erstellen Gehen Sie hierzu folgendermaßen vor 1 Drücken Sie auf die Taste PRO EPG Abb 3 12 Sie sehen nun eine Tabelle Hier geben Sie die gewünschte Reihenfolge der Tracks bei CD...

Page 22: ...die Wie dergabe Seite 23 Datei Verzeichnis auswählen und Wiedergabe starten Folgende Speicherkarten können Sie verwenden SD Card Multi Media Card Memory Stick 1 Stecken Sie die Speicherkarte in den Kartenleser Abb 2 21 2 Drücken Sie auf die Taste SOURCE Abb 3 14 der Fernbedienung um den DVD Player in den Dateimodus zu schalten 3 Wählen Sie die gewünschte n Datei en aus und starten Sie die Wie derg...

Page 23: ...d starten Sie die Wie dergabe Seite 23 Datei Verzeichnis auswählen und Wiedergabe starten 4 Wollen Sie wieder in den DVD Modus wechseln drücken Sie wieder holt auf die SOURCE Taste Abb 3 14 5 Entfernen Sie anschließend das USB Speichermedium Medien können zahlreichen Daten Dateien und Verzeichnisse enthalten Sie müssen daher zunächst bestimmen welche Dateien wiedergegeben werden sollen 1 Sofern di...

Page 24: ...t des Wiedergabegerätes entspricht Dieses beträgt bei Fernsehern normalerweise 1024x576 Pixel Seitenverhältnis 16 9 oder 768x576 Seitenverhältnis 4 3 Bitte beachten Sie dass jegliche Konvertierung Umwandlung im allgemeinen immer einen Informationsverlust im Bezug auf das ursprüngliche Format zur Folge hat Starten Sie die Bildwiedergabe indem Sie die Datei auswählen mit der die Wiedergabe beginnen ...

Page 25: ...ion und Auswahl Im Hauptmenü bewegen Sie sich mit den Richtungstasten Abb 3 8 der Fernbedienung Im Untermenü hingegen bewegen Sie sich mit den Richtungstasten Einen Menüpunkt wählen Sie mit der Taste ENTER Abb 3 7 aus Eine Option z B PAL in der Abbildung links wählen Sie ebenfalls mit der Taste ENTER aus Die ausgewählte Option im Beispiel PAL ist nun hervorgehoben Schieberegler In einigen Menüs fi...

Page 26: ...zeichnet wurden nach wie vor im Verhältnis 4 3 angezeigt werden Es wird also nicht die gesamte Fläche des Wide Screen Fernsehers zur Wiedergabe verwendet 05 CTV 48 _D indd 26 05 CTV 4894_D indd 26 20 03 2008 12 02 11 Uhr 20 03 2008 12 02 11 Uhr HINWEIS Die Einstellung 4 3 Panscan wird nicht von allen DVDs unterstützt Winkelzeichen Kamerawinkel Falls die DVD Sequenzen enthält die von unterschiedlic...

Page 27: ...eristik der Lautsprecherausgabe L R Wählen Sie diese Einstellung wenn Sie die DVD im Pro Logic Dol by Stereoeffekt abspielen wollen Hierdurch entsteht ein realitätsnaher 2 Kanal Wiedergabeeffekt Stereo Wählen Sie diese Einstellung wenn eine DVD die im 5 1 Au dio Format aufgenommen wurde als 2 Kanal Stereoton ausgegeben werden soll Doppeltes Mono Normalerweise erfolgt die Tonausgabe als Stereo Ausg...

Page 28: ...rtragungssystem Ihres Wiedergabegerät an Folgende Optionen stehen zur Auswahl PAL In Europa verbreitetes System MULTI Wählen Sie diese Einstellung wenn es sich bei Ihrem Wieder gabegerät um ein Multisystemgerät handelt NTSC Primär in Nordamerika verbreitetes System PBC Durch PBC Playback Control werden die auf den DVD s bzw VCD s be findlichen vom Hersteller vorgegebenen interaktiven Menüs automat...

Page 29: ...messen sein Freig ab 16 Eine elterliche Begleitung ist notwendig N Frei u 16 Jugendliche unter 16 Jahren dürfen den Film nur in Begleitung eines Erwachsenen sehen N Frei u 18 Kinder und Jugendliche unter 18 Jahren dürfen den Film nicht sehen Erwachsene Der Film darf nur von Erwachsenen gesehen werden Grundeinstellung Wählen Sie den Befehl Grundeinst Rückstellen wenn Sie das Gerät wieder auf die we...

Page 30: ...wort in der Zeile Neues Passwort mit den Zifferntasten der Fernbedienung ein 3 Geben Sie zur Bestätigung das neue Kennwort in der Zeile PW Be stätigen erneut ein Bestätigen Sie Ihre Eingabe mit der Taste ENTER Abb 3 7 HINWEIS Das DVB T Einstellmenü kann nur im DVB T Betrieb angewählt werden Zone Standort Wählen Sie hier Ihre Standort Region aus Zeitzone Wählen Sie hier die Zeitzone aus die Ihrem S...

Page 31: ...n in Anspruch nehmen HINWEIS Möchten Sie den Vorgang abbrechen drücken Sie die Taste PBC SCAN Abb 3 19 und bestätigen Sie die eingeblendete Sicherheits abfrage mit der ENTER Taste Abb 3 7 Durch Drücken der Taste PBC SCAN Abb 3 19 können Sie ebenfalls den automatischen Sendersuchlauf aktivieren Manueller Suchlauf HINWEIS In diesem Suchlauf ist es notwendig die Frequenz des gesuchten Programms zu ke...

Page 32: ...s Passwortes gebeten Um das Kanal Einstellmenü zu verlassen wählen Sie den Befehl ENDE aus und bestätigen mit der ENTER Taste Abb 3 7 HINWEIS Der Befehl ENDE kann nur angewählt werden wenn die ersten fünf Programme angezeigt werden Das Passwort ist identisch mit dem welches Sie im Menü Passwort Setup Menü Passwort vergeben haben Programme sortieren 1 Wählen Sie den Befehl Start aus Das Programm So...

Page 33: ...dung 2 Folgende Sendung 3 Aktuelles Datum und Uhrzeit 4 Drücken Sie die Taste ANGLE TTX Abb 3 4 um die Funktion Video text aufzurufen Geben Sie mit Hilfe der Zifferntasten Abb 3 3 die gewünschte Videotextseite ein Ihre Eingabe wird in der oberen linken Bildschirmecke angezeigt Nachdem Sie die gewünschte Videotextseite eingegeben haben sucht Ihr Gerät die Seite Da die Videotextseiten nicht alle gle...

Page 34: ...begerät um ein Multisystemgerät handelt PAL In Europa verbreitetes System SECAM In Frankreich und Osteuropa verbreitetes System Tonsyst Stellen Sie hier das Norm System entsprechend Ihrer Region ein BG In West Europa verbreitetes System DK In Ost Europa verbreitetes System I Im Vereinigtem Königreich Irland Hong Kong und Südafrika verbrei tetest System L In Frankreich verbreitetest System Swap In ...

Page 35: ... sucht nun nach den verfügbaren Programmen Dieser Vorgang kann einige Minuten in Anspruch nehmen Suche Starten Sie den manuellen Suchlauf zum nächsten bzw vorherigen Programm durch Drücken der Richtungstasten Das gefundene Programm wird auf dem aktuellen Programmplatz automatisch abgespei chert Feinein In diesem Menü können Sie die Frequenz des aktuellen Programms nach oben oder unten hin abstimme...

Page 36: ...andere CD DVD Voreinstellungen falsch Überprüfen Sie die Voreinstellungen des DVD Players Kindersicherung ist aktiviert Deaktivieren Sie den Kinderschutz AV IN OUT Schalter Abb 2 14 steht auf IN Stellen Sie den AV IN OUT Schalter auf OUT Keine Reaktion auf Tastendruck Probleme mit der Stromversor gung oder statische Aufladung des Gerätes Schalten Sie den Hauptschalter aus und ziehen Sie den Netz s...

Page 37: ...fälle dürfen nicht zusammen mit Haushaltsabfällen entsorgt werden Wenden Sie sich für Ratschläge bezüglich des Recyclings an Ihre Kommunalbehörde oder Ihren Händler Hinweise zum Umgang mit Batterien Akku Halten Sie Batterien Akku von Kindern fern Sie sind kein Spielzeug Werfen Sie Batterien Akku niemals ins Feuer nicht in Wasser tauchen Achten Sie beim Einlegen der Batterie auf die Polarität Öffne...

Page 38: ...escheins an uns Befindet sich das Gerät zum Zeitpunkt des Garantiefalls im Ausland muss es auf Kosten des Käufers uns zur Erbringung der Garantielei stungen zur Verfügung gestellt werden 3 Mängel müssen innerhalb von 14 Tagen nach Erkennbarkeit uns gegenüber schriftlich angezeigt werden Besteht der Garantiean spruch zu Recht entscheiden wir auf welche Art der Schaden Mangel behoben werden soll ob ...

Page 39: ...tv de oder per Fax 0 21 52 20 06 15 97 mitteilen Bitte teilen Sie uns Ihren Namen Vornamen Straße Hausnummer PLZ und Wohnort Telefon Nummer soweit vorhanden Fax Nummer und E Mail Adresse mit Im Weiteren benötigen wir die Typenbezeichnung des reklamierten Gerätes eine kurze Fehlerbeschreibung das Kaufdatum und den Händler bei dem Sie das Neugerät erworben haben Nach Prüfung Ihres Garantieanspruches...

Page 40: ...FREI AB 16 6 N FREI U 16 7 N FREI U 18 8 ERWACHSEN GRUNDEINST RÜCKSTELLEN PASSWORT SETUP MENÜ KENNWORTMODUS EIN AUS PASSWORT ÄNDERN DVB T SETUP PAGE ZONE ZEITZONE ÄNDERN ALTERSSPERRE 4 18 DEAKTIVIERT KANAL EINSTELLUNG KANAL EINSTELLUNG AUTOM SUCHLAUF START MANUELLER SUCHLAUF START KANAL EINSTELLEN START PROGR SORTIEREN START Analog OSD Menü BILD HELLIGKEIT KONTRAST FARBE DEUTSCH RESET LAUTSTÄRKE L...

Page 41: ...Deutsch 41 05 CTV 48 _D indd 41 05 CTV 4894_D indd 41 20 03 2008 12 02 19 Uhr 20 03 2008 12 02 19 Uhr ...

Page 42: ...H CH 10 MODE button 11 Scan button SCAN 12 SOURCE button 13 ANT aerial connexion 14 AV IN OUT switch 15 AV input output sockets VIDEO AUDIO L AUDIO R 16 VGA connection 17 Headphones connection 18 DC IN 9 V socket 19 CHARGE indicator 20 On Off switch POWER I O 21 SD MMC card reader connec tion 22 USB connection 23 Carrying handle Device parts Fig 1 Fig 2 05 CTV 48 _GB indd 42 05 CTV 4894_GB indd 42...

Page 43: ...time and audio in DVB T mode Press the button again to display the signal strength and signal quality Pressing again hides the information 14 SOURCE For selecting between analogue TV DVD USB CARD and DVB T 15 EJECT for ejecting CDs DVDs 16 10 For selecting the chap ters tracks above 9 Pressing again increases by a further 10 In DVB T analogue TV mode for selecting the channels above 9 17 GOTO For ...

Page 44: ... 0 V P P 75 Ω Analogue Audio output 1 4 V rms Operating environment 0 C bis 40 C level base Compatible media ATTENTION With this device it is possible to play back only 12 cm discs DVD Video DVD Disc DVD R RW MPEG 4 Video von CD DVD Disc DVD R RW CD R RW Audio CD von CD Disc CD R RW Video CD von CD Disc CD R RW MP3 files von CD DVD Disc DVD R RW CD R RW Regional 2 Europe Greenland South Africa Egy...

Page 45: ...51 Changing the Picture Settings 54 About the DVD Player 55 Playing media 56 Working in file mode 59 Changing the default settings 62 The DVB T Receiver 70 About the Analogue TV Receiver 71 Troubleshooting 73 Disposal 74 Declaration of conformity 74 OSD Menu overview 75 Table of Contents 05 CTV 48 _GB indd 45 05 CTV 4894_GB indd 45 20 03 2008 12 01 07 Uhr 20 03 2008 12 01 07 Uhr ...

Page 46: ...these instructions to avoid accidents and damage to the machine WARNING Warns against dangers to your health and indicates potential risks of injury ATTENTION Indicates potential hazards for the player or other objects NOTE Highlights tips and information for you ETV Elektro technische Vertriebsgesellschaft mbH Industriering Ost 40 47906 Kempen We reserve the right to make technical and design rel...

Page 47: ... pay particular attention to the following Never touch the plug with wet hands If you want to pull the plug out of the plug socket always pull directly on the plug Never pull on the cable as it could tear Make sure that the power cable is not bent caught or run over and that it does not come into contact with heat sources Make sure that the power cable is not wound around the device while in opera...

Page 48: ...slots are not blocked Protect the appliance against the mechanical vibrations Always place the device on a firm even base Protect the remote control against weather influences moisture and high temperatures e g by direct sunlight Do not use the device while travelling in a motor vehicle The player is able to show a still image on the TV screen monitor over an unlimited period of time This can caus...

Page 49: ... from walls and objects 2 Connect the device to a properly installed power socket 3 If present remove the protective film from the device LCD screen Starting up WARNING Leaking out battery acid can damage your health Remove the battery from the battery compartment as soon as it is exhausted or if the remo te control is not going to be used for a longer period of time Wipe up leaked out battery aci...

Page 50: ...230 240 V When connecting to an alternating current source outside Europe a plug adapter must be used that conforms to the socket 1 Insert the cable from the alternating current adapter into the DC IN 9V socket Fig 2 18 of the device 2 Connect the alternating current adapter to a correctly installed shock proof socket ATTENTION The alternating current adapter supplied is intended for use only with...

Page 51: ... is not going to be used for a prolonged period the mains lead must be removed from the power socket The battery is fully charged when the CHARGE control lamp changes to green Remove the mains lead from the alternating current adapter and then the battery from the charging device NOTE If the power of the rechargeable battery falls playback stops If the device switches itself off during operation t...

Page 52: ...tinnitus you should turn the volume down low or refrain from using this device Ear doctors recommend that earphones should not be used conti nuously over a prolonged period In order to show the image from another playback device e g digi tal camera on the LCD screen please connect the cinch cable to the corresponding sockets on the device Fig 2 15 and the other end to the playback device Turn the ...

Page 53: ...B T room aerial to the ANT socket on the left hand side of the device This device also has a built in analogue receiver In order to be able to receive cable television channels with the built in analogue receiver it is necessary to connect your permanently installed cable system For this you should connect the cable of your cable connection to the ANT socket on the left hand side of the device USB...

Page 54: ...ettings to the default values Volume Here you can set the volume Option Here you can adjust the settings for the picture mode Display screen Normal and Down as well as the zoom 16 9 and 4 3 System The System menu varies depending on the mode of operation In DVB T and DVD mode it is not possible to make any adjustments For the settings available in analogue TV mode see the section About the Analogu...

Page 55: ...ying CDs or DVDs which were created on a PC e g holiday photographs In case of pro blems check the settings of the DVD writing program on your computer You should in particular make sure that the DVD has been finalized For further information on this matter please refer to the operating manual of your recorder Input Not Possible If a function or input selected by you is not possible the adjacent s...

Page 56: ...ss the DISPLAY button Fig 3 13 once or several times to have further times displayed The following possibilities are available for selection time remaining to the end of the track playback time of the CD so far time remaining to the end of the CD When playing DVDs you can view the on screen menu by pressing the DISPLAY button Fig 3 13 DVD menu Current title total number of titles 1 Current chapter...

Page 57: ...I button Fig 3 21 again to continue the replay from the last position Press the button Fig 3 20 twice to stop the replay completely Press the II button Fig 3 21 again to replay the CD DVD from the beginning Press the I button Fig 3 25 to jump to the start of the previous chapter or track Press the I button Fig 3 26 to jump to the start of the next chapter or track Enter the number of the desired c...

Page 58: ...ast forward and a fast reverse feature 1 Press the PROT Fig 3 27 or FAV button Fig 3 28 to start fast forward or fast reverse The current replay direction and the speed e g 2x is now displayed on screen 2 Press the PROT or FAV button several times in order to change the speed The speed can be accelerated by factor 2 4 8 16 or 32 3 Press the II button Fig 3 21 to restart the normal replay when the ...

Page 59: ...tons Fig 3 8 to select the command Start at the bottom of the screen to save the input 5 Press the ENTER button Fig 3 7 on the remote control to confirm this command 1 Press the PRO EPG button You will now see a table Fig CD or Fig DVD 2 Use the Cursor Buttons Fig 3 8 to manoeuvre to the command Stop at the bottom of the table 3 Press the ENTER button Fig 3 7 on the remote control to confirm this ...

Page 60: ...such devices are USB memory sticks or digital cameras This device has been developed in accordance with the latest techni cal developments in the USB field Unfortunately the large number of different types of USB storage media on offer today makes it impossible to guarantee full compatibility with all USB storage media For this reason there may be problems in rare cases with playing back from USB ...

Page 61: ...ay occasionally be problems when files are played back for example files are displayed but cannot be played back This is no malfunction of the player NOTE In order to return from the files to the folders select the symbol higher level folder and press the ENTER key Fig 3 7 Press the button Fig 3 20 on the remote control to stop the replay The DVD player is suitable for displaying your digital phot...

Page 62: ...y be valid until the DVD Player is switched off or the DVD is changed The Setup menu has two menu levels Main menu The main level is represented by graphical symbols Sub menu The corresponding sub menu options can be found under each of the main menu options Navigation and selection Use the Cursor Buttons Fig 3 8 on the remote control to browse through the main menu In contrast to this you must us...

Page 63: ...s thus reduced in size whereby black bars appear below and above the film 16 9 Wide Select this option if you use a wide screen TV for replay Please note that films that have been recorded with TV aspect 4 3 can still be replayed using aspect 4 3 This means that replaying this film will not require the complete wide screen area of the television NOTE The setting 4 3 Panscan is not supported by all...

Page 64: ...and then restar ted playback begins from the beginning of the medium Downmix Change the characteristics of the speaker output LT RT Choose this setting if you want to play the DVD with the Pro Logic Dolby stereo effect This produces a almost real 2 channel replay effect Stereo Choose this setting if you want to play a DVD that has been produced in the 5 1 Audio format as 2 channel stereo sound Dua...

Page 65: ... DVD Player to the colour transfer system of your playback device The following options are available PAL A system commonly used in Europe MULTI Select this setting if your playback device is a multi system unit NTSC A system primarily used in North America PBC By means of the PBC Playback Control function the interactive menus specified by the manufacturer on the DVDs or VCDs are started automati...

Page 66: ...r children under the age of 13 PGR The presence of parents is strictly necessary R Young persons under the age of 17 may only view this film in the presence of an adult NC17 Children and juveniles under the age of 17 are not allowed to watch this film Adult The film must only be watched by adults Default Select the command Default Reset if you want to reset the player to the factory implemented de...

Page 67: ...ine with the Numeri cal buttons of the remote control 3 Confirm the new password by entering it again in the Confirm line Confirm your entry with the ENTER button Fig 3 7 NOTE The DVB T settings menu can only be selected during DVB T opera tion Zone location Here you can select the region where you are located Time zone Here you can select the time zone corresponding to your location This is synch...

Page 68: ...rrupt the procedure press the PBC SCAN Fig 3 19 button and acknowledge the confirmation prompt with the ENTER button Fig 3 7 By pressing the PBC SCAN button Fig 3 19 you can also activate the automatic channel search Manual Scan NOTE In this type of search it is necessary to know the frequency of the chan nel you are searching for This can be obtained either on the Internet or directly from the re...

Page 69: ...d once more to enter the password To leave the channel setting menu select the EXIT command and con firm with the ENTER button Fig 3 7 NOTE The EXIT command can only be selected if the first five channels are displayed The password is identical to the one you entered in the menu Pass word Setup Page Password Sorting the Channels 1 Select the Start command The channel sorting menu appears 2 Use the...

Page 70: ...e 3 Current date and time 4 Press the ANGLE TTX button Fig 3 4 to call up the teletext function Enter the desired teletext page with the help of the numerical buttons Fig 3 3 The number you have entered is shown in the top left hand corner of the screen After you have entered the desired teletext page number your television set searches for the page As the teletext pages cannot all be transmitted ...

Page 71: ...idespread system in Europe SECAM A system used in France and Eastern Europe Sound System S SYS Here you can set the standard system according to your region BG A widely used system in Western Europe DK A widely used system in Eastern Europe I The most widely used system in the United Kingdom Ireland Hong Kong and South Africa L The most widely used system in France Swap In this menu you can swap t...

Page 72: ...nel search The device now searches for all available channels This process can take a few minutes Search Start the manual search to the next or previous channel by pressing the cursor buttons The channel found is automatically stored in the current channel position Fine In this menu you can adjust the frequency of the current channel upwards or downwards fine adjustment Band Here you can set the c...

Page 73: ... Deactivate the child protection The AV IN OUT switch Fig 2 14 is turned to IN Turn the AV IN OUT switch to OUT No response when pressing button Power supply problem or static charging of appliance Switch off the main switch and pull out the mains plug Insert the mains plug into the socket and switch the player on again No sound During operation with a television set Audio cable not connected WARN...

Page 74: ...atteries away from children They are not a toy Never throw batteries into a fire or immerse in water When inserting a battery ensure the correct polarity Do not open the batteries by force Avoid contact with metallic objects rings nails screws et cetera There is a danger of short circuiting As a result of a short circuit batteries may heat up considerably or even catch fire This may result in burn...

Page 75: ... 4 PG 13 5 PGR 6 R 7 NC17 8 ADULT DEFAULT RESET PASSWORD SETUP PAGE PASSWORD MODE ON OFF PASSWORD CHANGE DVB T SETUP PAGE AREA TIME ZONE CHANGE PARENTAL AGE 4 18 DISABLE CHANNEL SETUP CHANNEL SETUP AUTO SCAN START MANUAL SCAN START ADJUST CHANNEL START CHANNEL REMAP START ANALOG OSD MENU PICTURE BRIGHT CONTRAST COLOR ENGLISH RESET VOLUME VOLUME OPTION NORMAL DOWN ZOOM 16 9 4 3 SYSTEM S ROLOC AUTO ...

Page 76: ...05 CTV 48 _GB indd 76 05 CTV 4894_GB indd 76 20 03 2008 12 01 20 Uhr 20 03 2008 12 01 20 Uhr ...

Page 77: ...05 CTV 48 _GB indd 77 05 CTV 4894_GB indd 77 20 03 2008 12 01 20 Uhr 20 03 2008 12 01 20 Uhr ...

Page 78: ...klæring 24miesiącegwarancjinapodstawiekartygwarancyjnej Záruka24mésíců podle prohlášení o záruce A garanciát lásd a használati utasításban Гарантийные обязательства смотри руководство пользователя Kaufdatum Händlerstempel Unterschrift Koopdatum Stempel van de leverancier Handtekening Date d achat cachet du revendeur signature Fecha de compra Sel lo del vendedor Firma Data de compra Carimbo do vend...

Reviews: