25
ENGLISH
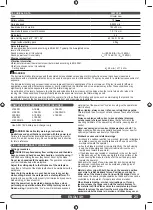
TECHNICAL DATA
A18FCS68
Type
Circular saw
Battery voltage
18 V
1RORDGVSHHG
PLQ
Saw blade dia. x hole dia.
[PP
6DZEODGHWKLFNQHVVWRRWKWKLFNQHVV
PP
Blade teeth
0D[&XWWLQJGHSWKDW
PP
Weight without battery pack
NJ
Noise Information
0HDVXUHGYDOXHVGHWHUPLQHGDFFRUGLQJWR(17\SLFDOO\WKH$ZHLJKWHGQRLVH
levels of the tool are:
6RXQGSUHVVXUHOHYHO8QFHUWDLQW\
6RXQGSRZHUOHYHO8QFHUWDLQW\
Wear ear protection!
L
pA
G%$.
pA
G%$
L
WA
G%$.
WA
G%$
Vibration Information
9LEUDWLRQWRWDOYDOXHVWULD[LDOYHFWRUVXPGHWHUPLQHGDFFRUGLQJWR(1
9LEUDWLRQHPLVVLRQYDOXH8QFHUWDLQW\
Cutting board
a
h
=
PV
. PV
WARNING!
The declared vibration total values and the declared noise emission values given in this instruction manual have been measured in
accordance with a standardised test and may be used to compare one tool with another. They may be used for a preliminary assessment of
exposure.
7KHGHFODUHGYLEUDWLRQDQGQRLVHHPLVVLRQYDOXHVUHSUHVHQWWKHPDLQDSSOLFDWLRQVRIRZHYHULIWKHWRROLVXVHGIRUGLႇHUHQW
DSSOLFDWLRQVXVHGZLWKGLႇHUHQWDFFHVVRULHVRUSRRUO\PDLQWDLQHGWKHYLEUDWLRQDQGQRLVHHPLVVLRQPD\GLႇHU7KHVHFRQGLWLRQVPD\
VLJQL¿FDQWO\LQFUHDVHWKHH[SRVXUHOHYHOVRYHUWKHWRWDOZRUNLQJSHULRG
$QHVWLPDWLRQRIWKHOHYHORIH[SRVXUHWRYLEUDWLRQDQGQRLVHVKRXOGWDNHLQWRDFFRXQWWKHWLPHVZKHQWKHWRROLVWXUQHGRႇRUZKHQLWLV
UXQQLQJLGOH7KHVHFRQGLWLRQVPD\VLJQL¿FDQWO\UHGXFHWKHH[SRVXUHOHYHORYHUWKHWRWDOZRUNLQJSHULRG
,GHQWLI\DGGLWLRQDOVDIHW\PHDVXUHVWRSURWHFWWKHRSHUDWRUIURPWKHHႇHFWVRIYLEUDWLRQDQGQRLVHVXFKDVPDLQWDLQLQJWKHWRRODQGWKH
accessories, keeping the hands warm (in case of vibration), and organising work patterns.
COMPATIBLE BATTERY PACKS (NOT INCLUDED)
/5
/6
$)%
/5
/5;
$%
/5
$)%
/5
$)%
/5
/5;
L1890R
8VH$(*9EDWWHU\DQGFKDUJHURQO\
WARNING! Read all safety warnings, instructions,
LOOXVWUDWLRQVDQGVSHFL¿FDWLRQVSURYLGHGZLWKWKLVSRZHUWRRO
Failure to follow all instructions listed below may result in electric
VKRFN¿UHDQGRUVHULRXVLQMXU\6DYHDOOZDUQLQJVDQGLQVWUXFWLRQ
for future reference.
CIRCULAR SAW SAFETY WARNINGS
Cutting procedures
'$1*(5.HHSKDQGVDZD\IURPFXWWLQJDUHDDQGWKHEODGH
.HHS\RXUVHFRQGKDQGRQDX[LOLDU\KDQGOHRUPRWRUKRXVLQJ
If
both hands are holding the saw, they cannot be cut by the blade.
'RQRWUHDFKXQGHUQHDWKWKHZRUNSLHFH
The guard cannot protect
you from the blade below the workpiece.
$GMXVWWKHFXWWLQJGHSWKWRWKHWKLFNQHVVRIWKHZRUNSLHFH
Less than a full tooth of the blade teeth should be visible below the
workpiece.
1HYHUKROGWKHZRUNSLHFHLQ\RXUKDQGVRUDFURVV\RXUOHJ
ZKLOHFXWWLQJ6HFXUHWKHZRUNSLHFHWRDVWDEOHSODWIRUP
It is
important to support the work properly to minimise body exposure,
blade binding, or loss of control.
+ROGWKHSRZHUWRROE\LQVXODWHGJULSSLQJVXUIDFHVZKHQ
SHUIRUPLQJDQRSHUDWLRQZKHUHWKHFXWWLQJWRROPD\FRQWDFW
KLGGHQZLULQJ
&RQWDFWZLWKD³OLYH´ZLUHZLOODOVRPDNHH[SRVHG
PHWDOSDUWVRIWKHSRZHUWRRO³OLYH´DQGFRXOGJLYHWKHRSHUDWRUDQ
electric shock.
:KHQULSSLQJDOZD\VXVHDULSIHQFHRUVWUDLJKWHGJHJXLGH
This improves the accuracy of cut and reduces the chance of blade
binding.
$OZD\VXVHEODGHVZLWKFRUUHFWVL]HDQGVKDSHGLDPRQG
YHUVXVURXQGRIDUERXUKROHV
Blades that do not match the
PRXQWLQJKDUGZDUHRIWKHVDZZLOOUXQRႇFHQWUHFDXVLQJORVVRI
control.
1HYHUXVHGDPDJHGRULQFRUUHFWEODGHZDVKHUVRUEROW
The
blade washers and bolt were specially designed for your saw, for
optimum performance and safety of operation.
.LFNEDFNFDXVHVDQGUHODWHGZDUQLQJV
• kickback is a sudden reaction to a pinched, jammed or misaligned
saw blade, causing an uncontrolled saw to lift up and out of the
workpiece toward the operator;
• when the blade is pinched or jammed tightly by the kerf closing
down, the blade stalls and the motor reaction drives the unit
rapidly back toward the operator;
• if the blade becomes twisted or misaligned in the cut, the teeth
at the back edge of the blade can dig into the top surface of the
wood causing the blade to climb out of the kerf and jump back
toward the operator.
.LFNEDFNLVWKHUHVXOWRIVDZPLVXVHDQGRULQFRUUHFWRSHUDWLQJ
procedures or conditions and can be avoided by taking proper
precautions as given below.
0DLQWDLQD¿UPJULSZLWKERWKKDQGVRQWKHVDZDQGSRVLWLRQ
\RXUDUPVWRUHVLVWNLFNEDFNIRUFHV3RVLWLRQ\RXUERG\WR
HLWKHUVLGHRIWKHEODGHEXWQRWLQOLQHZLWKWKHEODGH
.LFNEDFN
could cause the saw to jump backwards, but kickback forces can be
controlled by the operator, if proper precautions are taken.
:KHQEODGHLVELQGLQJRUZKHQLQWHUUXSWLQJDFXWIRUDQ\
UHDVRQUHOHDVHWKHWULJJHUDQGKROGWKHVDZPRWLRQOHVVLQ
WKHPDWHULDOXQWLOWKHEODGHFRPHVWRDFRPSOHWHVWRS1HYHU
DWWHPSWWRUHPRYHWKHVDZIURPWKHZRUNRUSXOOWKHVDZ
EDFNZDUGZKLOHWKHEODGHLVLQPRWLRQRUNLFNEDFNPD\RFFXU
Summary of Contents for A18FCS68
Page 1: ...A18FCS68 Original instructions ...
Page 4: ...4 6 20 8 13 14 START STOP 21 23 ...
Page 5: ...5 18 24 10 12 16 18 90 22 ...
Page 6: ...6 1 1 1 1 1 2 1 2 click 1 Remove the battery pack before starting any work on the product ...
Page 7: ...7 75 100 50 75 25 50 0 25 ...
Page 8: ...8 1 2 3 1 2 1 ...
Page 9: ...9 1 2 3 1 2 EN 847 1 ...
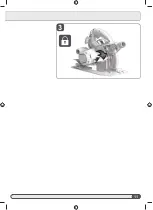
Page 11: ...11 3 ...
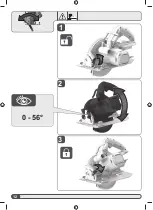
Page 12: ...12 1 2 3 0 56 1 ...
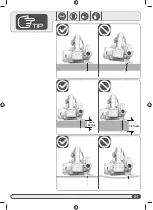
Page 13: ...13 1 2 3 1 1 2 2 0 18 cm 45 0 ...
Page 15: ...15 Handle insulated gripping surface ...
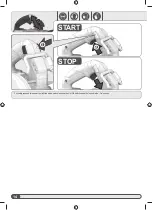
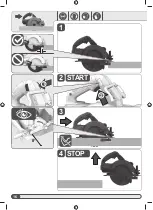
Page 16: ...16 1 1 1 1 3 4 2 START STOP 2 0 1 1 ...
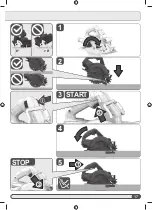
Page 17: ...17 1 2 4 5 3 START 2 1 0 0 STOP 2 1 1 ...
Page 19: ...19 1 4 ...
Page 21: ...21 max 65 mm 65 mm ...
Page 22: ...22 2 1 1 ...
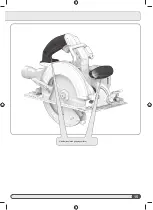
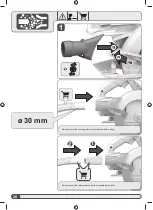
Page 23: ...23 ...
Page 24: ...24 1 2 1 1 1 1 2 1 3 2 1 3 1 ...

