8
8
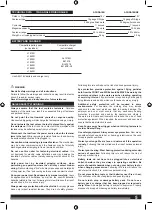
■ Press the release button and allow the pusher to push the nails
up to the driving mechanism. The pusher will stop when it rests
against the end of the nail strip.
NOTE:
Do not allow the pusher to snap back into place.
WARNING
Use only the nails recommended for use with this product. The
use of any other nails can result in tool malfunction, leading to
serious injuries.
WARNING
Never load nails with the workpiece contact or trigger activated.
Doing so could result in possible serious personal injury.
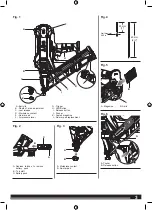
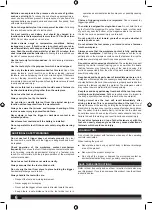
USING THE MODE SELECTOR SWITCH (FOR AFNDA18B
ONLY)
See figures 7 - 8.
WARNING
Never wedge or hold back the workpiece contact mechanism
during operation of the product. Doing so could result in possible
serious injury.
This product is shipped from the factory with the trigger mode
selector set in the single sequential actuation mode. The trigger
mode selector can also be set for contact actuation mode.
Full sequential actuation mode
Full sequential actuation provides the most accurate fastener
placement.
■ Remove the battery pack from the product.
■ Slide the trigger mode selector to (for AFNDA18B only).
■ Reinstall the battery pack.
■ Grip the product firmly to maintain control. Position the nose of
the product onto the work surface.
■ Push the product against the work surface to depress the
workpiece contact.
■ Squeeze the trigger to drive a fastener.
■ Always remove your finger from the trigger after the nail has
been driven.
■ Allow the product to recoil away from the work surface as the
fastener is driven.
NOTE:
The trigger must be depressed within 3 seconds of placing
the nose of the product against the workpiece. If depressing the
trigger does not drive a fastener, lift the product away from the
workpiece, then replace and try driving the fastener again.
Contact actuation mode (for AFNDA18B only)
Contact actuation allows very fast repetitive fastener placement.
■ Remove the battery pack from the product.
■ Slide the trigger mode selector to
.
■ Reinstall the battery pack.
■ Grip the product firmly to maintain control.
■ Squeeze and hold the trigger. Push the product against the work
surface to depress the workpiece contact and drive a fastener.
■ Allow the product to recoil away from the work surface as the
fastener is driven.
NOTE:
In contact actuation mode, the product may also be
operated by depressing the workpiece contact against the surface
and squeezing the trigger. The nose of the product must be pressed
against the workpiece within 3 seconds of depressing the trigger.
If pressing the nose to the workpiece does not drive a fastener,
release the trigger, depress the trigger again, then try driving the
fastener again.
WARNING
During normal use the product will recoil immediately after
driving a fastener. This is a normal function of the product. Do
not attempt to prevent the recoil by holding the nailer against
the work. Restriction to the recoil can result in a second fastener
being driven from the nailer. Grip the handle firmly, let the
product do the work, and do not place second hand on top of
product at any time. Failure to heed this warning can result in
serious personal injury.
WARNING
When used in the contact actuation mode do not carry the
product with the trigger depressed as this will cause a fastener
to discharge if the workpiece contact accidentally bumps against
an object. Failure to observe this warning can result in serious
personal injury.
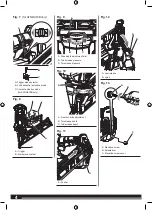
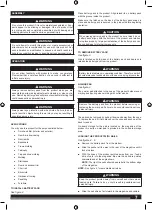
SETTING THE AIR POWER
See figure 9.
The amount of air power required will depend on the size of the nail
and the workpiece material.
Begin testing the depth of drive by driving a test nail into the same
type of workpiece material used for the actual job.
■ Remove battery pack from the tool.
■ Move power adjustment lever to the right to increase air power
or to the left to decrease air power.
It may be possible to achieve the desired depth with air power
adjustments alone. If finer adjustments are needed, use the depth
of drive adjustment.
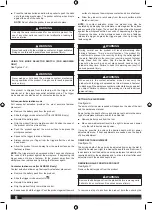
DRIVE DEPTH ADJUSTMENT
See figure 10.
The driving depth of the nail may be adjusted by moving the dial to
the left to decrease or right to increase the depth the nail is driven. It
is advisable to test the depth on a scrap workpiece to determine the
required depth for the application and to drive a test nail after each
adjustment until the desired depth is set.
REMOVING NAILS FROM THE PRODUCT
See figure 11.
Remove the battery pack from the product.
WARNING
Remove the battery pack from the product before removing nails.
Failure to do so could result in serious personal injury.
To remove a strip of nails from the product, hold the nailer by the
Summary of Contents for 8904077
Page 1: ......
Page 11: ...11 11 ...

