background image

7

7

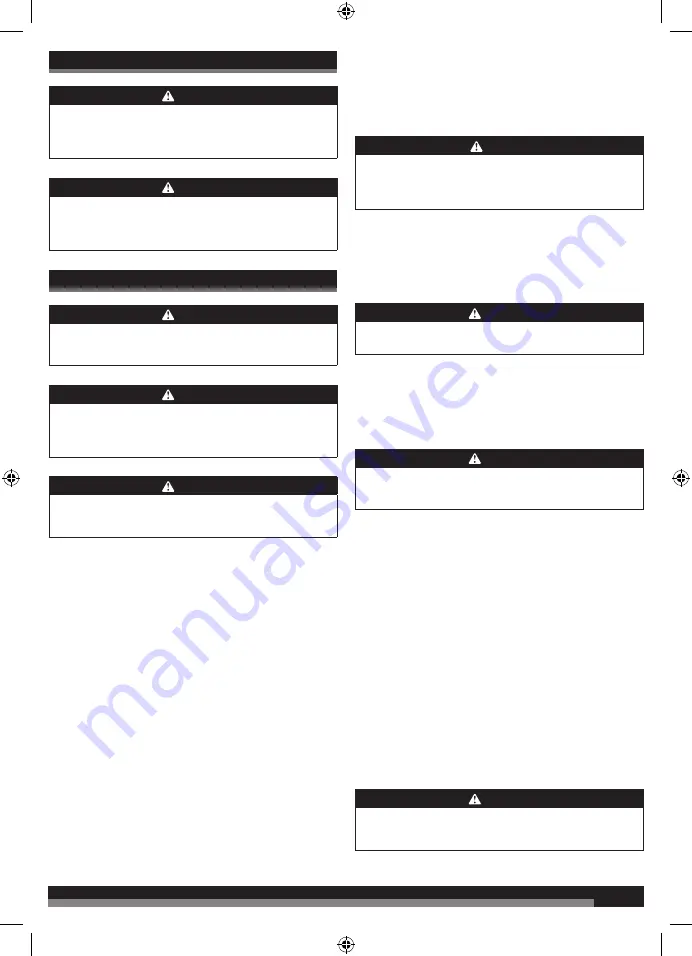
ASSEMBLY


 WARNING

Do not use this product if it is not completely assembled or if any 

parts appear to be missing or damaged. Use of a product that 

is not properly and completely assembled or with damaged or 

missing parts could result in serious personal injury.


 WARNING

Do not attempt to modify this product or create accessories or 

attachments not recommended for use with this product. Any 

such  alteration  or  modification  is  misuse  and  could  result  in  a 

hazardous condition leading to possible serious personal injury.

OPERATION


 WARNING

Do not allow familiarity with products to make you careless. 

Remember that a careless fraction of a second is sufficient to 

inflict severe injury.


 WARNING

Always remove battery pack from the product when you are 

assembling parts, making adjustments, cleaning, or when not in 

use. Removing battery pack will prevent accidental starting that 

could cause serious personal injury.


 WARNING

Always wear eye protection with side shields. Failure to do so 

could result in objects being thrown into your eyes, resulting in 

possible serious injury.

APPLICATIONS

You may use this product for the purposes listed below:


● Finish and trim (interior and exterior)


● Door & window casing


● Door jambs


● Baseboard


● Crown molding


● Cabinetry


● Cap and shoe molding


● Molding


● Staircases


● Door and window trim


● Chair rail


● Brickmold


● Hardwood flooring


● Panelling


● Furniture

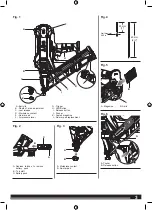
TO INSTALL BATTERY PACK

See figure 2.

Place battery pack in the product. Align raised rib on battery pack 

with the groove inside the product.
Make sure the latches on the back of the battery pack snaps in 

place and battery pack is secured in the product before beginning 

operation.


 CAUTION

When placing battery pack in the product, be sure raised rib on 

battery pack aligns with the bottom of the product and latches 

into place properly. Improper installation of the battery pack can 

cause damage to internal components.

TO REMOVE BATTERY PACK

See figure 2.

Locate latches on both sides of the battery pack and depress to 

release the battery pack from the product.


 WARNING

Battery tools are always in operating condition. Therefore, switch 

should always be locked when not in use or carrying at your side.

NO-MAR PAD

See figure 3.

The no-mar pad attached to the nose of the product helps prevent 

marring and denting when working with softer woods.


 WARNING

Remove the battery pack from the product before removing or 

replacing the no-mar pad. Failure to do so could result in serious 

personal injury.

The pad can be removed by pulling it down and away from the nose. 

To replace the pad, fit it into place over the nose and push up at the 

back to reseat.
On-board storage for the pad is located on the magazine of the 

product. An extra no-mar pad is provided in the on-board storage 

area.

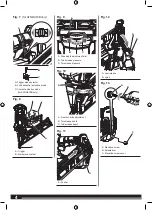
LOADING THE PRODUCT WITH NAILS

See figures 4 - 6.


■ Remove the battery pack from the product.


■ Slide the pusher all the way to the rear of the magazine until it 

locks in place.


■ With the nose of the product pointed away from you, feed a 

strip of nails into the magazine. Be sure the nails are pointed 

downward and at the angle shown.

NOTE:

 The tip of the nails should be parallel to the bottom edge 

of the magazine.

NOTE:

 See figure 4, for acceptable nail sizes.


 WARNING

Keep the product pointed away from yourself and others when 

loading nails. Failure to do so could result in possible serious 

personal injury.


■ Slide the nail strip as far forward in the magazine as possible.

Summary of Contents for 8904077

Page 1: ......

Page 2: ...2 2 Important It is essential that you read the instructions in this manual before operating this machine Subject to technical modifications ...

Page 3: ...on I Release button J Pusher K Angled magazine L No mar pad replacement A B No mar pad Workpiece contact A Depress latches to remove battery pack B To install C Battery pack A Magazine B Nails B Release button A Pusher A Fig 1 Fig 2 Fig 3 Fig 5 Fig 6 Fig 4 65 mm 2 25 mm 1 Nail diameter 069 in A B C B H G F I J K A B A A B C B D E L ...

Page 4: ...ssure A Depth of drive adjustment B To increase depth C To decrease depth A Trigger mode selector for AFNDA18B only B Full sequential actuation mode C Contact actuation mode for AFNDA18B only Fig 8 Fig 12 Fig 9 Fig 7 Fig 10 A B C B A A A Pusher Fig 11 A A A B B B C A Elevation screw B Screwdriver C Elevation screw cover Fig 13 A C ...

Page 5: ...g or servicing this tool Eye protection is required to guard against flying fasteners and debris which could cause severe eye injury Additional safety protection will be required in some environments For example the working area may include exposure to noise level which can lead to hearing damage The employer and user must ensure that any necessary hearing protection is provided and used by the op...

Page 6: ...ever engage in horseplay Never pull the trigger unless nose is directed toward the work Keep others a safe distance from the tool while tool is in operation as accidental actuation may occur possibly causing injury Choice of triggering method is important Check manual for triggering options The nailer is designed for single hand use Do not hold the tool by the front of the magazine Do not put hand...

Page 7: ...red in the product before beginning operation CAUTION When placing battery pack in the product be sure raised rib on battery pack aligns with the bottom of the product and latches into place properly Improper installation of the battery pack can cause damage to internal components TO REMOVE BATTERY PACK See figure 2 Locate latches on both sides of the battery pack and depress to release the batter...

Page 8: ...he work surface as the fastener is driven NOTE In contact actuation mode the product may also be operated by depressing the workpiece contact against the surface and squeezing the trigger The nose of the product must be pressed against the workpiece within 3 seconds of depressing the trigger If pressing the nose to the workpiece does not drive a fastener release the trigger depress the trigger aga...

Page 9: ...orage longer than 30 days Store the battery pack where the temperature is below 27 C and away from moisture Store the battery packs in a 30 50 charged condition Every six months of storage charge the pack as normal TRANSPORTING LITHIUM BATTERIES Lithium ion batteries are subject to the Dangerous Goods Legislation requirements Transportation of those batteries has to be done in accordance with loca...

Page 10: ...rs are not driven fully Air pressure is too low Depth of drive is not deep enough Nail is too long for wood hardness Increase the air pressure Adjust the depth of drive Use nails of the length that is appropriate for the wood Tool operates properly but fasteners are driven too deep Air pressure is too high Depth of drive is too deep Decrease the air pressure Adjust the depth of drive Tool jams fre...

Page 11: ...11 11 ...

Page 12: ...Max Eyth Straße 10 71364 Winnenden Germany Techtronic Industries Australia Pty Ltd 31 Gilby Road Mount Waverley VIC 3149 Australia Techtronic Industries N Z Limited 2 Landing Drive Mangere Auckland New Zealand 2022 961096260 01B ...

Reviews: