background image

B-5360 Hardware and Install Manual 

How to Connect Audio In Device

­

The camera comes with an audio jack where an audio input device, such as a microphone with a 

built-in amplifier, can be connected. The audio-in jack is covered by a rubber protection. 

WARNING: 

Do not remove this rubber protection if the audio-in jack will not be used to avoid 

water or dust from entering the jack. 

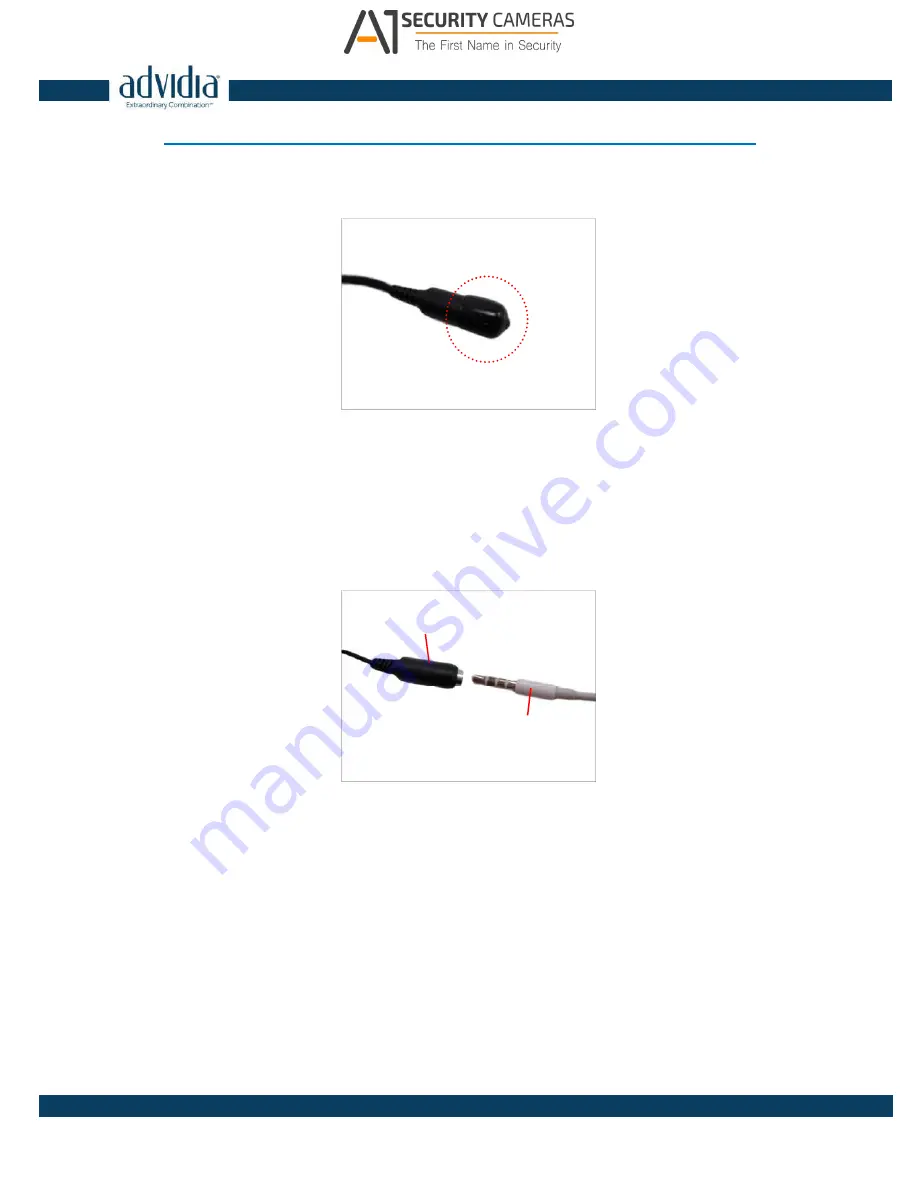
To connect an audio input device, do the following: 

1.

 ­

Pull to remove the rubber protection. 

2.

 ­

Connect the audio input device. 

Audio Input Jack 

Audio Device 

NOTE: 

The microphone must have a built-in amplifier. Connecting an ordinary microphone 

will dwarf sounds and will result in inaudible recording. 

3.

 ­

If the camera is installed outdoors, be sure to wrap the audio connectors with 

Waterproof 

Tape 

(can be purchased in hardware stores). 

DISCLAIMER: 

The manufacturer will not be responsible for camera damage due by water 

leakage caused by improper waterproofing of cables. 

22 

                    Available from A1 Security Cameras 

     www.a1securitycameras.com   email: [email protected]

Summary of Contents for B-5360

Page 1: ...B 5360 Hardware and Install Manual Available from A1 Security Cameras www a1securitycameras com email sales a1securitycameras com...

Page 2: ...the Cable Connection 14 RJ 45 Ethernet Cable B 5360 14 Step 6 Connect to Network 17 Step 7 Access the Camera Live View 17 Step 8 Close the Dome Cover 18 Other Adjustments and Accessories 20 How to In...

Page 3: ...l Configure the IP Addresses 25 Using DHCP Server to Assign IP Addresses 25 Using the Default Camera IP Address 27 Access the Camera 29 3 Available from A1 Security Cameras www a1securitycameras com e...

Page 4: ...g covers may expose you to dangerous voltage or other hazards Refer all servicing to qualified service personnel Trademarks All names used in this manual are probably registered trademarks of respecti...

Page 5: ...ouraged to try to correct the interference by one or more of the following measures Reorient or relocate the receiving antenna Increase the separation between the equipment and receiver Connect the eq...

Page 6: ...service personnel under the following conditions 1 When the power supply cord or plug is damaged 2 If liquid has been spilled or objects have fallen into the product 3 If the inner parts of product h...

Page 7: ...IMPORTANT When the camera is taken out from the box the lens cover is covered by a thin film DO NOT remove this film It is used to protect the lens cover from scratches or fingerprint marks which may...

Page 8: ...ave a built in amplifier Connecting an ordinary microphone will dwarf sounds and will result in inaudible recording 3 Ethernet Port RJ 45 Connects to a network using an Ethernet cable with RJ 45 conne...

Page 9: ...Wall Mount Suitable when mounting the camera on the wall with the camera facing down as if installed on the ceiling The Wall Mount optional mounting accessory is required for this type of installatio...

Page 10: ...additional accessories required for installation B 5360 Exterior grade Ethernet Cable with RJ 45 connector not included can be purchased from local stores Bundled Cable Gland 2 Depending on the materi...

Page 11: ...sing the bundled hex screwdriver 2 Lift to remove the dome cover NOTE A desiccant bag is attached underneath the dome cover DO NOT remove the desiccant bag to keep the camera interior parts dry 11 Ava...

Page 12: ...r tab to the dome cover to close the gap 3 Route the cable from the network side through the hole and connect it to the Ethernet port of the camera NOTE If the camera will be installed outdoors or in...

Page 13: ...a 1 If necessary insert a memory card into the memory card slot of the camera See How to Insert the Memory Card on page 20 for more information 2 Install the camera to the surface using the three 3 bu...

Page 14: ...to waterproof the cable connection 1 Detach the cable gland as shown below Gland Body Clamping Nut Sealing Rubber and Claw 2 On the network side cable insert the clamping nut through the Ethernet cab...

Page 15: ...body to the Ethernet port of the camera IMPORTANT Make sure the rubber ring is completely aligned and flat on the gland body to avoid possible water leakage 6 Connect the RJ 45 connector of the networ...

Page 16: ...cable gland body Make sure the clamping nut is tightly secured and the rubber is squeezed in to avoid water leakage DISCLAIMER The manufacturer will not be responsible for camera damage caused by wate...

Page 17: ...ver Ethernet PoE example connection diagram below Network AC Power Source PoE Injector PoE Switch Power Cable Ethernet Cable Ethernet Cable Data Power Ethernet Cable Data Camera Step 7 Access the Came...

Page 18: ...ure the rubber on the camera is positioned properly on its track as the dome cover is closed on the camera to ensure protection against water ingress 2 Tighten the three 3 screws using the supplied he...

Page 19: ...B 5360 Hardware and Install Manual Final installation should look similar to the illustration below 19 Available from A1 Security Cameras www a1securitycameras com email sales a1securitycameras com...

Page 20: ...e of the camera 3 Push the card completely until it clicks into place 4 Attach the dome cover to the camera and tighten the three 3 screws How to Remove the Memory Card In case there is a need to remo...

Page 21: ...3 screws securing the lens 3 Turn the lens module to adjust the viewing orientation The arrow on the lens indicates the top side orientation 4 Once done tighten the three 3 screws to fix the lens posi...

Page 22: ...ollowing 1 Pull to remove the rubber protection 2 Connect the audio input device Audio Input Jack Audio Device NOTE The microphone must have a built in amplifier Connecting an ordinary microphone will...

Page 23: ...cover The smoked dome cover is an optiona accessory contact your sales agent to purchase To replace the dome cover follow the procedures below 1 Open the dome cover 2 Remove the six 6 screws securing...

Page 24: ...er and place the black rubber to the replacement dome cover 5 Install the replacement dome cover and then the bracket 6 Align the screw holes and secure the six 6 screws 7 Close the dome cover 24 Avai...

Page 25: ...le to access it by using a Web browser The quickest way to discover the cameras in the network is to use the simplest network search built in the Windows system just by pressing the Network icon all t...

Page 26: ...the list Click on the IP address to automatically launch the default browser of the PC with the IP address of the target camera filled in the address bar of the browser already 26 Available from A1 Se...

Page 27: ...t will automatically assign itself a default IP 192 168 0 100 Whereas the default port number would be 80 In order to access that camera the IP address of the PC has to be configured to match the netw...

Page 28: ...cameras will have unique IP addresses starting from 192 168 0 101 In case there are 20 cameras selected the last one of the cameras would have the IP 192 168 0 120 Later by pressing the Refresh butto...

Page 29: ...ug ins must be installed to the PC first to be able to get the live video feed from the camera Browser Required Plug In Safari QuickTime http www apple com quicktime download Other non Internet Explor...

Page 30: ...http 192 168 0 100 Upon successful connection to the camera the user interface called Web Configurator would appear together with the login page The HTTP port number was not added behind the IP addres...

Reviews: