


17
VOXX LINk(CONTINUED)
18:00
80%
VOXX
LINK
Google Play
VOXX LINK
Kevin_Android_R&D
Tools
INSTALL
18:00
80%
VOXX
LINK
VOXX
REAR SEAT INFOTAINMENT
AVAILABLE NETWORK
AMOVA10/OVA10_1a144
᱘
᱘
᱘
᱘
᱘
᱘
᱘
SCREEN
OFF
WIFI
VOXX LINK
WFMM
IR TRANSMITTER
LANGUAGE
ABOUT DEVICE
RESET
SCREEN
OFF
Scan
Searching...
TP-LINK_72DA
Secured with WPA/WPA2
TP-LINK_363C
Secured with WPA/WPA2
Thomas_S9
Secured with WPA/WPA2
TP-LINK_565A
Secured with WPA/WPA2
You must connect to WiFi first
SCREEN
OFF
Scan
Thomas_S9 Connected
TP-LINK_72DA
Secured with WPA/WPA2
TP-LINK_363C
Secured with WPA/WPA2
Thomas_59
Secured with WPA/WPA2
TP-LINK_565A
Secured with WPA/WPA2
Device Name: AMOVA10/OVA10_1a44
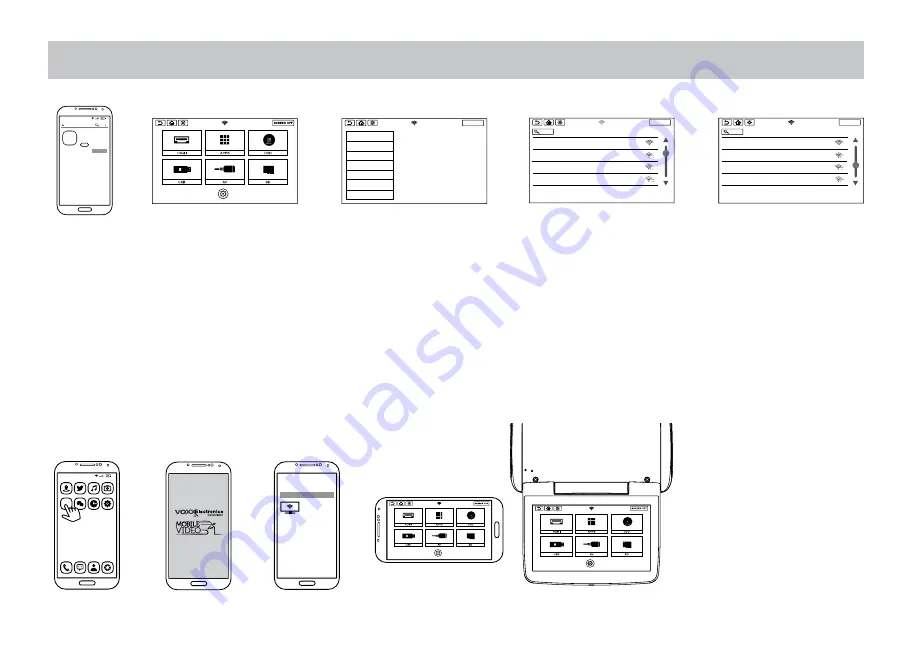
1.
Once the network connection is established between the controlling device and the system monitor, open the Voxx Link APP.
2.
After the initial splash
screen, the monitor will display under "Available Network".
3.
Select the monitor you wish to control. Once selected, that monitor's display will appear on the controlling device.
4.
To select a different monitor
(multiple Overhead Monitor Installation)
, exit to the controlling device's home screen and go back into the
Voxx Link APP to select a different monitor.
NOTES:
1.
In the available network listing, the monitor currently connected to the controlling device will be highlighted in green.


