Advantech TREK-306DH User Manual Download Page 16

TREK-306DH User Manual

8

2.2 Overview of Hardware Installation

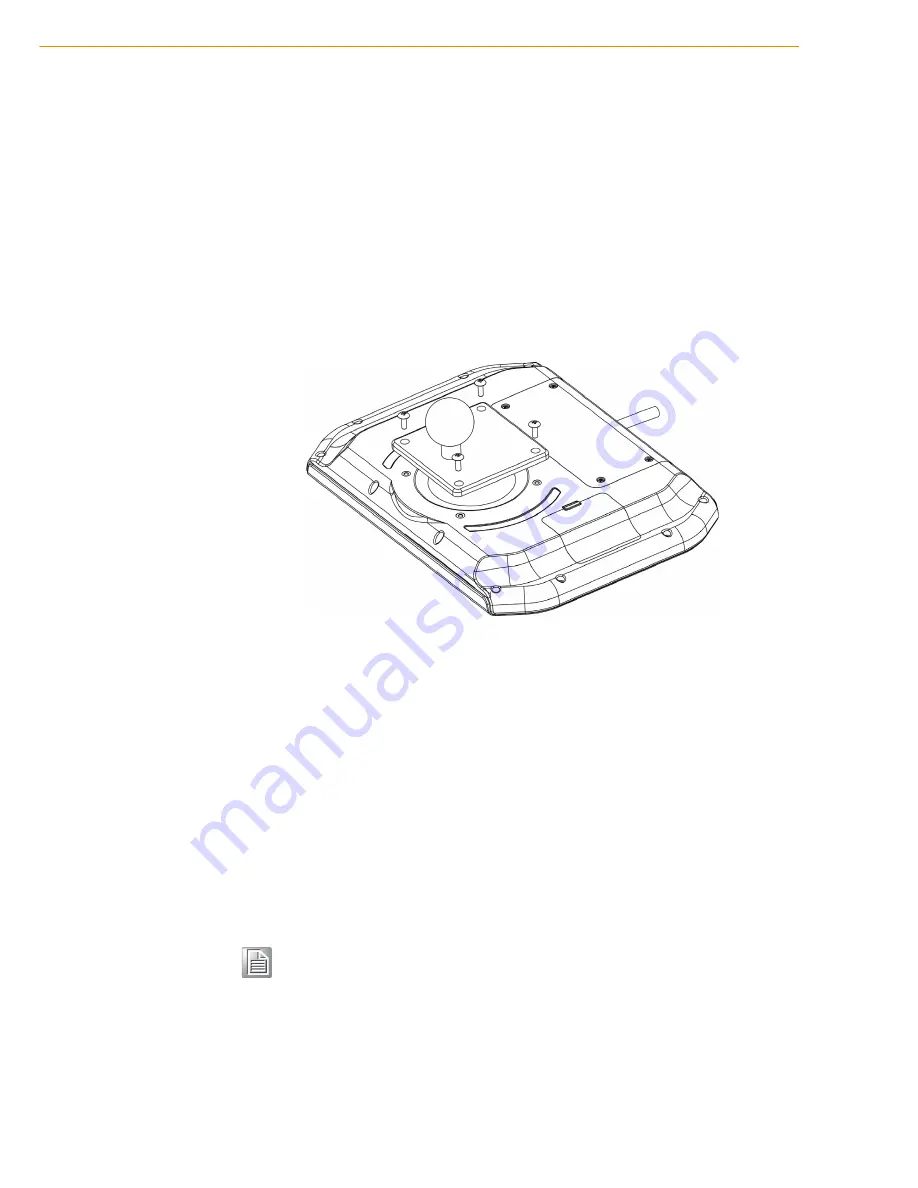
2.2.1 Mounting Kits for TREK-306DH

TREK-306DH is designed to be compatible with VESA mount and RAM Mount (75 x
75 mm). Advantech also provides several kind of mounting kits which are the perfect
choice for securing MDTs (Mobile Data Terminal) to vehicles on the move. The
mounting kits come with two plates and double socket arms which can absorb harm-
ful shocks and vibrations. They are designed to absorb a shock of up to 40G, 11ms
(MIL-STD-810G) or 100 G, 6ms (EN60721-3-5) and will hold MDTs/Display solidly in
place even in the harshest of conditions. The viewing angle and position of MDTs is
fully adjustable by the double socket design. You can consult with the your sales
agent or visit our website for more detailed information: http://www.advantech-
dlog.com

Figure 2.5 Installation of RAM MOUNT Kits

2.2.2 Connect to TREK Computing Box

The same as with TREK-303R/DH, TREK-306DH can be paired with all TREK x86
computing boxes with a “One-Cable-Connection”. That is, you can just simply con-
nect the one side of the “smart display cable” to TREK-306DH and connect the other
side of cable to TREK x86 computing box directly. That’s all!
To assure that the entire system is IP55 compliant, we recommend that when putting
on the rear I/O Cover it is firmly sealed. Without the I/O Cover, TREK-306DH will still-
work well but will not be guaranteed to be IP55 compliant. 
Once the cable is installed, then you can turn on the entire system by either the
power button on TREK-306DH or the ignition signal on TREK x86 computing box. 

Note!

TREK-303/ 306DH are designed to be powered directly by the TREK 
computing box (e.g. TREK-306DH will be turned on/off together with 
TREK x86 computing box). Also, TREK-303 /306DH does not support 
hot-plugging. Please make sure that the TREK computing box has been 
completely powered off before making cabling changes. 

Summary of Contents for TREK-306DH

Page 1: ...User Manual TREK 306DH 10 4 In Vehicle Smart Display...

Page 2: ...iability under the terms of this warranty as a consequence of such events Because of Advantech s high quality control standards and rigorous testing most of our customers never need to use our repair...

Page 3: ...rticular installation If this equipment does cause harmful interfer ence to radio or television reception which can be determined by turning the equip ment off and on the user is encouraged to try to...

Page 4: ...ormation Warning Warnings indicate conditions which if not observed can cause personal injury Caution Cautions are included to help you avoid damaging hardware or losing data e g There is a danger of...

Page 5: ...service personnel 10 If one of the following situations arises get the equipment checked by service personnel The cable or plug is damaged Liquid has penetrated the equipment The equipment has been e...

Page 6: ...er off when you installing TREK 306DH After connecting the Smart Display cable you could turn on off TREK 306DH by its power button or via the ignition signal from TREK computing box European Contact...

Page 7: ...gure 2 5 Installation of RAM MOUNT Kits 8 2 2 2 Connect to TREK Computing Box 8 2 3 BIOS Setup on TREK Computing Box 9 Table 2 1 BIOS version which support panel auto detection 9 2 4 Driver Installati...

Page 8: ...TREK 306DH User Manual viii...

Page 9: ...Chapter 1 1 General Information This chapter gives background information on the TREK 306DH In Vehicle Computing Box Sections include Introduction General Specifications Dimensions...

Page 10: ...ey Features Vehicle grade 10 4 4 3 XGA TFT LCD with 5 wire Analog Resistive Touch screen Five user programmable function keys Two 2 Watt water proof speakers Built in light sensor for auto dimming app...

Page 11: ...n 2 x 2 W waterproof speaker Hot Keys 5x User programmable Function keys with green LED Light Sensor 1 x Built in light sensor for auto dimming implementation Rear I O Smart Display Port A 36 pin lock...

Page 12: ...TREK 306DH User Manual 4 1 3 Dimensions Figure 1 1 TREK 306DH Dimensions 302 6 225 9 35 225 9 75 75 9 2...

Page 13: ...ystem Setup This chapter details system setup on TREK 306DH Sections include A Quick Tour of the system Overview of hardware installa tion BIOS Setup on TREK computing box Driver installation on TREK...

Page 14: ...ent to become familiar with the locations and functions of the connectors and features which are illustrated in the figures below Figure 2 1 Front View of TREK 306DH Figure 2 2 Rear View of TREK 306DH...

Page 15: ...ted to the TREK x86 com puting box The USB port on the other hand is for direct access to the TREK 306DH Also if you press the power or reset button on TREK 306DH it will affect both the TREK x86 comp...

Page 16: ...f RAM MOUNT Kits 2 2 2 Connect to TREK Computing Box The same as with TREK 303R DH TREK 306DH can be paired with all TREK x86 computing boxes with a One Cable Connection That is you can just simply co...

Page 17: ...the power on self test POST If an error occurs an error message is displayed on screen and the user is prompted to run the setup program 2 4 Driver Installation on TREK Computing Box All the pre requ...

Page 18: ...TREK 306DH User Manual 10...

Page 19: ...Chapter 3 3 Pin Assignments This chapter explains pin assign ments on the TREK 306DH Sections include Smart Display Port Connector Smart Display Cable...

Page 20: ...g list for customer reference Contact your sales agent for details and choose the proper one to add into your order list Table 3 1 Pin assignment for Smart Display Ports Pin Signal Pin Signal 1 Backli...

Page 21: ...is limited to 10 meters If longer cable length is desired an additional signal booster box might be required Please contact Advantech for further assistance P1 1 2 3 4 5 6 7 8 9 10 11 12 13 14 15 16...

Page 22: ...TREK 306DH User Manual 14...

Page 23: ...ter 4 4 Software Demo Utility Setup This appendix explains the soft ware demo utility for TREK 306DH Sections include Introduction Demo Utility for TREK 306DH How to write an App with the MRM SDK libr...

Page 24: ...TREK 306DH This section explains how to install the Advantech demo utility in Windows XP Pro Embedded 1 Execute IMC demo utility under the imc_demo_vX X X X folder Figure 4 1 IMC Demo Utility Table 4...

Page 25: ...a certain level of TREK 306 click Get Light sensor When the sensor has detected a change in brightness in the environment the value will change For the lowest level of brightness the lowest value is p...

Page 26: ...TREK 306DH User Manual 18...

Page 27: ...tions are subject to change without notice No part of this publication may be reproduced in any form or by any means electronic photocopying recording or otherwise without prior written permis sion of...

Reviews: