


Chapter 1 General Information
11
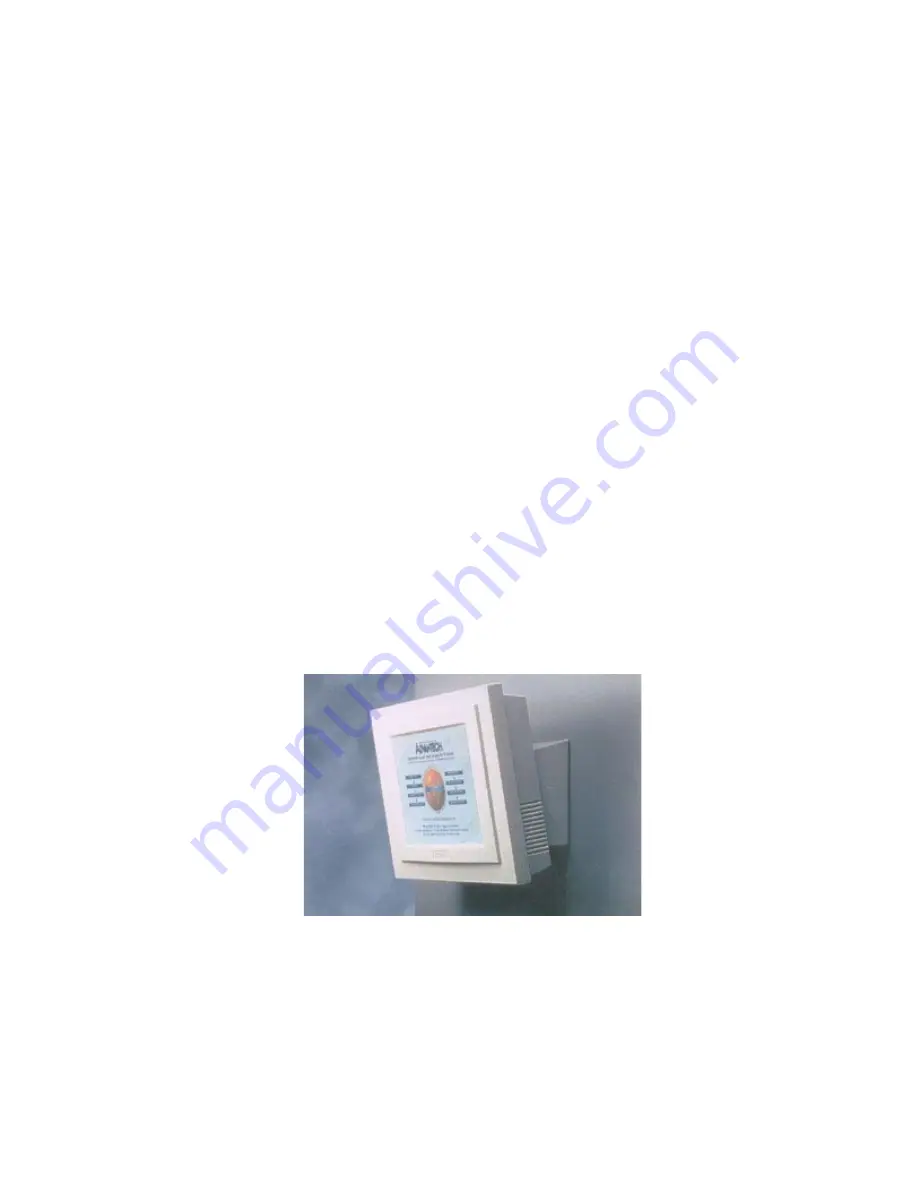
1.7.3 Wall-mounting (optional)
An optional wall-mounting attachment is also available for mounting the
PPC at approximately 45° to a flat surface. Installation instructions
follow:
1. The wall-mounting attachment is comprised of three parts: one back
bracket, one support bracket, and one mounting bracket.
2. First attach the back bracket to the rear cover of the PPC-105,
securing it in place with four of the philips-head screws provided.
3. Using a flat-head screwdriver, attach the support bracket to the back
bracket using four of the flat-head screws provided, two on either
side of the support bracket. The sides of the support bracket should
overlap the sides of the back bracket, and the screws should secure
one bracket to the other through the existing holes drilled into each
bracket.
4. Mount the mounting bracket on the wall or other flat surface. The
support bracket slides vertically from the top into the mounting
bracket. It can then can be secured to the mounting bracket by
screwing one of the philips-head screws provided through the
corresponding holes at the tops of the mounting bracket and the
support bracket.
Figure 1-7:
PPC-105 wall mounting configuration
Summary of Contents for PPC-105
Page 1: ...PPC 105 NS GX1 processor based Panel PC with 10 TFT LCD flat panel display User s Manual...
Page 18: ...6 PPC 105User sManual Figure 1 1 PPC 105 panel PC dimensions Unit mm 1 4 Dimensions...
Page 24: ...12 PPC 105User sManual...
Page 29: ...Chapter2SystemSetup 17 Figure 2 2 Installing a primary 2 5 HDD internal...
Page 36: ...24 PPC 105User sManual...
Page 48: ...36 PPC 105TUser s Manual...
Page 57: ...Chapter 4 PCI Bus Ethernet Interface 45 5 Click Next 6 Click Next...
Page 58: ...46 PPC 105T User s Manual 7 Click Next 8 Click Next...
Page 59: ...Chapter 4 PCI Bus Ethernet Interface 47 9 a Insert WINNT CD b Click Continue 10 Click Next...
Page 67: ...Chapter 5 PCI SVGA Audio Setup 55 8 Press Yes to reboot...
Page 69: ...Chapter 5 PCI SVGA Audio Setup 57 4 Click Yes 5 a Insert Windows 98 CD ROM b Click Next...
Page 74: ...62 PPC 105 User s Manual...
Page 84: ...72 PPC 105 User s Manual...
Page 85: ...Award BIOS Setup This chapter describes how to set BIOS configuration data CHAPTER 7...
Page 102: ...90 PPC 105 User s Manual...
Page 112: ...100 PPC 105User sManual 7 Calibrate the touch screen...
Page 114: ...102 PPC 105User sManual 4 a Select COM4 b Click Next 5 Click Yes...
Page 116: ...104 PPC 105User sManual...
Page 122: ...110 PPC 105 User s Manual...
Page 123: ...I O Pin Assignments C A PPENDIX...


