background image


1569

PT060EE1


Rev.


7


Page


17


of


62


3.7 

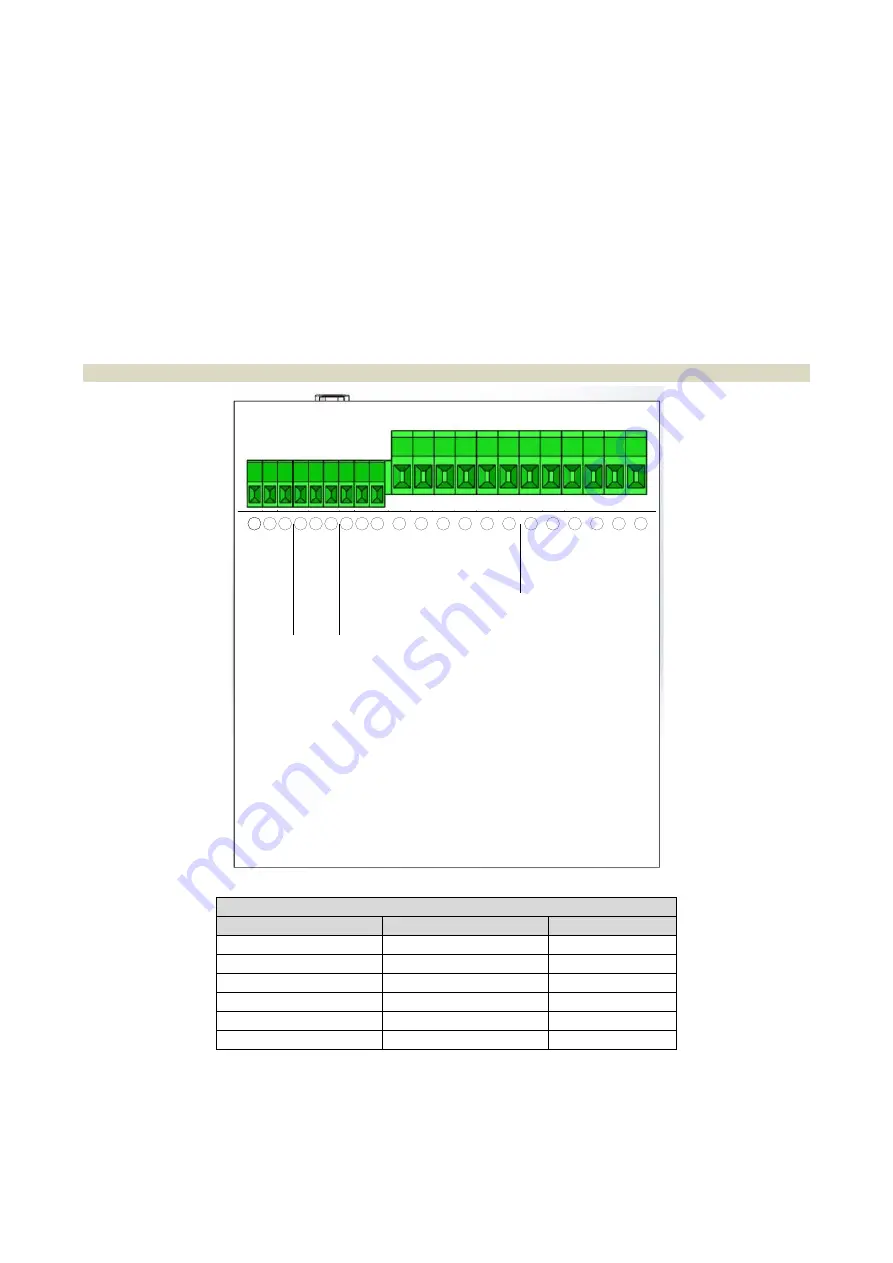
Connection of load cells (side A) 


The


cable


coming


from


the


load


cells


or


junction


box


must


be


connected


to


the


terminals


located


on


the


rear


of


the


instrument


and


called


LOAD


CELL


1.


Connection


between


the


load


cell


and


the


instrument


must


be


carried


out


with


a


shielded


cable.


The


cable’s


shield


must


be


connected


to


the


ground.


Connection


must


take


place


respecting


the


colour


code


indicated


on


the


load


cells.


T060


foresees


the


standard


connection


of


6

wire


load


cells.


In


case


of


connection


of


4

wire


load


cells,


connect


the


reference


wires


to


the


relative


polarities


of


the


power


supply


cables.


MAKE


SURE


THE


CONNECTION


CABLE


BETWEEN


LOAD


CELLS


AND


INSTRUMENT


IS


DUCTED


IN


TROUGHS


SEPARATE


FROM


THOSE


OF


POWER


LINES,


IN


ORDER


TO


AVOID


COUPLING


THAT


MAY


PREJUDICE


THE


MEASUREMENT


ACCURACY.


3.7.1


Connection of load cells 1


LC1

INDICATION


FUNCTION

TERMINAL


+A


+


Excitation

39

A


Excitation

38

+S


+


Signal


37

S


Signal

36

+R


+


Reference

35

R


Reference

34


31

28 29 30

-S

+R

-R

34

32 33

+S

36

35

37

-A

+A 

39

38

-R

+R

-S

+S

-A

+A 

LOAD CELL 2

LOAD CELL 1

23

20

19

22

21

25

24

27

26

SGND

 3

IOUT

+

VOUT

+

SGND

 2

-RS485

+RS

4

85

SGND

 1

-RS

485/R

X

+R
S485/TX

SERIAL

OUT 1

SERIAL

OUT 2

ANALOG

OUTPUT

OPTO

OPTO

Summary of Contents for T060E

Page 1: ...1569 PT060EE1 Rev 7 Page 1 of 62 ELECTRONIC WEIGHING TRANSMITTER T060E User and installation manual ...

Page 2: ...oad cells 2 input 19 3 7 3 Wiring example single weighing system 20 3 7 4 Wiring example double weighing system 21 3 8 Connection of serial lines side A 22 3 9 Digital inputs side B 23 3 10 Connection of relay outputs side B 24 3 11 Optional analogue output 25 3 12 PROFIBUS DP output optional 26 4 MAINTENANCE ON THE INSTRUMENT 27 4 1 Preventive maintenance 27 4 2 Corrective maintenance 27 5 MANAGE...

Page 3: ... 5 5 1 Theoretical calibration procedure 40 5 5 2 Permanent tare 41 5 5 3 Zero calibration 42 5 5 4 Span calibration 43 5 5 5 Linearization 44 5 5 6 Analogue output adjustment 45 5 5 7 Zero adjustment D A 46 5 5 8 Full scale adjustment D A 47 5 6 Instrument test 48 5 6 1 Testing relay outputs and digital inputs 48 5 6 2 Testing the analogue output 49 5 6 3 Testing load cell inputs 50 6 SERIAL PROT...

Page 4: ...he must also ensure that the equipment is operated in compliance with its intended use for his own safety 1 2 Description T060E is a weight transmitter designed for use in weighing systems boasting strain gauge load cells The main operating characteristics are Checking of 5 basic thresholds that can be activated according to programmable operating parameters Management of 2 inputs that can be acti...

Page 5: ... if there are any damages and if so cut off power and replace it The manufacturer declines any liability for damages caused to people or objects derived from an improper use of the device 1 4 Description of labels The labels affixed on T060E contain indication of manufacturer identification of the instrument s model Instrument s serial number identification of the operating voltage CE marking The ...

Page 6: ...tivity 0 02 µV Linearity Temperature drift Converter s resolution 24 bit Resolution of displayed weight 50000 div Analogue signal From 2 mV V to 3 mV V Conversion speed 100 Hz Digital filter Selectable Serial ports 1 RS232 RS485 full duplex opto isolated Serial ports 1 RS485 half duplex Logic outputs 5 SPST relay outputs Logic outputs optional 1 SPST output safety output Logic inputs 2 digital opt...

Page 7: ...instrument is turned on the following sequence of indications appears on the primary display approx every two seconds apart A D O S T 0 6 0 E R 1 0 0 Revision of the installed software When reaching this phase the instrument becomes immediately operative and the weight value appears on the display ...

Page 8: ...mple in case of a weighing pin applied to the fixed component of a lifting system the operator must set the value actually lifted by the bridge crane for example in case of pin weighing 1 ton and the capacity of the bridge crane consisting of 300 tons In this case the signal will be set according to the pin s data sheet and the capacity will be set to 300 corresponding to 300 tons of the system s ...

Page 9: ...1000 the channel 2 value is displayed as for channel 1 in t According to different systems capacities multiplying or dividing it is possible to sum values with the same measure unit 2 2 3 Management of the zero The external inputs can be used to reset potential zero derivatives or deviations relative to the weighing system The AZM limit is valid in both ways therefore the actual field is 100 0 100...

Page 10: ...imes but are less effective with regards to interferences therefore they must be used when extremely quick weight variations must be detected The latter allow mitigating interferences since they boast a higher filtering effect at the disadvantage of the response time to weight variations In both cases the higher is the filter s number the greater is the filtering effect and the response time to a ...

Page 11: ...he minus sign and the weight value alternatively If the negative weight value is of seven digits the less significant five digits are displayed and the message starts flashing in order to indicate the presence of a non visible initial 1 The first left digit will indicate the minus sign and the weight value alternatively The weight indication limits are Lower limit 20 of full scale upper limit 120 ...

Page 12: ...y will indicate the value by pressing this key for the selected channel If the instrument is in configuration mode it allows browsing backward the menu items and decreasing the parameters value If the instrument is in operating mode it allows entering in configuration mode If the instrument is in configuration mode the key will confirm the selections made If the instrument is in operating mode it ...

Page 13: ...ollowing modes F A I L 1 Load cell connection fault FAIL The alarm status is triggered when the FAIL condition is present L O N 1 Minimum alarm LO N The alarm status is triggered when the weight value is lower than or equal to the threshold value H I N 1 Maximum alarm HI N The alarm status is triggered when the weight value is greater than or equal to the threshold value L O G 1 Minimum alarm LO G...

Page 14: ...on model and serial number This data together with the software version must be indicated when requesting information 3 2 Assembling the instrument WARNING Make sure that the supply voltage falls within the instrument s allowed limits Make sure that it is possible to disconnect power during installation and or maintenance phases Perform a ground connection if required It is recommended to use a sh...

Page 15: ...t cabling operations is affixed on the sides of the instrument near terminals SIDE B SIDE A 3 5 Power supply tag Before connecting the equipment to a power source make sure that the selected value on the label corresponds to the foreseen voltage If the foreseen values differs from the voltage indicated on the tag do not connect the equipment and contact exclusively a company s assistance centre to...

Page 16: ...3 Connect the instrument s safety ground terminal to the system s ground bar through flexible cable 3 6 2 Version 12 24V INDICATION FUNCTION TERMINAL 12 24 1 0 2 1 2 3 4 5 6 7 8 9 10 11 12 13 14 15 16 17 18 OUT 1 OUT 4 OUT 2 OUT 1 OUT 2 OUT 4 OUT 3 OUT 3 G SAFETY OUT V SAFETY OUT OUT 5 OUT 5 INP 2 INP 1 C INP 100 240VAC 1 24VAC 48VAC L L N N E E 2 3 24VDC L E N ...

Page 17: ...d cells In case of connection of 4 wire load cells connect the reference wires to the relative polarities of the power supply cables MAKE SURE THE CONNECTION CABLE BETWEEN LOAD CELLS AND INSTRUMENT IS DUCTED IN TROUGHS SEPARATE FROM THOSE OF POWER LINES IN ORDER TO AVOID COUPLING THAT MAY PREJUDICE THE MEASUREMENT ACCURACY 3 7 1 Connection of load cells 1 LC1 INDICATION FUNCTION TERMINAL A Excitat...

Page 18: ...T060EE1 Rev 7 Page 18 of 62 In case of 4 wire connection short circuit the terminals Excitation with Reference and Excitation with Reference CONNECTION WITH 4 WIRE LOAD CELLS CONNECTION WITH 6 WIRE LOAD CELLS ...

Page 19: ...pply for the optional input channel LC2 INDICATION FUNCTION TERMINAL A Excitation 33 A Excitation 32 S Signal 31 S Signal 30 R Reference 29 R Reference 28 31 28 29 30 S R R 34 32 33 S 36 35 37 A A 39 38 R R S S A A LOAD CELL 2 LOAD CELL 1 23 20 19 22 21 25 24 27 26 SGND 3 IOUT VOUT SGND 2 RS485 RS485 SGND 1 RS485 RX RS485 TX SERIAL OUT 1 SERIAL OUT 2 ANALOG OUTPUT OPTO OPTO ...

Page 20: ...g system In the case of plant consists of a single weighing system with one or more cells connected in parallel the wiring must be made on channel 1 see diagram as an example Example of a system consisting of a single weighing system with only two load cells in parallel ...

Page 21: ...hing system In the case of plant consists of a double weighing system with one or more cells connected in parallel the wiring must be made like a diagram as an example Example of a system consisting of a double weighing system with only one load cells for each system ...

Page 22: ...ble and connect the shield on one side only RS485 Use a twisted shielded cable 1 couple suitable for serial communications Use separate troughs from those of power lines where possible INDICATION FUNCTION TERMINAL RS485 TX TX RS232 port 1 27 RS485 RX RX RS232 port 1 26 RS485 TX RX485 port 1 27 RS485 RX RX485 port 1 26 SGND 1 Signal Ground 25 RS485 RX485 port 2 24 RS485 RX485 port 2 23 SGND 2 Signa...

Page 23: ...common terminal and the input terminal Closing must take place with potential free contact not under voltage the inputs are self powered internally by the T060E INDICATION FUNCTION TERMINAL INP 1 Tare channel 1 16 INP 2 Tare channel 2 17 C INP Common 18 1 2 3 4 5 6 7 8 9 10 11 12 13 14 15 16 17 18 OUT 1 OUT 4 OUT 2 OUT 1 OUT 2 OUT 4 OUT 3 OUT 3 G SAFETY OUT V SAFETY OUT OUT 5 OUT 5 INP 2 INP 1 C I...

Page 24: ...foreseen Use separate troughs from those of power lines where possible The relays are managed as alarm relays therefore they are always kept energized and are de energized in case of alarm INDICATION FUNCTION TERMINAL OUT 1 Relay 1 NO 4 OUT 1 Relay 1 C 5 OUT 2 Relay 2 NO 6 OUT 2 Relay 2 C 7 OUT 3 Relay 3 NO 8 OUT 3 Relay 3 C 9 OUT 4 Relay 4 NO 10 OUT 4 Relay 4 C 11 OUT 5 Relay 5 NO 12 OUT 5 Relay ...

Page 25: ...e use of separate troughs in order not to prejudice the proper use of the equipment and optimal performances The shield must be connected on one side only INDICATION FUNCTION TERMINAL VOUT Output under voltage 21 IOUT Output under current 20 SGND3 Common 19 31 28 29 30 S R R 34 32 33 S 36 35 37 A A 39 38 R R S S A A LOAD CELL 2 LOAD CELL 1 23 20 19 22 21 25 24 27 26 SGND 3 IOUT VOUT SGND 2 RS485 R...

Page 26: ...1569 PT060EE1 Rev 7 Page 26 of 62 3 12 PROFIBUS DP output optional PIN SIGNAL 1 2 3 B LINE 4 RTS 5 GND BUS 6 5V BUS 100 mA max 7 8 A LINE 9 HOUSING SHIELD ...

Page 27: ...intenance operations For safety purposes check the connections of the safety wires on a regular basis with a visual inspection 4 2 Corrective maintenance Each corrective maintenance operation concerning instrument s faults must be carried out exclusively at ADOS laboratories or anyhow by ADOS staff ANY INSTRUMENT S ALTERATION WILL VOID THE WARRANTY ...

Page 28: ... the logic operational sequence foresees The configuration of operational parameters The system s calibration 5 3 Selection of the management functions The following management functions are foreseen CONFIGURATIONSet up of general parameters CALIBRATION Weight calibration INSTRUMENT TEST Management of test functions To access the instrument s management mode press key The instrument is ready to co...

Page 29: ...ns to the first one automatically Press key to select all configurable parameters in sequence in reverse order once the first one is reached the system returns to the last one automatically Press key to cancel the configuration request and return to the selection menu of configuration levels Press key to confirm the selection the instrument is ready to configure the selected parameter the display ...

Page 30: ...key pressed the increase gradient is automatically increased up to maximum 128 times the basic increase value Press key to decrease the value of the selected parameter once zero is reached the system returns automatically to the maximum value If the data shown is a weight e g a relay threshold the decrease takes place according to the configured sensitivity By keeping key pressed the decrease grad...

Page 31: ... the range from 50 to 0 001 divisions The system resolution is given by the ratio between capacity and resolution See also point 2 2 1 5 4 6 Average settings M E D I E 1 This parameter is used for the digital filtering of the weight signal in order to reduce the unwanted effects due for example to mechanical vibrations that act on the weighing system The higher is the parameter s value the greater...

Page 32: ...This parameter define the scale factor selection OFF M 10 Value multiplying for 10 M 100 Value multiplying for 100 M 1000 Value multiplying for 1000 M 10000 Value multiplying for 10000 D 10000 Value dividing for 10000 D 1000 Value dividing for 1000 D 100 Value dividing for 100 D 10 Value dividing for 10 5 4 9 Relay 1 function F U N R 1 This parameter defines the function to assign to relay 1 See c...

Page 33: ... chapter 2 5 5 4 13 Minimum time to return to idle mode of relay 1 D O H R 1 This parameter defines the minimum time for relay 1 to return to idle mode See chapter 2 5 The characterisation parameters of the relay 1 function apply to all five relays 5 4 14 Enabling of FAIL function for channel 1 F A I L 1 If ON all channel s relays are forced in alarm status If OFF and no relay is configured as a F...

Page 34: ...U protocol 5 4 17 Function of serial port 2 excluded in case of PROFIBUS option S E R 2 OFF Serial port excluded CON Serial port with continuos string transmission BIDIR Serial port with logic HALF DUPLEX protocol The instrument responds as slave In case of multi point operating mode the data structure foresees the additional ID RS485 address field REPEAT It foresees the interfacing with ADOS repe...

Page 35: ...annel 2 TOTAL Weight value relative to sum channel 1 channel 2 5 4 20 Data transmitted on serial port 2 in continuous mode D A T A 2 CELL 1 Weight value relative to channel 1 CELL 2 Weight value relative to channel 2 TOTAL Weight value relative to sum channel 1 channel 2 5 4 21 Baud rate of serial port 1 B A U D 1 B A U D In case of PROFIBUS option 1200 2400 4800 9600 19200 38400 ...

Page 36: ...ss of serial port 1 A D D R 1 It allows identifying the instrument in case of multi point connections with an address from 1 to 32 S E A D D In case of T060E with PROFIBUS interface 5 4 24 RS485 address of serial port 2 excluded in case of PROFIBUS option A D D R 2 It allows identifying the instrument in case of multi point connections with an address from 1 to 32 ...

Page 37: ...he value of the analogue output is proportional to the net weight value displayed value of channel 1 GROS 1 The value of the analogue output is proportional to the gross weight value value independent from the reset value of channel 1 NET 2 The value of the analogue output is proportional to the net weight value displayed value of channel 2 GROS 2 The value of the analogue output is proportional t...

Page 38: ...the analog output data AN FS 5 4 30 Digital filter setting F 1 L T E R Setting of the digital filter value values expressed in Hz The value must be set to eliminate any weight fluctuations due to electrical system noise 50 X2 51 X2 53 X2 55 X2 57 X2 59 X2 50 X2 61 X2 64 X2 66 X2 69 X2 72 X2 76 X2 80 X2 84 X2 88 X2 94 X2 100 X2 106 X2 114 X2 123 X2 133 X2 145 X2 160 X2 177 X2 200 X2 228 X2 266 X2 3...

Page 39: ...rol of two weighing channels 2 capacity of the two systems equal PORT parameter 3 sensitivity of the two systems equal SENS parameter If the above conditions are not observed inserting the unbalancing value the instrument signals ERROR Once the unbalance value has been set set the relay to be assigned to the function following example with relay 1 S B I L A N This parameter defines the unbalanced ...

Page 40: ... weights are removed once again 8 The tank is loaded with the material until reaching the weight value indicated in point 3 9 Repeat steps 1 and 2 until reaching the nominal load then correct the calibration curve SPAN if needed During the calibration phase by using known masses it is possible to check the interferences and errors caused by the application of the load on mechanical parts or load c...

Page 41: ...of 62 5 5 2 Permanent tare To access the calibration menu you must enter the instrument s management menu by selecting the following function C A L Press Key O F F S 1 Press key or to cancel the operation O F F S Press Key D O N E ...

Page 42: ...cture is complete To access the calibration menu you must enter the instrument s management menu by selecting the following function C A L Press Key O F F S 1 Press key or to cancel the operation 2 E R O 1 The instrument is ready to receive the confirmation command 2 E R O By pressing key the instrument performs the calibration and displays message D O N E The operation can be repeated a few times...

Page 43: ...enu you must enter the instrument s management menu by selecting the following function C A L Press Key O F F S 1 Press key or to cancel the operation 2 E R O 1 Press key or to cancel the operation S P A N 1 By pressing key the instrument goes in calibration mode and the display shows the calibration value and function in progress alternatively SPAN 1 The operator can modify the procedure using ke...

Page 44: ... L I N 1 1 By pressing key the instrument goes in calibration mode and the display shows the calibration value and function in progress alternatively LIN 1 The operator can modify the procedure using keys or to increase or decrease the displayed value Once the required weight value is input by pressing key the instrument will perform the calibration and display message D O N E The procedure is the...

Page 45: ...f the analogue output could be set to 3000 This way for weight values from 0 to 3000 the analogue output will range from 0 to 10 V or from 4 to 20 mA for higher values the output will remain set to the maximum value Similarly for negative weight values the analogue output will remain set to the minimum value The second phase consists in aligning the analogue output so that zero minimum possible va...

Page 46: ... you must enter the instrument s management menu by selecting the following function C A L Press Key O F F S 1 Press key until visualizing the parameter A N 2 E By pressing key the instrument begins the zero adjustment procedure of the analogue output A N 2 E 0 A numeric value proportional to the output value under voltage or current read on the multimeter is visualized in this phase Press keys to...

Page 47: ...u you must enter the instrument s management menu by selecting the following function C A L Press Key O F F S 1 Press key until visualizing the parameter A N S P By pressing key the instrument begins the zero adjustment procedure of the analogue output A N S P 0 A numeric value proportional to the output value under voltage or current read on the multimeter is visualized in this phase Press keys t...

Page 48: ...digital inputs To access the test menu you must enter the instrument s management menu by selecting the following function T E S T Press Key T R E L E Press to check the relay connections and optimal operation of the inputs the instrument displays two messages T R E L E Test relay outputs O F F O F F Test inputs Press to energize each relay in sequence and individually while in order to test input...

Page 49: ...he following function T E S T Press keys and until selecting message T A N A Press key to confirm the selection the instrument displays two messages alternatively T A N A 0 By pressing keys the analogue output is increased or decreased by 1 10 full scale until reaching the full scale or zero then it returns to zero or full scale Press to cancel the test ...

Page 50: ...ing function T E S T Press keys and until selecting message T N U 1 Test input of cell 1 T N U 2 Test input of cell 2 Press key to confirm the selection the instrument displays two messages alternatively T N U 1 0 4 9 9 9 Signal coming from load cells of channel 1 value expressed in mV V The test of channel 2 follows the same procedure Press to cancel the test ...

Page 51: ...ata only when requested by an external system The protocol can be used with point to point or multidrop lines The selection depends on the configuration value of the RS485 address if other than zero the instrument controls the value of the address field in the received data and inserts the address field in the transmitted data Transmission to repeater Repeat The instrument transmits a string to a ...

Page 52: ...aracter WEIGHT 5 as above 8 character WEIGHT 6 as above 9 character WEIGHT 7 as above 10 character RELAY 1 character for alarm relay status Hexadecimal coded character Bit to 1 relay 5 11 character RELAY as above Bit to 1 relay 1 Bit to 2 relay 2 Bit to 4 relay 3 Bit to 8 relay 4 12 character STATUS SPACE Hex 20 Normal operating condition F Hex 43 FAIL detected S Hex 53 configuration in progress O...

Page 53: ...as above 8 character WEIGHT 4 as above 9 character WEIGHT 5 as above 10 character WEIGHT 6 as above 11 character WEIGHT 7 as above 12 character RELAY 1 character for alarm relay status Hexadecimal coded character Bit to 1 relay 5 13 character RELAY as above Bit to 1 relay 1 Bit to 2 relay 2 Bit to 4 relay 3 Bit to 8 relay 4 14 character STATUS SPACE Hex 20 Normal operating condition F Hex 43 FAIL ...

Page 54: ... format in bi directional mode The length of the string differs according to the ID485 parameter value 6 3 1 Weight request command STX ID485H ID485L CMD CHK1 CHK2 CR CMD P Hex 50 weight command request ID485 0 lunghezza 7 caratteri 1 character STX Hex 02 Start of text 2 character ID485 H from 0 Hex 30 to 9 Hex 39 to indicate the tens of the set ID485 value 3 character ID485 L from 0 Hex 30 to 9 H...

Page 55: ...n of an error the high order bit of the function code is set to 1 Supported error code are 01 Illegal function The message function received is not an allowable action for the addressed slave 02 Illegal data address The address referenced in the data field is not an allowable address in the address slave location 03 Illegal data value The value referenced in the data field is not allowable in the ...

Page 56: ...y message ADDR FUNC COIL HI COIL LOW DATA VALUE HI DATA VALUE LOW CHECK 01 05 00 00 FF 00 8C 3A 6 4 1 T060E registers list Register 0 is a special coded register see details Weight values gross net are coded on two consecutive registers as 2 complement binary value Registers marked R are read only Register Number Function Type 0 Status word R 1 2 Gross weight channel 1 R 3 4 Gross weight channel 2...

Page 57: ... that the relay 3 is energized R4 If 1 indicates that the relay 4 is energized R5 If 1 indicates that the relay 5 is energized SR If 1 indicates that the relay SR is energized FAIL1 If 1 indicates channel 1 in FAIL OL1 If 1 indicates channel 1 in OL UL1 If 1 indicates channel 1 in UL FAIL2 If 1 indicates channel 2 in FAIL OL2 If 1 indicates channel 2 in OL UL2 If 1 indicates channel 2 in UL IN1 If...

Page 58: ... s complement 0x000C Net sum weight LSB Valore signed in two s complement 6 5 2 Status word coding MSB LSB 15 14 13 12 11 10 9 8 7 6 5 4 3 2 1 0 Z2 Z1 F2 F1 OL2 UL2 OL1 UL1 IN2 IN1 SAF R5 R4 R3 R2 R1 Z1 if 1 Tare channel 1 acquired Z2 if 1 Tare channel 2 acquired F1 If 1 indicates a load cell failure on channel 1 F2 If 1 indicates lo a load cell failure on channel 2 OL2 If 1 indicates an over rang...

Page 59: ...ation 2008 06 12 Updated SW revision information 2008 10 23 Updated SW revision information and added Max_User_Prm_Data_Len 2008 11 20 Updated SW revision information and removed Max_User_Prm_Data_Len 2011 04 20 Updated SW and HW revision information Profibus_DP GSD_Revision 3 Device identification Vendor_Name HMS Industrial Networks Model_Name Anybus IC PDP Revision Version 2 13 Ident_Number 0x18...

Page 60: ...res Freeze_Mode_supp 1 supported Sync_Mode_supp 1 supported Auto_Baud_supp 1 supported Set_Slave_Add_supp 1 supported Maximum polling frequency Min_Slave_Intervall 1 100 us Maximum supported sizes Modular_Station 1 modular Max_Module 24 Max_Input_Len 144 Max_Output_Len 144 Max_Data_Len 288 Modul_Offset 1 Fail_Safe 1 Data telegram without data in state CLEAR accepted Slave_Family 0 Max_Diag_Data_Le...

Page 61: ...word 0x51 9 EndModule Module INPUT 8 Byte 4 word 0x53 10 EndModule Module INPUT 16 Byte 8 word 0x57 11 EndModule Module INPUT 32 Byte 16 word 0x5F 12 EndModule Module OUTPUT 1 Byte 0x20 13 EndModule Module OUTPUT 2 Byte 1 word 0x60 14 EndModule Module OUTPUT 4 Byte 2 word 0x61 15 EndModule Module OUTPUT 8 Byte 4 word 0x63 16 EndModule Module OUTPUT 16 Byte 8 word 0x67 17 EndModule Module OUTPUT 32...

Page 62: ...1569 PT060EE1 Rev 7 Page 62 of 62 ...

Reviews: