


7
1.5A
COMPUTER
Indoor use onl
y
5V
1
2
3
4 PWR
1
ON 2
3
4
5
6
7
8
OPTIONS
Host computer or KVM switch
The AdderView Prism can either connect directly to a single host computer or to
range of hosts via one or more KVM switches.
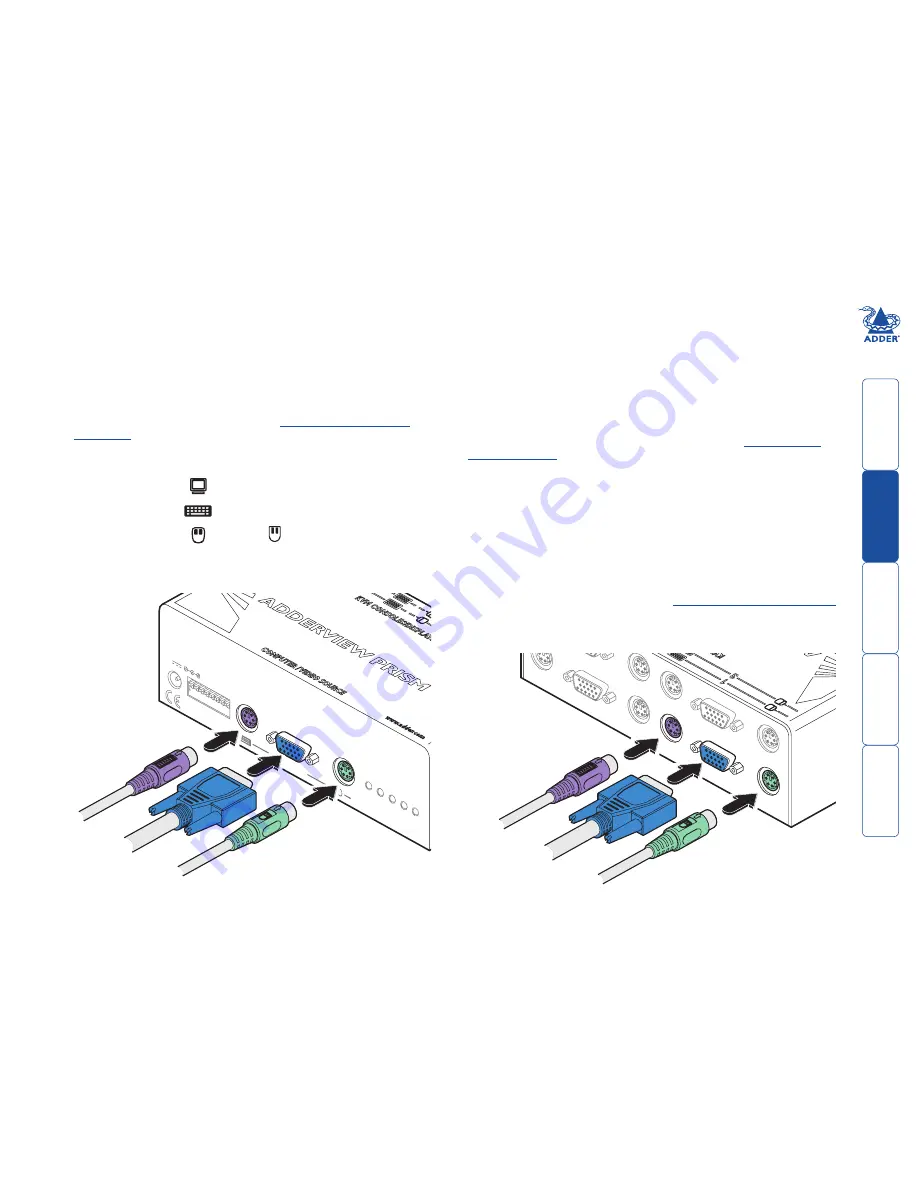
To connect a host computer or KVM switch
1 Ensure that power is disconnected from the computer or KVM switch to be
connected.
(Note: If it is not possible to switch off devices prior to connection, then
a ‘Hot plug’ procedure is available – see the
Hot plugging and mouse
restoration
section for more details).
2 Connect the plugs at one end of a KVM cable set to the keyboard, video
and mouse sockets of the computer or KVM switch.
Monitor (video)
Blue
Keyboard
Purple
Mouse
or
Mid green
3 Connect the plugs at the other end of the KVM cable set to the corresponding
sockets, collectively labelled as ‘COMPUTER’, on the front panel of the
AdderView Prism.
Keyboards, video monitors and mice
The rear panel provides sets of ports (either two or four, depending on the
AdderView Prism model) and each accommodates a keyboard, video monitor
and mouse connection.
The ports can be connected and used in any order (see note 2 below), and not
all connectors of each port need to be used. For instance, when AdderView
Prism is used as a video splitter, usually only the video connections are utilised.
Where a user will be situated close to the AdderView Prism, the keyboard, video
monitor and mouse can be connected directly. When a user will be placed some
distance away, then an extender cable should be used. See
What you may
additionally need
for part numbers.
Note 1: In square matrix configurations, these rear panel ports would be
connected to the CPU/computer ports of suitable KVM switches.
Note 2: At power on, AdderView Prism attempts to gain information about
the capabilities of connected monitors (using the Display Data Channel [DDC]
format) by interrogating the monitor at port 1. If you are using a mixture of
monitors, it is advantageous to place one that supports DDC at port 1.
To connect a keyboard, video monitor and mouse
1 Position a suitable keyboard, video monitor and mouse in the required
location. Where the distance to the AdderView Prism is greater than the cable
lengths use suitable extender cables (see
What you may additionally need
).
2 Connect the keyboard, video monitor and mouse plugs to the sockets
of one of the ports (labelled between 1 and 4) at the rear panel of the
AdderView Prism.
From mouse
From
keyboard
From video monitor
From mouse port
From
keyboard
port
From video port


