background image

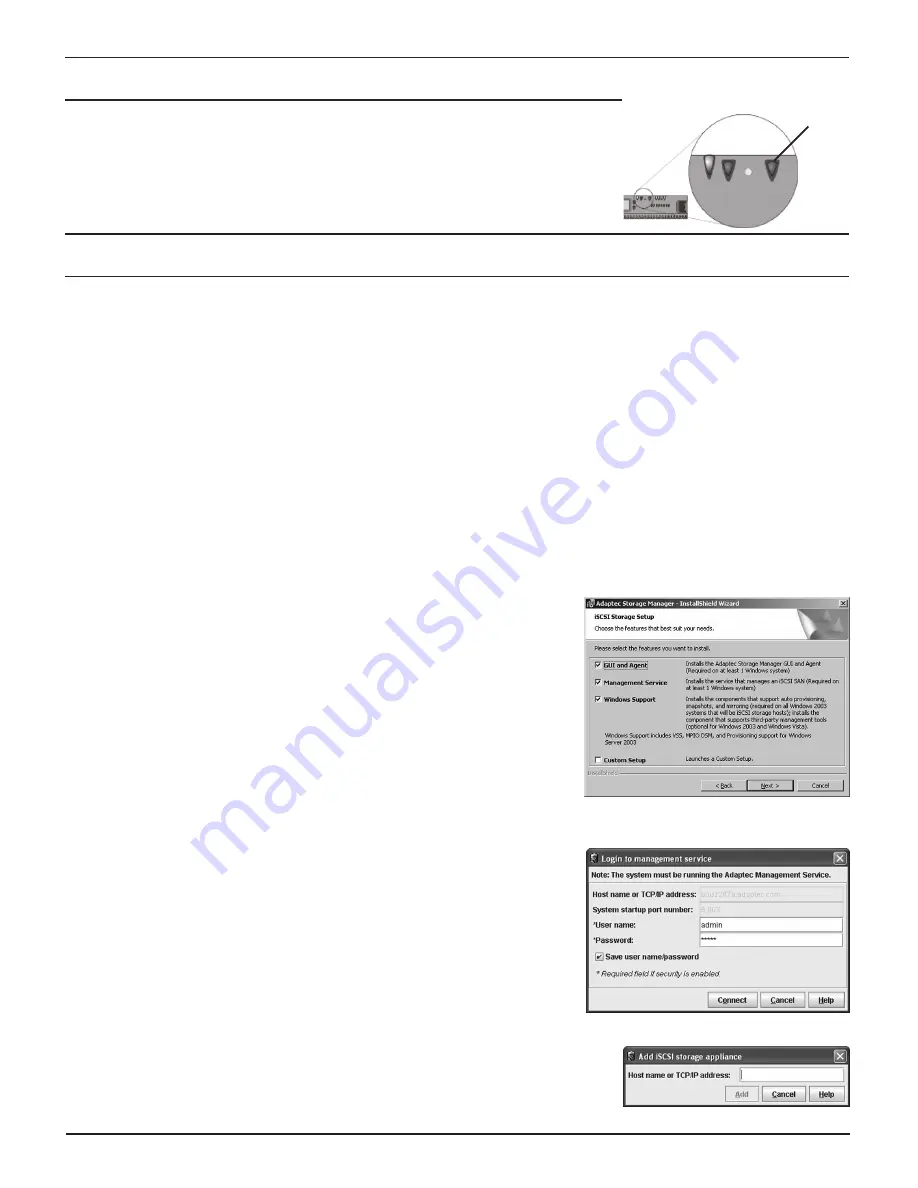
Step 4: Power On the Snap Server

To turn on the server, press the power button on the front of the server. The server takes a 

few minutes to initialize. The LCD will display the server’s name and the eth0 (Management 

port) IP address when the system has fully initialized.

Note   

If you connect a SANbloc S50 expansion array, use the array’s documentation to 

install and connect the array before powering on the Snap Server. 

Step 5: Connect to the Snap Server and Configure the iSCSI Storage Appliance

Snap Servers are preset to acquire an IP address from a DHCP server. If no DHCP server is found on the network, the server 

defaults to an IP address of 10.10.10.10 and you should assign a different IP address using the following procedure: 

1

  Set a machine in your environment to the same subnet as the Snap Server and telnet to the Snap Server: 

telnet 

10.10.10.10

2

  Exit the CLI Wizard to get an Administrator prompt: 

*abort

 (If prompted for an ID and password, use admin/admin.)

3

  Change the IP Address: 

interface 


     manage eth0 


     ip 

xxx.xxx.xxx.xxx

 (the new IP Address) 

The LCD screen on the Snap Server bezel will show the new IP Address.

Install and Configure Adaptec Storage Manager™ (ASM)

Your iSCSI Storage can be configured in a number of ways. This Quick Start Guide describes the simplest configuration, where 

all components are installed on a single server running Windows 2003 and connected to the Snap Server 700i Series iSCSI 

Storage Appliance. For more complex network configurations and for installations on Windows Vista, XP, or Linux-based 

operating systems, see the Snap Server 700i Series User’s Guide on your Adaptec 

OnTarget™ User CD.

IMPORTANT!


Install your Microsoft iSCSI Software Initiator v2.0

5


BEFORE 

installing ASM. Download and install the Initiator from www.microsoft.com and 

select the following options: 

Initiator Service

Software Initiator

Microsoft MPIO 

Multipathing Support for iSCSI

.

Install ASM (located on your User CD), and follow the Installation Wizard 

prompts:


a.  Select 

iSCSI Storage

 as the Setup Type.

  b.  Make sure all component boxes (

GUI and Agent

Management Service

and

 Windows Support) 

are checked (this is the default).  

  d.  Create a user name and password and click 

Next

. Then click 

Install

 to begin 

the installation. 

  e.  Reboot after the installation is complete.

Configure ASM to add the Management Service. 


a.

  Launch ASM. The 

Login to management service

 dialog box should open 

automatically. If it does not, in the Enterprise view, expand iSCSI Storage, 

then click the ASM Management Service just installed.


b

.  Log in, using the user name and password you created when installing ASM. 

Add the Snap Server and Configure it as an iSCSI Storage Appliance

1


Add the Snap Server as an iSCSI Storage Appliance

.

The Configuration Wizard opens, prompting you to provide the IP address of the Snap 

Server. Enter the IP address displayed on the Snap Server LCD screen, and click 

Add


Power

Summary of Contents for 5325302055

Page 1: ...ateur Guida rapida all uso e CD utente Руководство по быстрой установке и компакт диск User CD 700i Series Quick Start Guide and User CD Kurzanleitung und Benutzer CD Guía de iniciación rápida y CD del usuario Guide de mise en route rapide et CD de l utilisateur Guida rapida all uso e CD utente Руководство по быстрой установке и компакт диск User CD ...

Page 2: ...designed to work with a USB or network based APC brand UPS Visit the APC Web site for a list of APC models to use with your Snap Server Memory Upgrades The Snap Server 720i memory can be upgraded to 2 GB Memory upgrades are available in 1GB DIMMs Step 2 Install the Server in a Rack Note The Snap Server 700i Series models can only be mounted in a four post 32 inch depth EIA compliant rack A two pos...

Page 3: ...n 14 Service connector 22 Quick Start Guide and User CD 7 Not active for future use 15 Unit ID UID light and button 8 LCD Liquid Crystal Display 16 SAS connector The Snap Server 720i has a single power supply with one power cable 1US 1UK 1EU It also has 3 Ethernet ports with 3 Ethernet cables 7 10 12 11 13 15 14 16 18 9 22 19 17 8 2 1 3 4 5 5 6 Quick Start Guide and User CD Kurzanleitung und Benut...

Page 4: ...rformance At least one port must be connected however a multi port configuration offers considerable performance advantages and is highly recommended If you connect only one port it must be the eth0 port as shown in the Hardware Features illustration which is used by Adaptec Storage Manager as the management port but which can also double as an iSCSI port Cabling the Server to the Network Use the ...

Page 5: ...erver running Windows 2003 and connected to the Snap Server 700i Series iSCSI Storage Appliance For more complex network configurations and for installations on Windows Vista XP or Linux based operating systems see the Snap Server 700i Series User s Guide on your Adaptec OnTarget User CD IMPORTANT Install your Microsoft iSCSI Software Initiator v2 05 BEFORE installing ASM Download and install the ...

Page 6: ...Click Register Now to register your iSCSI Storage Appliance 2 Create and Configure RAID Pools On the Configure RAID Pools screen create pools using either a Express or Custom configuration If you select Express the default configuration is a RAID 5 with one hot spare If you select Custom you configure the pools and RAID levels based on your system requirements See the Snap Server 700i Series User ...

Page 7: ... internacional Todos los otros nombres de productos o de compañías son propiedad de susrespectivos priopietarios Copyright 2007 Adaptec Inc Tous droits réservés dans le monde entier Tous les autres noms de produit ou de société appartiennent à leurs détenteurs respectifs Copyright 2007 Adaptec Inc Tutti i diritti riservati in tutti i paesi del mondo Tutti i nomi di prodotti e società sono di propr...

Reviews: