


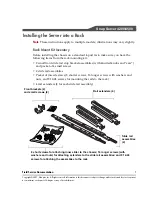


Installing the Server into a Rack
Snap Server 4200/4500 Series
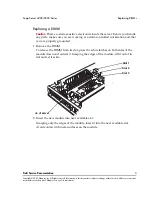
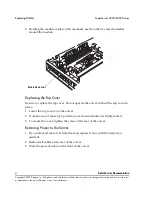
6
Field Service Documentation
Copyright © 2007, Adaptec, Inc. All rights reserved. Information in this document is subject to change without notice and does not represent
a commitment on the part of Adaptec or any of its subsidiaries.
2
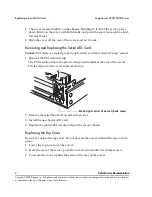
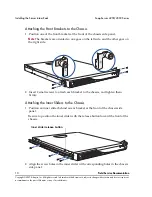
Place a rail extender over the front end of a slide rail assembly, as shown in the
picture below.
3
Measure the distance between the front and rear posts on your rack.
4
Position the rear rail extender so the assembly, front end to rear, matches the
distance on the rack.
5
Carefully turn the assembly over, maintaining the front-to-rear distance you
measured.
6
Align a screw hole in the slide rail assembly with the appropriate slot in the
extender.
This may take a bit of trial and error handling. Hold the slide rail assembly and
extender to maintain the overall length of the assembly (as determined by the
front-to-back distance on the rack). At the same time, move the inner sliding
mechanism aside as you watch through an oval-shaped access hole for a screw
hole on the outside of the slide rail assembly.
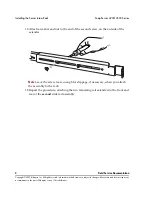
7
Insert a screw.
A magnetized screwdriver can help you control the screw as you put it through
the access oval and into the screw hole.


