background image

3

Adaptec Customer Support

If you have questions about installing or using your Adaptec product, check this 
document first—you will find answers to most of your questions. If you need 
further assistance, use the support options listed below. To expedite your service, 
have your computer in front of you.

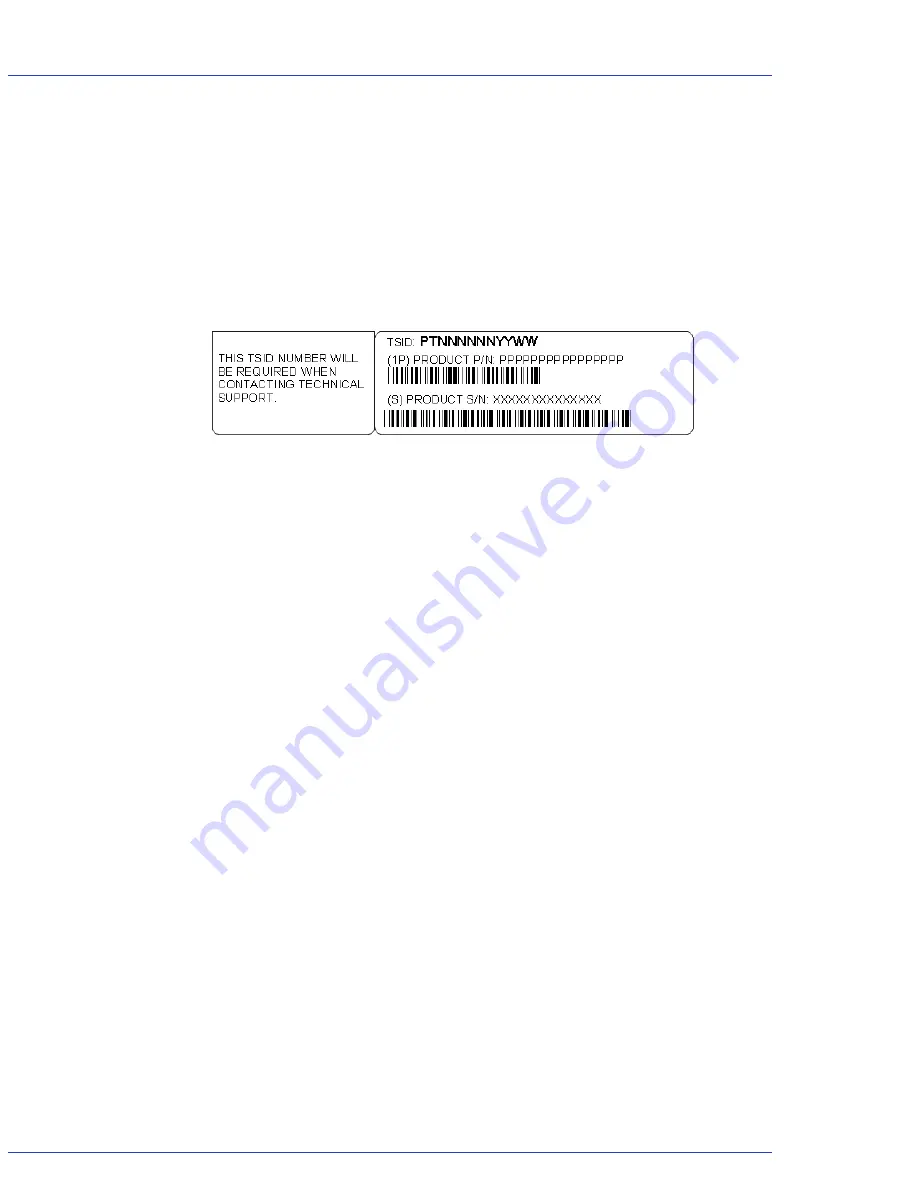
Technical Support Identification (TSID) Number

Before contacting Technical Support, you need your unique 12-digit TSID 
number. The TSID number identifies your product and support status. 

The TSID number is included on a white, bar-coded label, like this example: 

North America 

Visit our Web site at 

www.adaptec.com

.

Search the Adaptec Support Knowledgebase (ASK) at 

ask.adaptec.com

 for 

articles, troubleshooting tips, and frequently asked questions for your product.

For information about Adaptec’s support options, call +1 408-957-2550, 
24 hours per day, 7 days per week. To speak with a Technical Support 
Specialist,

For 

Hardware 

products call +1 408-934-7274, 

Monday to Friday, 3:00 

A

.

M

. to 5:00 

P

.

M

., Pacific Time. 

For 

RAID and Fibre Channel

 products call +1 321-207-2000,

Monday to Friday, 3:00 

A

.

M

. to 5:00 

P

.

M

., Pacific Time. 

For support via e-mail, submit your question at


ask.adaptec.com

.

You can order Adaptec products, including accessories and cables, by calling 
+1 408-957-7274. Or, you can order cables online at 

www.adaptec.com/buy-cables

.

Europe 

Visit our Web site at 

www.adaptec-europe.com

.

German: 

Call +49 89 43 66 55 22, Monday to Friday, 9:00 to 17:00, CET. For 

support via e-mail, submit your question at 

ask-de.adaptec.com

French: 

Call +49 89 43 66 55 33, Monday to Friday, 9:00 to 17:00, CET. For 

support via e-mail, submit your question at 

ask-fr.adaptec.com

.

English: 

Call +49 89 43 66 55 44, Monday to Friday, 9:00 to 17:00, GMT. For 

support via e-mail, submit your question at 

ask.adaptec.com

.

You can order Adaptec cables online at 

www.adaptec.com/buy-cables

.

Japan 

Visit our Web site at 

www.adaptec.co.jp

.

Call +81 3 5308 6120, Monday–Friday, 9:00 

A

.

M

. to 12:00 

P

.

M

 and 1:00 

P

.

M

. to 

6:00 

P

.

M

.

Summary of Contents for 335SAS

Page 1: ...ADAPTEC STORAGE ENCLOSURE 335SAS QUICK INSTALLATION GUIDE ...

Page 2: ...er license All other trademarks are the property of their respective owners Changes The material in this document is for information only and is subject to change without notice While reasonable efforts have been made in the preparation of this document to assure its accuracy Adaptec Inc assumes no liability resulting from errors or omissions in this document or from the use of the information con...

Page 3: ...nical Support Specialist For Hardware products call 1 408 934 7274 Monday to Friday 3 00 A M to 5 00 P M Pacific Time For RAID and Fibre Channel products call 1 321 207 2000 Monday to Friday 3 00 A M to 5 00 P M Pacific Time For support via e mail submit your question at ask adaptec com You can order Adaptec products including accessories and cables by calling 1 408 957 7274 Or you can order cable...

Page 4: ...ne Adaptec at 691 South Milpitas Boulevard Milpitas CA 95035 800 959 7274 5 THIS LIMITED WARRANTY DOES NOT EXTEND TO ANY PRODUCT WHICH HAS BEEN DAMAGED AS A RESULT OF ACCIDENT MISUSE ABUSE OR AS A RESULT OF UNAUTHORIZED SERVICE OR PARTS 6 THIS WARRANTY IS IN LIEU OF ALL OTHER EXPRESS WARRANTIES WHICH NOW OR HEREAFTER MIGHT OTHERWISE ARISE RESPECT TO THIS PRODUCT IMPLIED WARRANTIES INCLUDING THOSE ...

Page 5: ...an outlet on a circuit different from that to which the receiver is connected Consult the dealer or an experienced radio television technician for help Use a shielded and properly grounded I O cable and power cable to ensure compliance of this unit to the specified limits of the rules This device complies with part 15 of the FCC rules Operation is subject to the following two conditions 1 this dev...

Page 6: ...Canadian Interference Causing Equipment Regulations Cet appareil numérique de la classe B respecte toutes les exigences du Règlement sur le matériel brouilleur du Canada Japanese Compliance Voluntary Control Council Initiative This equipment complies to class B Information Technology equipment based on VCCI Voluntary Control Council for Interface This equipment is designed for home use but it may ...

Page 7: ...d Disk Drives 9 Installation Checklist 10 Before You Begin 10 Installing Disk Drives 11 Removing the Fan Optional 12 Installing the Enclosure 14 Connecting to a Controller 15 Completing the Connections 18 Monitoring the Enclosure 18 Solving Problems 20 Technical Specifications 22 Environmental Specifications 22 ...

Page 8: ...nd SATA II RAID controllers and HBAs This Guide assumes that you have installed or are simultaneously installing one or more controllers or HBAs and are familiar with computer hardware and SATA and SAS terminology and technology Kit Contents Adaptec Storage Enclosure 335SAS Light Emitting Diode LED cable Inter Integrated Circuit I2C cable SATA 4 x1 to SAS x4 SFF 8484 Internal Fan Out Cable SATA co...

Page 9: ...s are shown in the following figures Supported Disk Drives When connected to a SAS controller or adapter the enclosure supports up to four 3 5 inch SAS and or SATA disk drives SAS and SATA disk drives can be combined within the same enclosure When connected to a SATA controller the enclosure supports SATA disk drives only J43 Backplane I O J35 Backplane Controller Reset J18 Buzzer Reset J42 Fan ...

Page 10: ... preinstallation tasks 1 Install a SAS or SATA controller and device drivers into your computer For instructions refer to the controller s documentation 2 Remove all components from the packaging and inspect them Place on an antistatic surface until you are ready to use them 3 If you are using new disk drives follow the manufacturer s installation instructions 4 Take appropriate safety precautions...

Page 11: ...To hot swap a disk drive see page 21 1 Press the lever button on the drive carrier then pull open the lever to release the drive carrier from the enclosure 2 Place a SAS or SATA disk drive into the driver carrier then secure it in place with two screws on each side ...

Page 12: ... on page 14 Removing the Fan Optional You can remove the enclosure s cooling fan before installation if space inside your server is limited and if your computer will provide sufficient cooling without it Note If you don t disable the fan function before removing it a loud alarm will sound when the enclosure is turned on To disable the alarm see Step 2 on page 13 To remove the fan 1 Turn the enclos...

Page 13: ...e a jumper on J42 to disable the fan function See the figure on page 9 for jumper location You may want to remove and replace the back cover to gain access to the jumper s or other components 3 Continue with Installing the Enclosure on page 14 ...

Page 14: ...r s instructions 3 Discharge any static electricity build up by touching a grounded metal object such as the exposed metal parts on the back of your computer 4 Install the enclosure using the screws provided in the kit Your server cabinet may not look exactly the same as the one shown in the figure below 5 Continue with Connecting to a Controller on page 15 ...

Page 15: ... Enclosure to a SATA Controller Using an internal SATA fan out cable connect the enclosure to the SATA ports on the controller It s important to attach the correct connector to each port When connecting to the backplane port 0 starts at the bottom of the connector Continue with Completing the Connections on page 18 3 2 1 0 0 1 2 AAR 1420SA 3 Notch at bottom of connector SATA Ports ...

Page 16: ... out cables connect each enclosure to the SATA ports on the controller Note If you are connecting two enclosures to your controller ensure that you select a different I2C address for each enclosure This can be done by populating the 3 pin jumper J43 differently for both enclosures See jumper location on page 9 Continue with Completing the Connections on page 18 3 2 1 0 4 5 6 7 AAR 2820SA ...

Page 17: ...S port on the controller Continue with Completing the Connections on page 18 Connecting Two Enclosures to a SAS Controller Note This procedure is for SAS controllers that support more than 4 disk drives Using two internal SAS cables connect each enclosure to a SAS port on the controller Continue with Completing the Connections on page 18 ...

Page 18: ...C cables must be daisy chained from one enclosure to the other For help locating connectors on the enclosure see the figure on page 9 For more information and to help locate connectors on your controller refer to the controller s documentation Monitoring the Enclosure This describes how the enclosure s LEDs help you monitor enclosure and drive status It also explains how to silence the alarm when ...

Page 19: ...as described in the following table Monitoring Drive Status Each disk drive in the Adaptec 335SAS enclosure has two LEDs Condition LED Off On Temperature Normal operation Temperature exceeds 55 o C measured on the backplane Fan Normal operation Fan Failure defect or the fan power is not connected while J42 is set Power Activity LED Failure LED ...

Page 20: ...er cabinet Refer to the server manufacturer s instructions Ensure that the disk drives are properly installed See page 11 for instructions Try replacing the cables Try replacing one or more disk drives See Silencing the Alarm on page 21 for instructions Condition LED Off On Blinking Power Activity Disk drive not ready Disk drive is ready Green Rapid Activity on disk drive Slow Rebuild on disk driv...

Page 21: ...ive Caution Removing a disk drive during I O activity can hang the host system and may cause data loss 2 Press the lever button on the drive carrier then pull open the lever to release the drive carrier from the enclosure 3 Allow the disk drive to fully spin down approximately one minute Warning Removing a disk drive before it has fully spun down may result in disk drive damage and possible person...

Page 22: ...One slim size ATAPI CD drive Dimensions H x W x D 5 inches x 5 8 inches x 7 5 inches without fan Cooling system One rear mounted fan removable System monitoring Fan fail detection LED and alarm Drive fail detection LED Overheat LED indication Ambient temperature without battery backup module 0 C to 55 C Relative humidity 10 to 90 noncondensing Altitude up to 3000 meters ...

Page 23: ... Milpitas Boulevard Milpitas CA 95035 USA 2005 Adaptec Inc All rights reserved Adaptec and the Adaptec logo are trademarks of Adaptec Inc which may be registered in some jurisdictions Part Number CDP 00105 01 A Rev A JB 09 05 ...

Reviews: