AcuRite 01602BPDIA2 Instruction Manual Download Page 13

13

OPERATION

Using the Professional Weather Center
Learning Mode

Self-Calibrating Forecasting use a unique algorithm to analyze changes in 

pressure over a time period (called Learning Mode) to determine your altitude. 

After 14 days, the Learning Mode icon disappears from the display screen. At 

this point, the self-calibrated pressure is tuned in to your location and the unit is 

ready for superior weather prediction. 

Weather Forecast

AcuRite’s patented Self-Calibrating Forecasting provides your personal forecast 

of weather conditions for the next 12 to 24 hours by collecting data from 

the sensor in your backyard. It generates a forecast with pinpoint accuracy - 

personalized for your exact location.

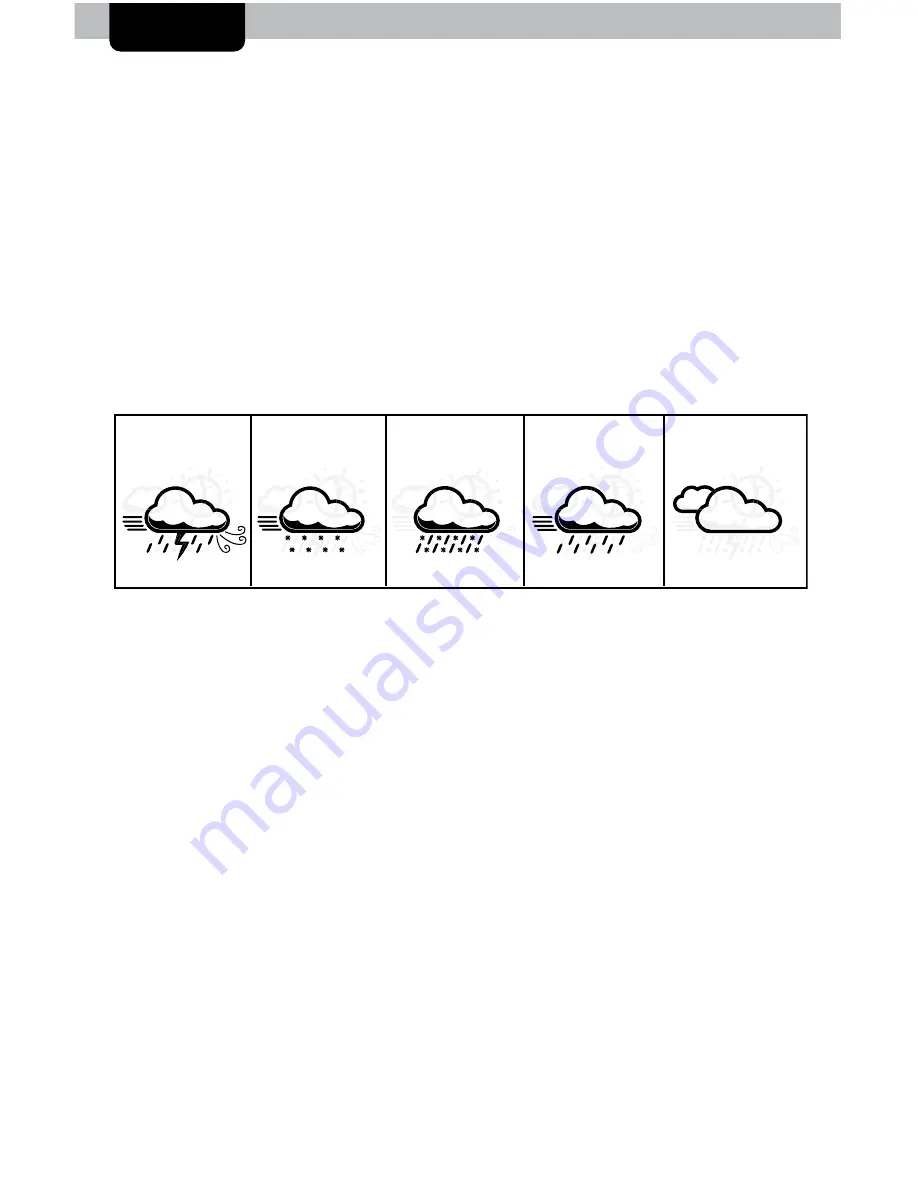
View the complete list of icons at www.AcuRite.com/acurite-icons

Barometric Pressure

Subtle variations in barometric pressure greatly affect the weather. This  

weather forecaster displays the current pressure and the direction it’s trending 

(FALLING, STEADY, or RISING).

Rainfall Event

The rainfall feature tracks rain accumulation over all-time, the current month, 

and today.

Programmable Weather Alarms

Each Selectable Weather Category features an alarm option. When an 

alarm sounds, the display unit emits an audible beep and flashes the affected 

category, its alarm settings, and any other relevant data. 
Some alarms can be customized to alert you when your programmed value is 

reached. Alarms include: outdoor temperature, outdoor humidity, wind speed, 

heat index, dew point, wind chill, indoor temperature and indoor humidity.
The rain alarm does not require a preset numerical value, but instead sounds as 

soon as rain is recorded. Similarly, the storm alarm sounds when a large atmo-

spheric pressure drop occurs, which usually indicates an oncoming storm. Note: 

The storm alarm is NOT intended to be a safety device or warning system.

SNOW / RAIN

MIX LIKELY

RAIN

LIKELY

SNOW

LIKELY

STORMY

& WINDY

MOSTLY

CLOUDY

(flashing=stormy)

(flashing rain/snow)

Summary of Contents for 01602BPDIA2

Page 1: ...ts 5 in 1 3 Features Display Unit 4 Back of Display Unit 6 Setup 7 5 in 1 Sensor Setup 7 Display Unit Setup 8 Set the Time Date 9 Measurement Units 10 Placement Guidelines 11 5 in 1 Sensor Installatio...

Page 2: ...D screen prior to using this product Locate the tab and peel off to remove Package Contents 1 Display unit with tabletop stand 2 5 in 1 sensor 3 Sensor mounting bracket 4 Mounting hardware 5 Snap in d...

Page 3: ...ion heating resulting in more accurate temperature measurement 3 A B C Switch ID code that must match display s A B C switch to ensure units synchronize 4 Battery Compartment 5 Temperature Humidity Se...

Page 4: ...4 Features Benefits Display Unit 1 31 32 33 34 30 29 28 27 26 25 24 22 20 23 21 2 3 4 5 6 7 8 9 10 11 12 13 14 15 17 18 19 16...

Page 5: ...ll time low and date recorded for current category selected on display 16 Press twice for all time high and date recorded 20 Record Lows Shown for current category selected on the display 16 21 Clear...

Page 6: ...asy wall mounting 3 Battery Compartment Cover 4 A B C Switch ID code that must match 5 in 1 sensor s A B C switch to ensure units synchronize 5 Clear Today Clears data recorded since 12 00am 6 Reset F...

Page 7: ...ne or lithium batteries for the best product performance Heavy duty or rechargeable batteries are not recommended The 5 in 1 sensor requires lithium batteries in low temperature conditions Cold temper...

Page 8: ...WITH YOUR LOCAL LAWS AND REGULATIONS BATTERY SAFETY Clean the battery contacts and also those of the device prior to battery installation Remove batteries from equipment which is not to be used for an...

Page 9: ...irm hour selection 5 Press the up or down arrows to adjust minutes 6 Press the button to confirm minute selection The clock is now set Set the Date 1 Press the up or down arrow buttons until SET DATE...

Page 10: ...Category part of the display unit 2 Press the button to set the unit preference 3 Press the up or down arrows to select STAND for standard or METRIC for metric units 4 Press the button to confirm you...

Page 11: ...away from large metallic items thick walls metal surfaces or other objects that may limit wireless communication PREVENT WIRELESS INTERFERENCE Place both units at least 3 feet 9 m away from electroni...

Page 12: ...he hardware bag 2 Insert the mounting base into the hole on the bottom of the sensor 3 Make sure the arrows on the top of the sensor are pointed in the proper direction and the bubble level is centere...

Page 13: ...ther forecaster displays the current pressure and the direction it s trending FALLING STEADY or RISING Rainfall Event The rainfall feature tracks rain accumulation over all time the current month and...

Page 14: ...lue by pressing the up or down arrow buttons 4 Press the button to confirm a value 5 Next press the button to activate the alarm The alarm ON indicator will highlight on the display Alarm is now progr...

Page 15: ...tall batteries in display unit 4 Let the units sit within a couple feet of each other for about 20 minutes to gain a strong connection Outdoor temperature is flashing or showing dashes Flashing of the...

Page 16: ...ou may need to clean inside the sensor Video available at www acurite com 5in1 Inaccurate wind readings What is wind reading being compared to Pro weather stations are typically mounted at 30 ft high...

Page 17: ...Cup Remove and empty rain collector debris filter The debris filter is located in the rain collector funnel Remove from the top by gently squeezing and pulling out Clean the Wind Vane Anemometer Remo...

Page 18: ...er should take more than 20 minutes to empty a quicker period will result in inaccurate calibration Try to simulate a normal steady rainfall When cup is empty of water display unit should register 1 0...

Page 19: ...llowing measures Reorient or relocate the receiving antenna Increase the separation between the equipment and the receiver Connect the equipment into an outlet on a circuit different from that to whic...

Page 20: ...es are hereby expressly disclaimed including without limitation the implied warranty of merchantability and the implied warranty of fitness for a particular purpose Chaney expressly disclaims all liab...

Page 21: ...21...

Page 22: ...22...

Page 23: ...23...

Page 24: ...uRite uses patented technology Visit www AcuRite com patents for details Printed in China 01602BPDIA2 INST 020915 It s More than Accurate it s AcuRite offers an extensive assortment of precision instr...

Reviews: