background image

10

11

Placement for Maximum Accuracy

AcuRite sensors are sensitive to surrounding environmental conditions. Proper 

placement of both the display unit and the sensor are critical to the accuracy 

and performance of this product.

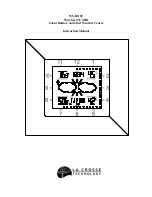
Display Unit Placement

Place the display unit in a dry area free of dirt and dust. To 

ensure accurate temperature measurement, place out of direct 

sunlight and away from heat sources or vents. Display unit stands 

upright for tabletop use or is wall-mountable.

5-in-1 Sensor Placement

The 5-in-1 sensor is designed to remain outdoors all year long. 

Choose an open location with no obstructions above or around 

the sensor for the most accurate measurements.

Important Placement Guidelines

Display unit and sensor must be within 330 feet (100 meters) of each other. 

MAXIMIZE WIRELESS RANGE

 Place units away from large metallic items, thick walls, metal surfaces, or other 

objects that may limit wireless communication.

PREVENT WIRELESS INTERFERENCE

 Place units at least 3 feet (90 cm) away from electronic devices (TV, computer, 

microwave, radio, etc.).

LOCATE AWAY FROM HEAT SOURCES

Position sensor away from heaters, air conditioners, chimneys, exhaust vents, 

asphalt and concrete (surfaces that radiate heat).

LOCATE AWAY FROM HUMIDITY SOURCES

Avoid installing the sensor near pools, spas, or other bodies of water. Water 

sources may impact humidity accuracy. 

LOCATE AWAY FROM SPRINKLER HEADS

DO NOT install the sensor where it will be sprayed by a sprinkler system. This 

may force water inside the sensor.

LOCATE AWAY FROM WIND & RAIN OBSTRUCTIONS

DO NOT mount the sensor with obstructions around it.  

Consider a location that is a wide open area, with few  

structures around to ensure accurate wind measurement.

Visit us online to view installation photos and  

video, or learn more about AcuRite technology:


www.AcuRite.com/5in1

View Video

Set the Time, Date & Units

Press the “   ” button, located on the front of the display unit, to enter SET 

MODE. Once in set mode, the preference you are currently setting will blink on 

the display.
To adjust the currently selected (flashing) item, press and release the “


“ or 

 “


“ buttons (press and HOLD to fast adjust).

To save your adjustments, press and release the “   ” button again to adjust 

the next preference. The preference set order is as follows:

LANGUAGE (English, French, Spanish) 

TIME ZONE (AST, EST, CST, MST, PST, AKST, HAST, NST, AEST, ACST, AWST) 

AUTO DST CHANGE (YES, NO) 

WEATHER TICKER SPEED (SLOW, MEDIUM, FAST) 

CLOCK HOUR 

CLOCK MINUTE 

CALENDAR MONTH** 

CALENDAR DATE** 

CALENDAR YEAR 

TEMPERATURE UNITS (

o

F or 

o

C) 

WIND SPEED UNITS (MPH, KPH, Knots) 

RAINFALL UNITS (inches or mm) 

PRESSURE UNITS (inHg or hPa)
*If you live in an area that observes daylight saving time, DST should be set to 

YES, even if it is not currently Daylight Saving Time. 
You will automatically exit SET MODE if no buttons are pressed for 20 seconds. 

Enter setup mode at any time by pressing the “   ” button.

Display Backlight Settings

This weather station’s color display features three different lighting settings: 

High (100%) brightness, Medium (60%) brightness and Low (15%) brightness.
Using battery power alone, the backlight is available momentarily for 10 

seconds by pressing the “ ” button.
When display is powered with the power adapter, backlight remains on at 

100% brightness. Press “ ” button once to dim to 60% brightness; press 

again to dim to 15%, press a 3rd time to enter “AUTO DIM” mode. “ ” icon 

appears to the left of the time to indicate that auto-dim mode is ON.

AUTO DIM MODE: 

Automatically adjusts display brightness based on time of day. 

6:00 a.m. - 9:00 p.m. = 100% brightness 

9:01 p.m. - 5:59 a.m.= 15% brightness

Summary of Contents for 02064C

Page 1: ...Features Benefits Display 4 Setup 7 5 in 1 Sensor Setup 7 Display Unit Setup 8 AcuRite Connect 9 Set the Time Date Units 10 Backlight Settings 10 Placement Guidelines 11 5 in 1 Sensor Installation 12 Using the Weather Center 13 Rainfall Tracking 14 Weather Ticker 15 Troubleshooting 16 Care Maintenance 19 Calibration 20 Specifications 21 FCC Information 21 Customer Support 22 Warranty 22 Profession...

Page 2: ...ion www AcuRite com IMPORTANT PRODUCT MUST BE REGISTERED TO RECEIVE WARRANTY SERVICE Register a Product 7 2 1 8 10 5 6 11 4 3 5 in 1 SENSOR 1 Rainfall Collector Funnel 2 Solar Cell Panel Converts sunlight into power to run internal aspirating fan Internal Aspirating Fan not shown Draws ambient air into sensor to reduce solar radiation heating resulting in more accurate temperature measurement 3 A ...

Page 3: ...casting pulls data from your 5 in 1 sensor to generate your personal forecast 17 Rainfall History Displays historical rainfall totals see page 14 18 Barometric Pressure Arrow icon indicates direction pressure is trending 19 Button Changes the rainfall data being displayed 17 20 Button For setup preferences and manually cycling through Weather Ticker messages 21 Button for setup preferences 22 Butt...

Page 4: ... in the 5 in 1 sensor for temperatures below 4ºF 20ºC 1 Slide off the battery compartment cover 2 Insert 4 x AA batteries into the battery compartment as shown Follow the polarity diagram in the battery compartment 3 Replace the battery cover Remove Rain Gauge Stabilizer Locate and remove the rain gauge stabilizer plastic tab taped into the bottom of the sensor The rain gauge will not function unt...

Page 5: ... IMPORTANT Batteries are a backup power source to preserve records in the event of a power outage Power adapter is the recommended primary power source to enjoy the full functionality of this product 2 Plug in Power Adapter AcuRite Connect AcuRite Connect works with Windows PC s to provide access to your Weather Center data in the following ways Data File Display unit logs or stores data so that y...

Page 6: ... to ensure accurate wind measurement Visit us online to view installation photos and video or learn more about AcuRite technology www AcuRite com 5in1 View Video Set the Time Date Units Press the button located on the front of the display unit to enter SET MODE Once in set mode the preference you are currently setting will blink on the display To adjust the currently selected flashing item press a...

Page 7: ...e The 5 in 1 sensor will now synchronize with the display unit It may take a few minutes for synchronization to complete If both or one of the units appear to be functioning improperly please refer to the troubleshooting section SOUTH 1 5 meters NO OBSTRUCTIONS ABOVE OR AROUND OPERATION Using the Professional Weather Center Learning Mode Self Calibrating Forecasting use a unique algorithm to analy...

Page 8: ...TEMP XX MM DD ALL TIME HIGH TEMP XXX RECORDED MM DD YY ALL TIME LOW TEMP XXX RECORDED MM DD YY 24 HOUR TEMP CHANGE XX ALL TIME HIGH WIND XX MPH RECORDED MM DD YY 7 DAY AVERAGE WIND XX MPH TODAY S AVERAGE WIND XX MPH MOON NEW MOON WAXING CRESCENT MOON FIRST QUARTER MOON WAXING GIBBOUS MOON FULL MOON WANING GIBBOUS MOON LAST QUARTER MOON WANING CRESCENT INDOOR HUMIDITY OK INDOOR HUMIDITY HIGH INDOOR...

Page 9: ...e before forecast and pressure will be accurate Allow unit to run continuously for 33 days Battery removal or resetting the display unit will restart Learning Mode After 14 days forecast should be fairly accurate however Learning Mode calibrates for a total of 33 days Troubleshooting Problem Possible Solution Inaccurate temperature or humidity Make sure both the display unit and 5 in 1 sensor are ...

Page 10: ...a gentle puff of air 5 in 1 Sensor Care Clean the Sensor Clean with a soft damp cloth Do not use caustic cleaners or abrasives that will mar the polished surfaces of the rain collection funnel or the solar cell Scratches will result in decreased performance and reliability Insect Prevention Insects may cause obstructions and interrupt data by nesting in or on the 5 in 1 sensor To limit this proble...

Page 11: ...ct to the following two conditions 1 This device may NOT cause harmful interference and 2 This device must accept any interference received including interference that may cause undesired operation This equipment has been tested and found to comply with the limits for a Class B digital device pursuant to Part 15 of the FCC rules These limits are designed to provide reasonable protection against ha...

Page 12: ...ties are hereby expressly disclaimed including without limitation the implied warranty of merchantability and the implied warranty of fitness for a particular purpose Chaney expressly disclaims all liability for special consequential or incidental damages whether arising in tort or by contract from any breach of this warranty Some states do not allow the exclusion or limitation of incidental or co...

Page 13: ...s AcuRite uses patented technology Visit www AcuRite com patents for details Printed in China 02064C INST 052215 It s More than Accurate it s AcuRite offers an extensive assortment of precision instruments designed to provide you with information you can depend on to Plan your day with confidence www AcuRite com Weather Stations Temperature Humidity Weather Alert Radio Kitchen Thermometers Timers ...

Reviews: