8
Quick Installation Guide
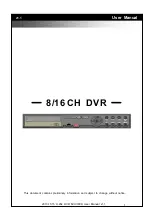
1. Click the
System Setup
icon on the
Live View
screen.
2. Click the
Storage
>
Management
page.
3. Select the hard disk to format, then click
Format
.
4. Repeat the above steps to format the other disk, and then click
OK
.
6
FORMAT THE HDD
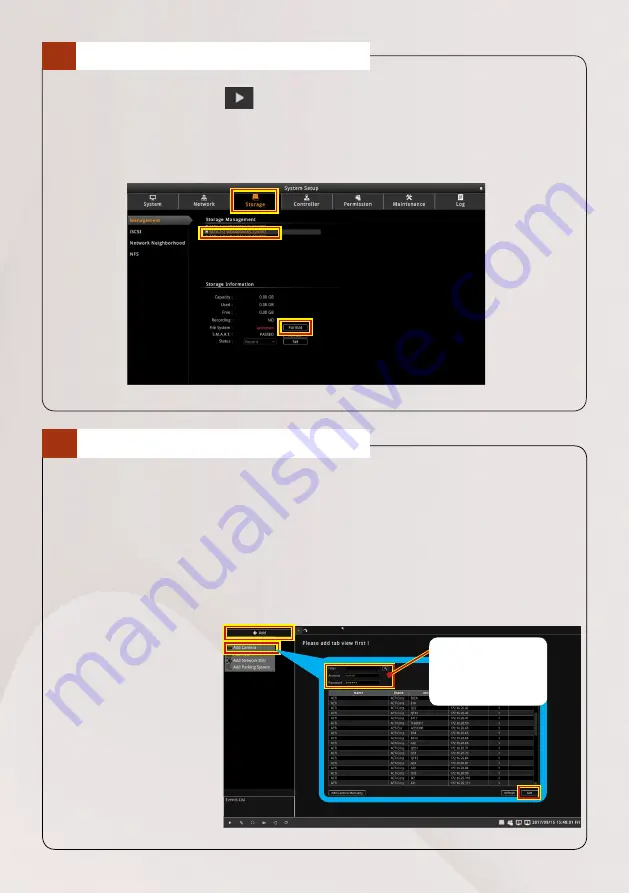
1. On the
Live View
screen, click
Add
.
2. Click
Add Camera
from the pop-up menu.
Or, click other network devices to add them in the ENR. You may also group
devices by creating a group. However, for this quick installation guide, we will
only cover adding cameras in general.
3. Click a model to select the camera. The text of the selected camera will turn
orange.
4. Repeat the above
step to add more
cameras.
5. Click
Add
to
complete.
Make sure to
input the correct
account and
password here.
ADD DEVICES
7