background image

www.acti.com


Hardware Manual 


16 

Accessing the Camera   

How to Configure IP Addresses 

In order to be able to communicate with the camera from your PC, both the camera and the PC 

have to be within the same network segment. In most cases, it means that they both should 

have very similar IP addresses, where only the last number of the IP address is different from 

each  other.  There  are  2  different  approaches  to  IP  Address  management  in  Local  Area 

Networks 

– by DHCP Server or Manually. 


Using DHCP Server to Assign IP Addresses 

If you have connected the computer and the camera into the network that has a DHCP server 

running, then you do not need to configure the IP addresses at all 

– both the camera and the 

PC  would  request  a  unique  IP  address  from  DHCP  server  automatically.  In  such  case,  the 

camera will  immediately be ready for the  access from the  PC. The  user,  however, might not 

know the IP address of the camera yet. It is necessary to know the IP address of the camera in 

other to be able to access it by using a Web browser. 


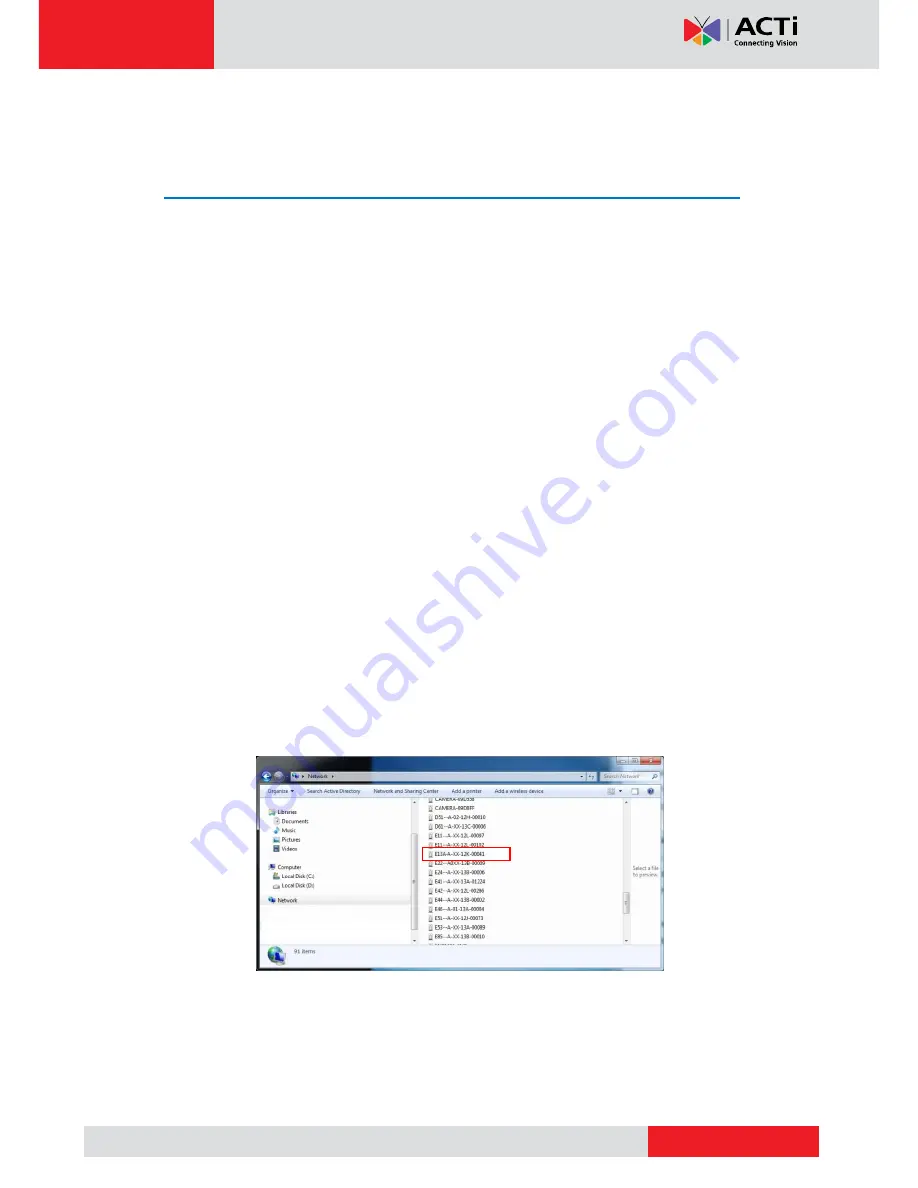
The quickest way to discover  the cameras in the network

 is to use the simplest network 

search, built in the Windows system 

– just by pressing the “Network” icon, all the cameras of 

the local area network will be discovered by Windows thanks to the UPnP function support of 

our cameras. 


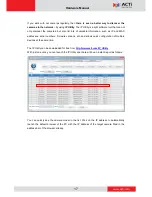
In  the  example  below,  we  successfully  found  the  camera  that  we  had  just  connected  to  the 

network. 


By  double-clicking  with  the  left  mouse  on  the  camera  model,  it  is  possible  to  automatically 

launch  the  default  browser  of  the  PC  with  the  IP  address  of  the  target  camera  filled  in  the 

address bar of the browser already. 

Summary of Contents for E12A

Page 1: ...Cube Camera Series Hardware Manual E12A E13A E14 E15 E16 Ver 2015 01 06...

Page 2: ...d optional 10 Step 3 Install the Camera 11 Step 4 Connect to Network 11 Step 5 Access the Camera Live View 11 Step 6 Adjust the Viewing Angle and Focus 12 Step 7 Connect Audio Out Device optional 13 O...

Page 3: ...attempt to service this video device yourself as opening or removing covers may expose you to dangerous voltage or other hazards Refer all servicing to qualified service personnel Trademarks All names...

Page 4: ...urning the equipment off and on the user is encouraged to try to correct the interference by one or more of the following measures Reorient or relocate the receiving antenna Increase the separation be...

Page 5: ...to qualified service personnel Damage Requiring service Disconnect this video product from the power supply immediately and refer servicing to qualified service personnel under the following conditio...

Page 6: ...s hardware manual contains the following models E12A 3MP Cube with Basic WDR Fixed lens E13A 5MP Cube with Basic WDR Fixed lens E14 10MP Cube with Basic WDR Fixed lens E15 5MP Fisheye Cube with Basic...

Page 7: ...www acti com Hardware Manual 7 Package Contents Camera E12A E13A E14 Camera E15 E16 Bracket Mounting Screws Quick Installation Guide Warranty Card or...

Page 8: ...the factory default settings of the camera including administrator s password The reset button can be used for following purposes 1 The administrator s password has been forgotten and therefore the c...

Page 9: ...www acti com Hardware Manual 9 Item Description 4 Audio Output Connects to audio output devices such as a speaker etc 5 Ethernet Port Connects to a network using a standard Ethernet cable...

Page 10: ...you purchased Step 1 Mount the Bracket Attach the bracket to the wall using the three 3 supplied screws Step 2 Insert the Memory Card optional 1 Pull to open the memory card slot cover 2 Insert the me...

Page 11: ...fix the camera Step 4 Connect to Network Connect one end of the Ethernet cable to the Ethernet port of the camera and the other end to a Power over Ethernet switch or injector Step 5 Access the Camer...

Page 12: ...nd Focus Based on the live view adjust the camera viewing angle and focus to get the target view NOTE Focus adjustment is available only on E1xA and E14 models 1 Loosen the knob 2 Tilt the camera towa...

Page 13: ...rdware Manual 13 4 For E1xA and E14 models turn the lens left or right to adjust the focus Step 7 Connect Audio Out Device optional If necessary connect the audio out device jack to the audio out port...

Page 14: ...ormation about lens model and how to purchase please visit our website www acti com To replace the lens perform the procedures below 1 Loosen the two 2 screws holding the lens to the module 2 Turn the...

Page 15: ...Hardware Manual 15 4 Tighten the two 2 screws to secure the lens to the module 5 Proceed to adjust the camera viewing angle and focus see Step 6 Adjust the Viewing Angle and Focus on page 12 for more...

Page 16: ...request a unique IP address from DHCP server automatically In such case the camera will immediately be ready for the access from the PC The user however might not know the IP address of the camera ye...

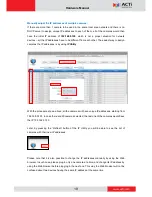
Page 17: ...ddresses serial numbers firmware versions etc and allows quick configuration of multiple devices at the same time The IP Utility can be downloaded for free from http www acti com IP_Utility With just...

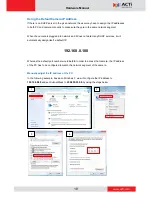
Page 18: ...work and it does not detect any DHCP services it will automatically assign itself a default IP 192 168 0 100 Whereas the default port number would be 80 In order to access that camera the IP address o...

Page 19: ...P Utility With the procedure shown above all the cameras will have unique IP addresses starting from 192 168 0 101 In case there are 20 cameras selected the last one of the cameras would have the IP 1...

Page 20: ...net Explorer browsers free third party software plug ins must be installed to the PC first to be able to get the live video feed from the camera Browser Required Plug In Safari QuickTime http www appl...

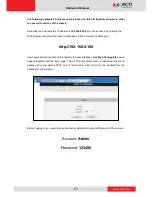
Page 21: ...ollowing address into Web browser s address bar http 192 168 0 100 Upon successful connection to the camera the user interface called Web Configurator would appear together with the login page The HTT...

Page 22: ...Copyright 2014 ACTi Corporation All Rights Reserved 7F No 1 Alley 20 Lane 407 Sec 2 Ti Ding Blvd Neihu District Taipei Taiwan 114 R O C TEL 886 2 2656 2588 FAX 886 2 2656 2599 Email sales acti com...

Reviews: