background image

5.3

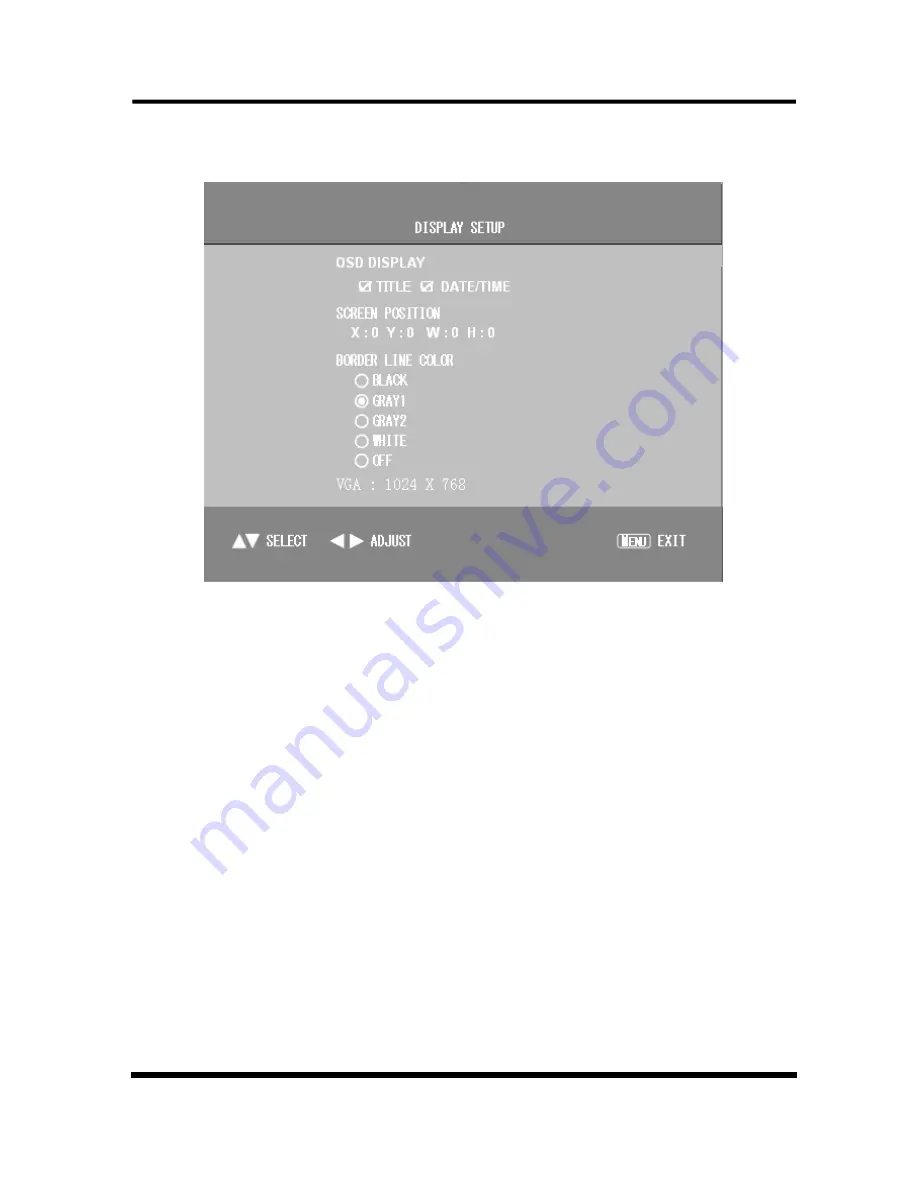
 Display Setup Menu

1

DISPLAY   ON   SCREEN

Select   YES   or   NO   to   display

camera  title,   data  time  in   the  screen.  Press  

/

to  move

cursor, press ENTER to change state. Display “√”

2

SCREEN POSITION

Select screen display area. X position: 

-10 c +10. Y position: -4 

 +3 . Default(X

Y

0).

3

BORDER COLOR

Border colors have black, gray, white and

selected. 
Default: GRAY2.

VGA: change the resolution of the vga output(optional)

5.4

 Camera Setup Menu

12 / 22

Summary of Contents for 6931240087558

Page 1: ...Color 9 16 Split System ACTII AC8755 User s Manual...

Page 2: ......

Page 3: ...7 Button M8 7 4 8 Button M9 7 4 9 Button 1 9 FULL 2 10 FULL 3 11 FULL ect 7 4 10 PAL NTSC System 7 4 11 PTZ Function 7 5 Setup Menu Operation 9 5 1 Setup Main menu 10 5 2 System Setup Menu 10 5 3 Disp...

Page 4: ...ealtime 8 Split Mode Non realtime 16 Split Mode Dual Split Mode Auto Sequence Mode High Performance Freeze Function Flicker Free Image Capture High Performance Zoom Function Selectable Zoom Area Vario...

Page 5: ...tion Accept 1 composite video input for playback from the VCR Provide 1 composite video output for recording in the VCR Monitor Connection Provide 1 composite video output for the main monitor AUDIO O...

Page 6: ...play mode MODE S Enter 16 Split picture in picture and Dual Split mode VCR L Enter Playback function ENTER S Enter menu setup M4 A L Enter or Exit PTZ control function M4 A S Master QUAD display up di...

Page 7: ...y display the turned on video channels CH1 CH2 CH3 CH4 CH16 and 4 quad if turned ON in the Auto sequence setup mode in the display mode windows The time of display video channels can be programmed by...

Page 8: ...enter setup function for select display channel and circle display star area Press up and down key to select item to setup Press left and right key to select which value we needed Press ENTER key agai...

Page 9: ...or adjust the value in menu setup 4 9 Button 1 9 FULL 2 10 FULL 3 11 FULL ect 16 channel keys select camera to be displayed as full screen 4 10 PAL NTSC System System can be defined as NTSC or PAL st...

Page 10: ...on Press the M4 B S button to switch channel for PTZ controlling when the ptz controlling is effective The control key definition as follows stop 8 16 FULL automatic pattern right 1 9 FULL left direct...

Page 11: ...up Menu Operation The system provides a built in GUI setup screen For each menu the key function is described in the lower region to help operation The following figure shows the structure of GUI menu...

Page 12: ...hree kinds of display format to data MM DD YY DD MM YY YY MM DD Default YY MM DD 07 07 07 3 TIME time setup HH MM SS is hour minute and second Default 12 00 00 4 SYSTEM FORMAT PAL NTSC Default PAL 5 L...

Page 13: ...eback to factory setup Press to select YES or NO If select NO press ENTER to enter into next dialog box Press to select YES and press ENTER to comeback factory setup Default NO Factory Reset Menu WARN...

Page 14: ...ress to move cursor press ENTER to change state Display 2 SCREEN POSITION Select screen display area X position 10 c 10 Y position 4 3 Default X 0 Y 0 3 BORDER COLOR Border colors have black gray whit...

Page 15: ...ed changed Default 0 4 CONTRAST Contrast setup From 100 to 100 can be changed Press long key value can be continued changed Default 0 5 SATURATION Saturation setup From 100 to 100 can be selected Pres...

Page 16: ...he camera with Default ch1 DETECTION TIME ALWAY ON ALWAYS OFF ON OFF TIME SENSITIVITY setup From 7 to 7 can be selected VELOCITY setup From 7 to 7 can be selected MASKING AREA every camera has 16x12 a...

Page 17: ...Setup display times of AUTO sequence to each screen There are skip 1sec 99sec be selected Default 1sec 5 7 Event Setup Menu 15 22...

Page 18: ...on 3 MOTION Motion detects alarm enable switch Default all off 4 BUZZER HOLD TIME OFF 1ses 99ses can be selected Default 5ses 5 REPORT HOLD TIME Report of relay Holding time OFF 1ses 99ses can be sele...

Page 19: ...s to change pages LOSS video loss ALARM exterior alarm MOTION motion detection LIST CLEAR Clear the list of reports 5 9 Event List Clear Menu WARNING LIST CLEAR EXIT ENTER MENU SELECT THIS SYSTEM GETS...

Page 20: ...ation of connection as follow 1 Ground must be connected into together 2 The 3th foot of the serial port connect to RX port of the machine 3 The 2th foot of the serial port connect to TX port of the m...

Page 21: ...e FREEZE F6 30 01 00 B5 00 66 F6 30 01 00 00 00 31 FAR Freeze ON OFF ZOOM F6 30 01 00 25 00 56 F6 30 01 00 00 00 31 WIDE Zoom ON OFF MODE F6 30 01 00 BD 00 6E F6 30 01 00 00 00 31 PATRN Switch mode VC...

Page 22: ...84 Channel 4 0x97 0x85 Channel 5 0x98 0x86 Channel 6 0x99 0x87 Channel 7 0x9a Enter 0x88 Channel 8 0x9b PTZ in out 0x89 Channel 9 0x9c CHN 0x8a Quad A Page 1 4 0x9d Stop 0x8b Quad B Page 5 8 0x9e Righ...

Page 23: ...6 Channel 6 0x9b 8 B Page 0x87 Channel 7 0x9c 2 Picture in Picture 0x88 Channel 8 0x9d 1 Picture in Picture 0x89 Channel 9 0x9e Dual Split 0x8a Channel 10 0x9f Auto Sequence 0x8b Channel 11 0xa0 Playb...

Page 24: ...ould by external power source supply Alarm output explains 1 2 switch quantity alarm output often on or closed external alarm equipment need to have power supply 2 to avoid overload and damage the hos...

Page 25: ...tact and coil 1500VAC 1 min Surge voltage Homo polarity 1500VAC 10 160us Operate time 5ms max Release time 5ms max Life Expectancy Mechanical 10 000 000 ops Electrical 100 000 ops Temp Range 25 55 23...

Page 26: ......

Reviews: