


Acorn Safety
a division of Acorn Engineering Company
™
Manual #7109-214-001
Installation & Operation
INSTALLATION INSTRUCTIONS:
Supplies required: (not provided by Acorn)
1. Floor fastener anchors, washers and bolts.
2. Pipe Sealant or Teflon tape for sealing water connections.
IMPORTANT: Flush water supply lines prior to
connection to safety equipment.
NOTES:
—
Top of spray nozzles must be between 33" - 45" from
finished floor in order to meet ANSI Z358.1.
—
Use hand tools and wrenches in a manner which will
prevent marring finished surfaces. Strap wrenches or tools
with plastic jaw linings are highly recommended.
—
Refer to Rough-in for location of supply and drain lines.
—
Fragments of Teflon tape or pipe sealant residue can
interfere with the proper operation of this unit. Ensure pipe
sealant methods do not cause contamination in the
system.
—
Prior to beginning assembly, TURN OFF water supply to 1-
1/4" potable water supply line.
STEP ONE: HYDRANT LOCATION
1. Determine location of eyewash equipment and ensure to
position equipment so that there is a minimum of 12" from
any wall or equipment around assembled unit.
2. Determine frost line and dig pit deep enough to
accommodate a minimum of 3 cubic feet of porous gravel
fill.
3. Test hydrant for functionality before permanent placement.
Place hydrant in proper location per rough-in drawing
above. Hydrant valve body shall be buried within the
gravel fill to insure proper drainage from weep holes.
Connect customer supply line to hydrant and fill pit with 3
cubic feet of porous fill.
4. Back fill pit and create a concrete pad large enough for
anchoring eyewash unit. Once concrete has completely
cured, follow anchoring hardware instructions in step two.
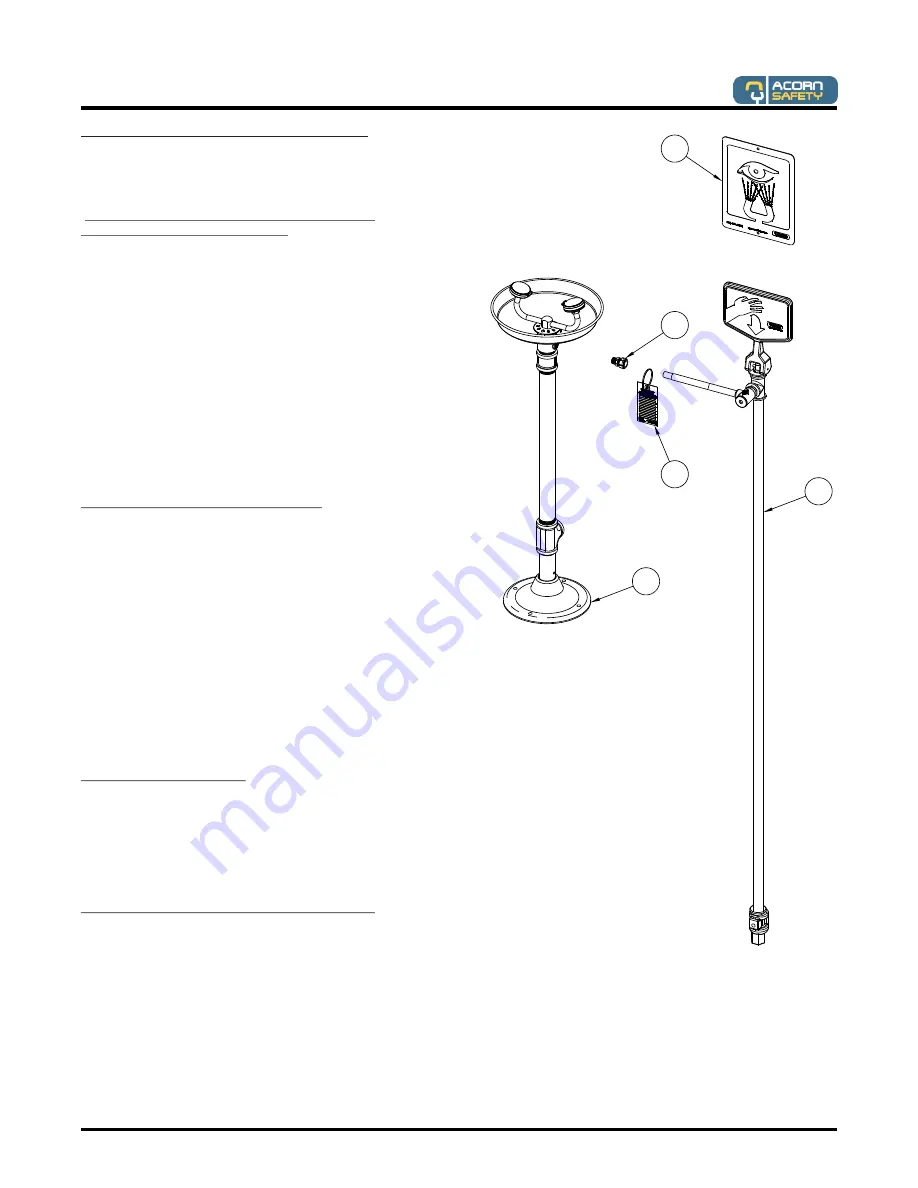
STEP TWO: PEDESTAL
1. While holding the eyewash assembly (A) in position, mark
mounting hole locations.
2. Remove flange assembly and install appropriate floor
anchors to receive mounting bolts (supplied by others).
3. Re-position assembly and install with mounting bolts and
washers.
STEP THREE: HYDRANT CONNECTIONS
1. Connect hydrant (B) to eyewash (A) assembly using 5/8"
OD x 3/8" NPTE compression adapter provided & proper
plumbing techniques to seal all made up threads.
B
A
D
C
E
Date: 10/28/2013
Page 3 of 7


