background image


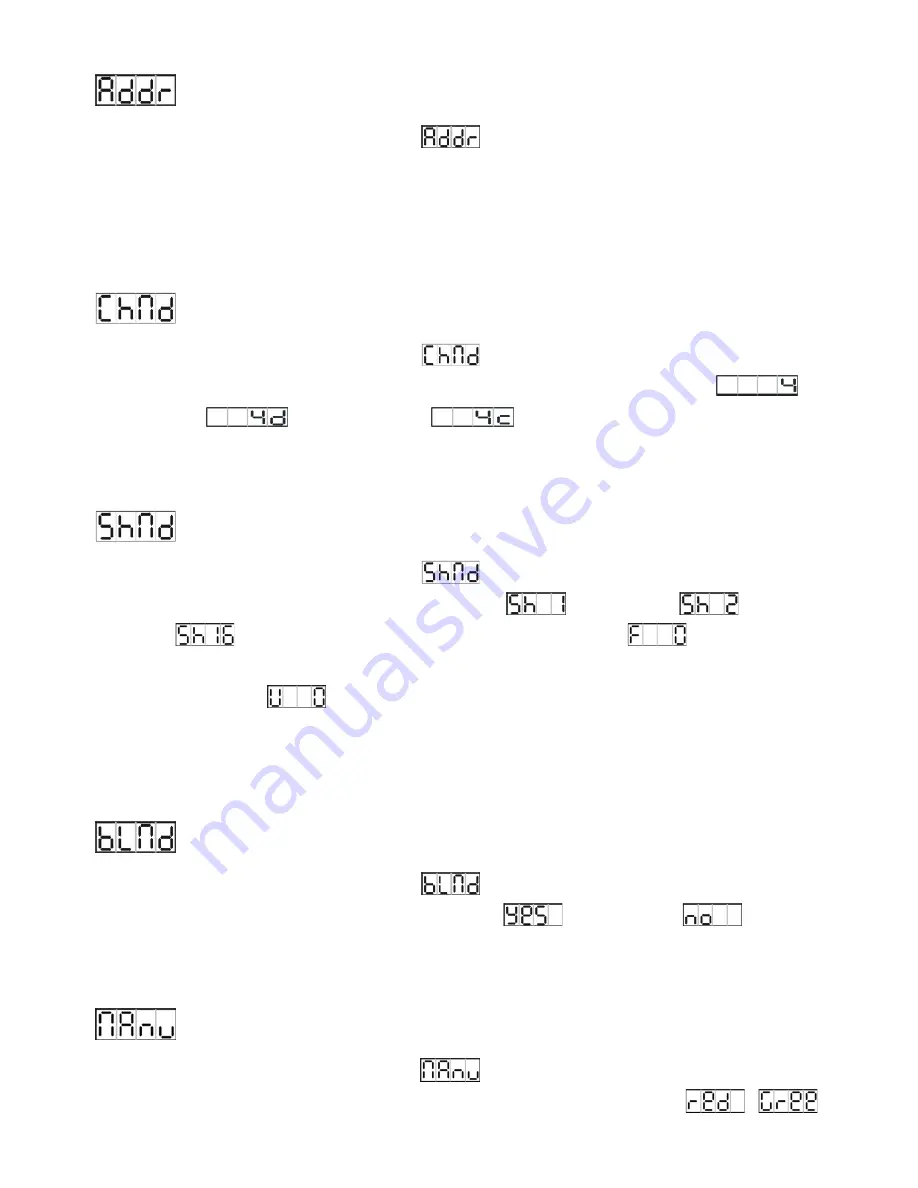
  DMX 512 Address Setting


Press the 

MENU

 button up to when the 

  is shown on the display. Pressing 

ENTER


button and the display will blink. Use 

DOWN

 and 

UP

 button to change the DMX 512 address. 

Once the address has been selected, press 

ENTER

  button to setup (or automatically exit 

menu mode  after  idling  one minute).  To go back to the  main  functions press the

  MENU


button. 

  Channel Mode 

Press the 

MENU

 button up to when the 

  is shown on the display. Pressing 

ENTER


button and the display will blink. Use 

DOWN

  and 

UP

  button to select the 

  (4 

channels) or 

  (5  channels) or 

  (7  Channels) mode. Once the mode 

has been selected, press the 

ENTER

 button to setup (or automatically exit menu mode after 

idling one minute). To go back to the main functions press the

 MENU

 button. 

  Show 1~16 

Press the 

MENU

 button up to when the 

  is shown on the display. Pressing 

ENTER


button,  Use 

DOWN

  and 

UP

  button to select the 

  (show 1)  or 

  (Show  2) 

or  … or 

  (show 16).


Press

  ENTER

  button to


confine, 

  (fade time) will 

blinking on the display, use 

DOWN

  and 

UP 

button to adjust the fade time, press 

ENTER


button to setup and 

  (wait time) will blinking on the display, use 

DOWN

  and 

UP 

button to adjust the wait time,  press 

ENTER

  button to setup (or automatically exit menu 

mode  after  idling  one minute).  Back to the previous functions without any change press 

MENU

 button. 

  Blackout mode 

Press the 

MENU

 button up to when the 

  is shown on the display. Pressing 

ENTER


button,  Use 

DOWN

  and 

UP

  button to select the 

  (blackout) or 

  (normal).


Once select, press 

ENTER

 button to setup (or automatically exit menu mode after idling one 

minute). To go back to the main functions press the

 MENU

 button. 

  Manual Test 

Press the 

MENU

 button up to when the 

  is shown on the display. Pressing 

ENTER


button and the display will blink. Use 

DOWN

 and 

UP

 button to select the 

6A 

Summary of Contents for VB-4-10FC

Page 1: ...VBar Integral VB 4 10FC VB 8 10FC User Manual Please read the instructions carefully before use ...

Page 2: ...ONTENTS 1 Safety Instructions 2 Technical Specifications 3 Installation 4 How To Set The Fixture 5 How To Control The Fixture 6 DMX 512 Configuration 7 DMX 512 Connections 8 Troubleshooting 9 Fixture Cleaning 1A ...

Page 3: ...are not flammable materials close to the unit while operating as it is fire hazard Use safety cable when fixes this unit Maximum ambient temperature is TA 40 and don t operate it where the temperature is higher than this There are no user serviceable parts inside the fixture Do not open the housing or attempt any repairs by yourself In the unlikely event your fixture may require service please con...

Page 4: ...Always ensure that the unit is firmly fixed to avoid vibration and slipping while operating Always ensure that the structure to which you are attaching the unit is secure and is able to support a weight of 10 times of the unit s weight The equipment must be fixed by professionals And it must be fixed at a place where is out of the touch of people and has no one pass by or under it 4 How To Set The...

Page 5: ...y will blink Use DOWN and UP button to change the mode Once the required mode has been selected press ENTER button to setup or it will automatically return to the main functions without any change after idling one minute Back to the functions without any change press MENU button The main functions are shown below 4A ...

Page 6: ...5A ...

Page 7: ...to when the is shown on the display Pressing ENTER button Use DOWN and UP button to select the show 1 or Show 2 or or show 16 Press ENTER button to confine fade time will blinking on the display use DOWN and UP button to adjust the fade time press ENTER button to setup and wait time will blinking on the display use DOWN and UP button to adjust the wait time press ENTER button to setup or automatic...

Page 8: ...lay Inverse Press MENU button until is blinking on the display Use DOWN and UP button to select display normal or display inverse Once select press ENTER button to store or automatically exit menu mode after idling one minute To go back to the main functions press the MENU button Self Test Press the MENU button up to when the is blinking on the display Pressing ENTER button and the unit will run t...

Page 9: ...sition and you may hear some noises for about 20 seconds After that the unit will be ready to receive DMX signal or run the built in programs 5 1 Master Slave Built In Preprogrammed Function By linking the units in master slave connection the first unit or master unit will control the other units to give an automatic light show This function is good when you want an instant show You have to select...

Page 10: ...ton to setup or automatically exit menu mode after idling one minute To go back to the main functions press the MENU button Please refer to the following diagram to address your DMX512 channel for the first 4 units 4 channels 4D channels 4C channels 9A ...

Page 11: ...6 DMX512 Configuration 4 5 7 channels mode 10A ...

Page 12: ... XLR plug and plug it in the DMX output of the last fixture 4 Each lighting fixture needs to have an address set to receive the data sent by the controller The address number is between 0 511 usually 0 1 are equal to 1 5 3 pin XLR connectors are more popular than 5 pins XLR 3 pin XLR Pin 1 GND Pin 2 Negative signal Pin 3 Positive signal 5 pin XLR Pin 1 GND Pin 2 Negative signal Pin 3 Positive sign...

Page 13: ...The motor s drive IC on the PCB might be out of condition 9 Fixture Cleaning The cleaning of internal must be carried out periodically to optimize light output Cleaning frequency depends on the environment in which the fixture operates damp smoky or particularly dirty surrounding can cause greater accumulation of dirt on the fixture s optics Clean with soft cloth using normal glass cleaning fluid ...

Page 14: ...mark in accordance with the provision of the Electromagnetic Compatibility EMC Directive 89 336 EEC EN55014 2 1997 A1 2001 EN61000 4 2 1995 EN61000 4 3 2002 EN61000 4 4 1995 EN61000 4 5 1995 EN61000 4 6 1996 EN61000 4 11 1994 Harmonized Standard EN60598 1 2000 ALL 2000 A12 2002 Safety of household and similar electrical appliances Part 1 General requirements 13A ...

Reviews: