15A
change the DMX512 address. Once the address has been selected, press the
ENTER
button to setup, to go back to the functions without any change press the
MENU
button again. Hold and press the
MENU
button about one second or wait
for one minute to exit the menu mode. Please refer to the following diagram to
address your DMX512 channel for the first 4 units
:
Channel mode
Unit 1
Address
Unit 2
Address
Unit 3
Address
Unit 4
Address
8channels 1
9
17 25
12channels
1 13 25 37
15channels
1 16 31 46
4.4 DMX512 Configuration
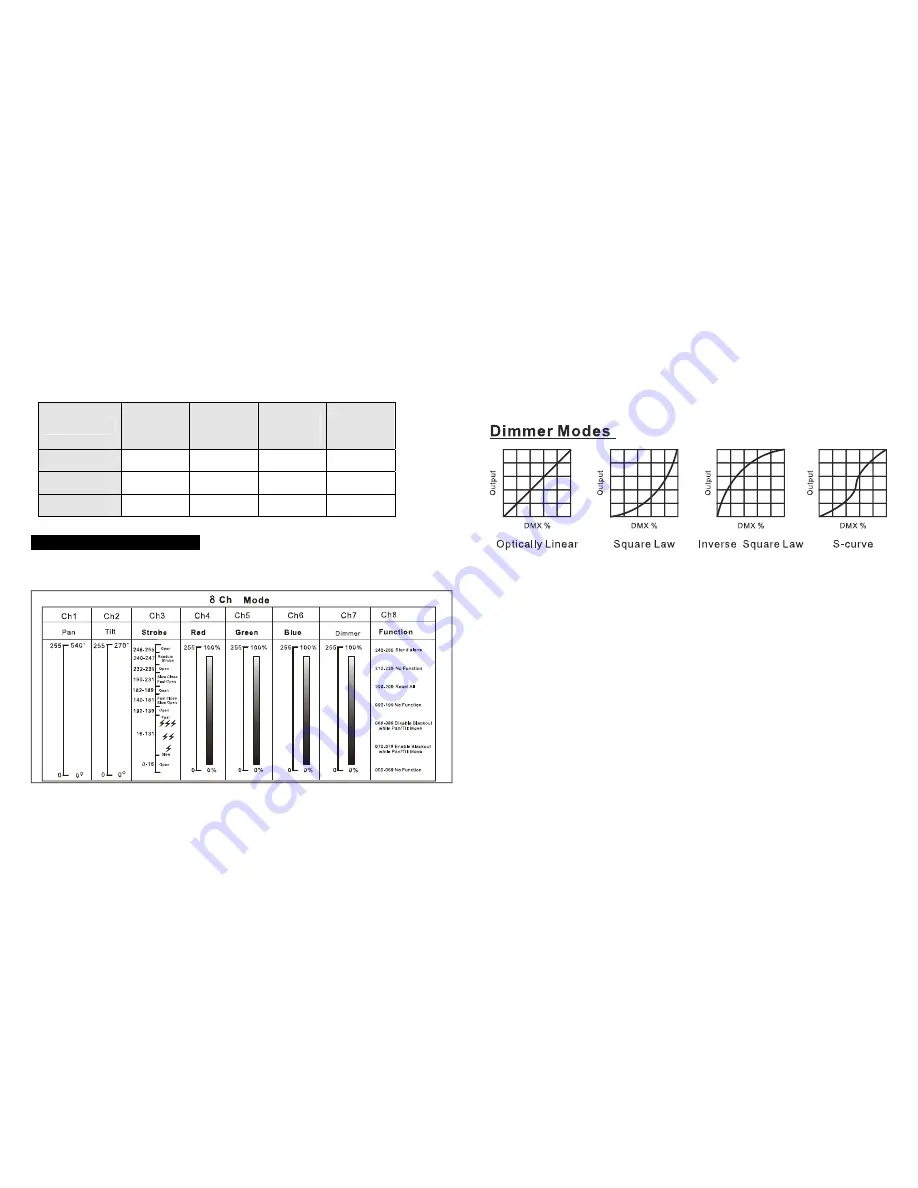
8 channel mode:
8A
Dimmer Curve
Select
Dimmer Curve
, press the
ENTER
button to confirm, present mode will
blink on the display. Use the
DOWN
and
UP
button to select the
mode 1
or
mode
2
or
mode 3
or
mode 4
mode. Once the mode has been selected, press the
ENTER
button to setup, to go back to the functions without any change press the
MENU
button again. Hold and press the
MENU
button about one second or wait
for one minute to exit the menu mode.
Mode 1(Optically Liner):
The increase in light intensity appears to be linear as
DMX value is increased.
Mode 2(Square Law):
Light intensity control is finer at low levels and coarser at
high levels.
Mode 3(Inverse Square Law):
Light intensity control is coarser at low levels and
finger at high levels.
Mode 4(S-cure):
Light intensity control is finger at low levels and high levels and
coarser at medium levels.
Slave Mode
S
elect
Slave Mode
, press the
ENTER
button to confirm, present mode will
blink on the display. Use the
DOWN
and
UP
button to select the
Slave 1
(normal)
or
Slave 2
(2 light show) mode. Once the mode has been selected, press the
ENTER
button to setup, to go back to the functions without any change press the
MENU
button again. Hold and press the
MENU
button about one second or wait
for one minute to exit the menu mode.
Black Out Mode
Select
Slave Mode
, press the
ENTER
button to confirm, present mode will


