Eng
lis
h
System
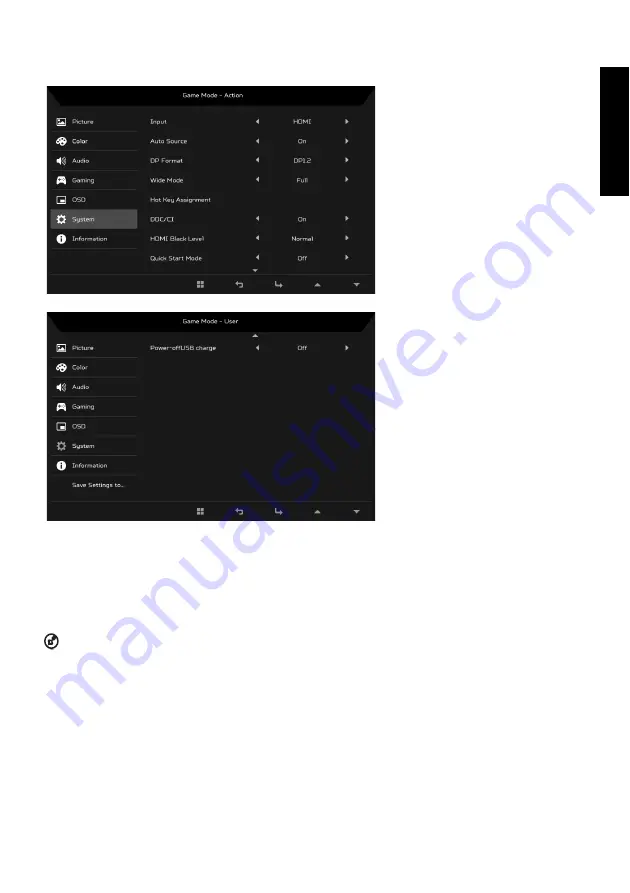
1. The System menu can be used to select settings such as Input, Wide Mode and Power LED.
2. Press the MENU key to open the OSD.
3. Using the
▲
/
▼
keys, select System from the OSD. Then navigate to the setting yo wish to adjust.
4. Use the
/
keys to select the setting.
5. Input: Select the source from DP In or HDMI.
6. Auto Source: Automatically searches for available input sources.
7. DP Format: You can select which DP format you are using. The default is set at DP1.2.
8. Wide Mode: You can select which screen aspect you are using. The options are Full, Aspect and 1:1.
9. Hot Key Assignment: Select the function of Hot Key 1 or Hot Key 2.
10. DDC/CI: Allows the monitor settings to be set through the software on the PC.
NOTE: DDC/CI, short for Display Data Channel/Command Interface, which allows monitor controls to be sent via software.
11. HDMI Black Level: You can select the level of blackness under HDMI source. The options are Normal and Low.
12. Quick Start Mode: Enable monitor rapidly.
13. Power-off USB charge: Turn On or Off.
Summary of Contents for XF240YU
Page 1: ......
Page 2: ......
Page 49: ...简体中文 ...
Page 113: ......
Page 114: ... ġ ġ _______________________________ ...
Page 115: ...ġ ġ ġ _______________________________ ...
Page 116: ... ġ ġ _______________________________ ...
Page 117: ... ġ ġ ...
Page 118: ...Acer Incorporated ġ _______________________________ ...
Page 119: ... Diretiva Diretiva RSP Diretiva ġ _______________________________ ...
Page 120: ......
Page 121: ......
Page 122: ......
Page 123: ...MC T7111 004 P N 4J 3B401 071 xx R43002 RoHS Barcode ...
Page 124: ......


