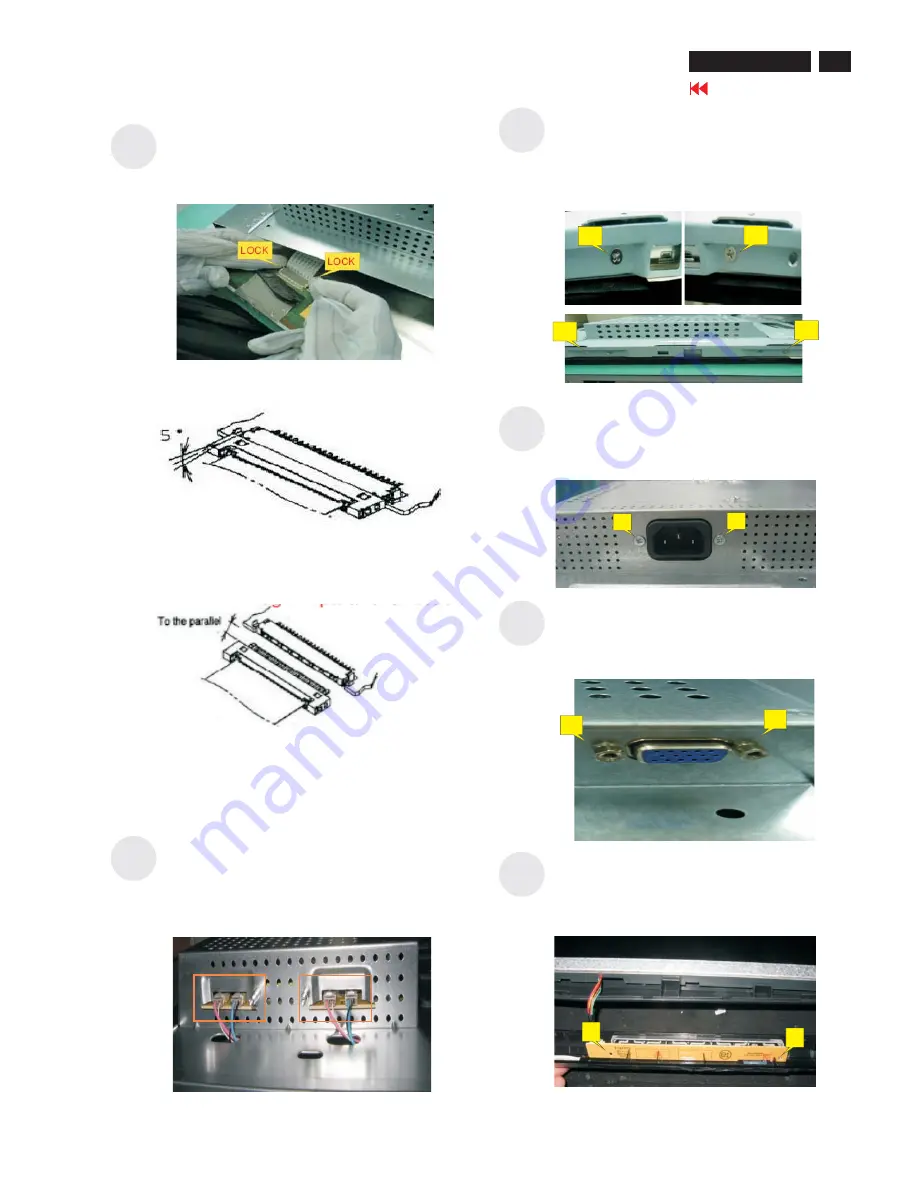
Use a Phillips-head screwdriver screwed the
No.1~2 screws.
(No1~2 screw size=M3x10; Torque=3~5KGFxCM).
Use a Phillips-head screwdriver screwed the No.1~4
screws on both side and assemble the LCD panel
and bracket chassis module.
(No1~4 screw size=M3x6; Torque=3~4KGFxCM).
Plug 8 lamp cables to the connectors of power
board.(Both of right and left sides)
Connect FFC cable to LCD panel. There are two
locks over here when plugging in should be
noticed
Use a Hex-head screwdriver screwed the
DVI and D-SUB connectors (No.1~4Hex Nut
screws Size=M3x8;Torque=3~5KGFxCM).
Take a key function board to hook with front
bezel (No.1~2) and connect to key function
cable.
4. Assembly and Disassembly Procedures (continued)
S11
S10
S13
S12
S8
S9
S8
S7
2
3
4
1
1
2
Angel < 5 degrees
Plug in parallel direction
1
2
1
2
13
Go to cover page
ACER X203W


