background image

1-12

User’s Guide

1.4.1

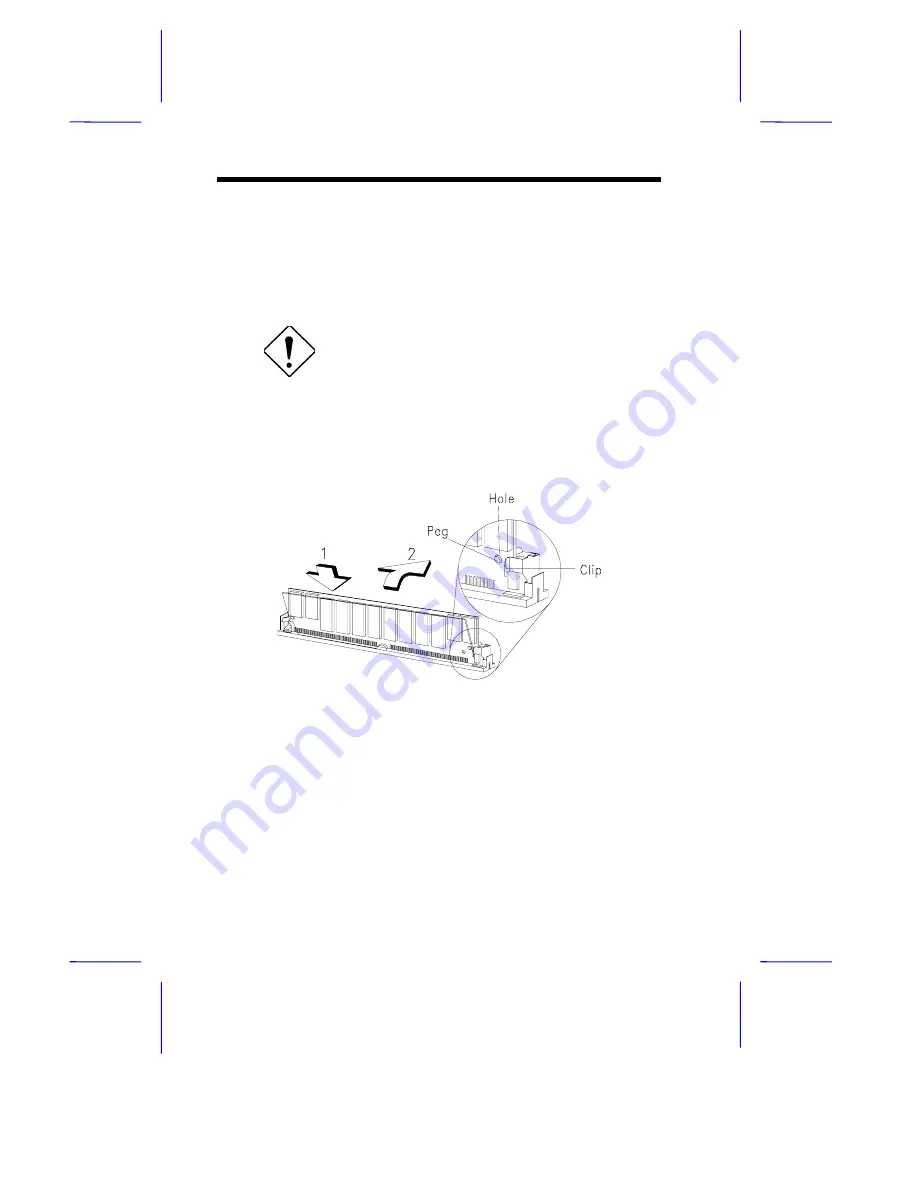
Installing a SIMM

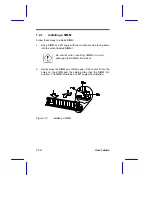
Follow these steps to install a SIMM:

1.

Slip a SIMM at a 45

°

 angle with the component side facing down

into the socket labeled SIMM-1.

Be careful when inserting SIMMs to avoid
damaging the SIMM or the socket.

2.

Gently press the SIMM up until the pegs of the socket fit into the
holes on the SIMM and the holding clips lock the SIMM into
position.  The SIMM should be at a 90

°

 angle when installed.

Figure 1-9

Installing a SIMM

Summary of Contents for V12LC

Page 1: ...the microprocessor with its 120 MB or 132 MB per second transfer rate in burst mode The system board features a slot for the PCI ISA slot board and two PCI enhanced IDE interfaces with a zero wait state 11 MB per second transfer rate and support up to four IDE devices It has buffered serial ports that reduce the number of interrupts to avoid slowing other system activities With the optional ECP EP...

Page 2: ...or system and VGA BIOS Two PCI enhanced IDE interfaces that support up to four IDE devices System clock calendar with 128 bytes CMOS RAM Cirrus 5430 5434 5440 VGA PCI accelerator that supports up to 2 MB video memory for a resolution up to 1280x1024 with 256 colors non interlaced or 1024x768 with 65 536 colors interlaced External ports PS 2 keyboard mouse ports Two buffered high speed serial ports...

Page 3: ...ution optional 3 Flash memory BIOS 4 Real time clock 5 Slot board connector 6 Voltage regulator 7 Second level cache 8 SIMM sockets 9 320 pin ZIF CPU socket 10 Video memory chips 11 Video memory upgrade sockets 12 Video port 13 Parallel port 14 COM2 15 COM1 16 PS 2 Mouse connector 17 PS 2 keyboard connector 18 RJ 45 phone jack optional Figure 1 1 System Board Layout ...

Page 4: ... PCI and ISA bus slots for system enhancements and future expansion The slot board may vary in size and layout depending on your system housing Figures 1 2 to 1 5 show the four kinds of slot boards Figure 1 2 2 PCI 3 ISA Slot Board for generic desktop systems Figure 1 3 2 PCI 3 ISA Slot Board for Aspire desktop systems ...

Page 5: ...System Board 1 5 Figure 1 4 3 PCI 5 ISA Slot Board for generic mini tower systems Figure 1 5 3 PCI 4 ISA Slot Board for Aspire mini tower systems ...

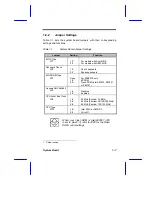
Page 6: ...mper and Connector Locations Figure 1 6 shows the jumper and connector locations on the system board Figure 1 6 System Board Jumper and Connector Locations Jumpers are prefixed JP Connectors are prefixed CN The blackened pin of a jumper represents pin 1 ...

Page 7: ...JP2 1 2 2 31 Check password Bypass password BIOS ROM Type JP3 Open 1 2 2 31 For 29EE010 only EPROM Flash ROM Intel 28F010 28F001 or 28F101 Onboard SMC665 669 JP6 1 2 2 31 Disabled Enabled CPU Local Bus Clock JP8 1 4 2 51 3 6 50 MHz Pentium 75 MHz 60 MHz Pentium 90 120 150 MHz 66 MHz Pentium 100 133 MHz CPU Type JP12 1 21 2 3 Intel P54C or AMD K5 Cyrix M1 When your Flash ROM is Intel 28F001 JP3 is ...

Page 8: ...1 5 2 1 1 Reset Switch JP15 1 2 2 31 For suspend mode function For reset function CN1 Connector Type JP16 JP17 1 21 2 3 Feature Connector I2 C interface HDD FDD LED Control JP19 Open1 Closed Detects HDD accesses only for generic housings Detects HDD and FDD accesses for Aspire housings only Flash ROM Control JP20 1 2 2 31 For Intel 28F001 only Programming boot block Normal work or programming bloc...

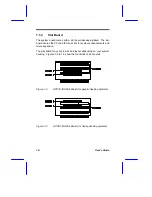
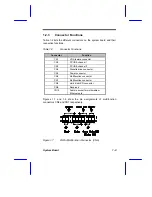
Page 9: ...re connector CN2 PCI IDE channel 1 CN3 PCI IDE channel 2 CN4 Diskette drive connector CN5 Power connector CN6 Multifunction connector CN7 Multifunction connector CN8 Hard disk LED connector CN9 Reserved CN10 Feature socket for multimedia or Ethernet card Figures 1 7 and 1 8 show the pin assignments of multifunction connectors CN6 and CN7 respectively Figure 1 7 20 Pin Multifunction Connector CN6 ...

Page 10: ...talling a system component 1 Do not remove a component from its antistatic packaging until you are ready to install it 2 Wear a wrist grounding strap before handling electronic components Wrist grounding straps are available at most electronic component stores Do not attempt the procedures described in the following sections unless you are a qualified technician ...

Page 11: ...MB 8 MB 16 MB 8 MB 8 MB 16 MB 4 MB 4 MB 4 MB 4 MB 16 MB 4 MB 4 MB 8 MB 8 MB 24 MB 8 MB 8 MB 4 MB 4 MB 24 MB 8 MB 8 MB 8 MB 8 MB 32 MB 16 MB 16 MB 32 MB 16 MB 16 MB 32 MB 4 MB 4 MB 16 MB 16 MB 40 MB 16 MB 16 MB 4 MB 4 MB 40 MB 8 MB 8 MB 16 MB 16 MB 48 MB 16 MB 16 MB 8 MB 8 MB 48 MB 16 MB 16 MB 16 MB 16 MB 64 MB 32 MB 32 MB 64 MB 32 MB 32 MB 64 MB 4 MB 4 MB 32 MB 32 MB 72 MB 32 MB 32 MB 4 MB 4 MB 72...

Page 12: ...e facing down into the socket labeled SIMM 1 Be careful when inserting SIMMs to avoid damaging the SIMM or the socket 2 Gently press the SIMM up until the pegs of the socket fit into the holes on the SIMM and the holding clips lock the SIMM into position The SIMM should be at a 90 angle when installed Figure 1 9 Installing a SIMM ...
Page 13: ...ps to remove a SIMM 1 Press the holding clips on both sides of the SIMM outward to release it Figure 1 10 Removing a SIMM 2 Move the SIMM to a 45 angle 3 Pull the SIMM out of the socket Always remove SIMMs from the socket labeled SIMM 4 then SIMM 3 and so on ...

Page 14: ...ion 3 Press Atwice to exit and reboot the system The system boots with the new memory configuration 1 5 IDE Fixed Disk Support The system board supports four IDE fixed disks or any other IDE devices through the two onboard PCI IDE interfaces See Figure 1 1 for the location Follow the instructions in the housing installation manual on how to install a fixed disk in the system Connect the cables acc...

Page 15: ...lever 2 Insert the CPU to the socket Make sure that the notched corner of the CPU matches the pin 1 indicator on the socket Be careful not to bend any pins 3 Pull down the socket lever Figure 1 11 Installing a Pentium CPU 4 Set jumpers JP8 JP14 and JP18 according to the CPU speed JP12 for the correct CPU type and JP13 for the appropriate CPU voltage Refer to Table 1 1 for the jumper settings ...

Page 16: ... MB Follow these steps to upgrade the video memory 1 Locate the video DRAM upgrade sockets labeled U12 and U13 on the system board See Figure 1 1 2 Gently insert a 514260ASL 256K x 16 70ns SOJ chip into each of the upgrade sockets Make sure that the pin 1 indicator on the chip matches the notched corner of the socket Figure 1 12 Installing a Video Memory Chip Pin 1 Indicator Notched Corner ...

Page 17: ...ror Messages Software error messages are returned by your operating system or application These messages typically occur after you boot the operating system or when you run your applications If you receive this type of message consult your application or operating system manual for help 1 8 2 System Error Messages A system error message indicates a problem with the computer itself A message of thi...

Page 18: ...ve If not replace the diskette drive Diskette Drive A Type Mismatch Run Setup and select the proper drive type Diskette Drive B Type Mismatch Run Setup and select the proper drive type Equipment Configuration Error Modify the memory configuration to agree with one of the options in Table 1 3 Fixed Disk Controller Error Run Setup Fixed Disk 0 Error Check all cable connections Replace fixed disk Fix...

Page 19: ...ot the system If the error message reappears ask for technical assistance Onboard Serial Port 1 Conflict Run Setup and disable the port Onboard Serial Port 2 Conflict Run Setup and disable the port Onboard Parallel Port Conflict Run Setup and disable the port Pointing Device Error Check and connect pointing device Pointing Device Interface Error Replace the pointing device or contact your dealer P...

Page 20: ...onfiguration is a major cause of power on error messages especially for a new system 2 Remove the system unit cover Check that the jumpers on the system board and any expansion boards are set correctly 3 If you cannot access a new disk it may be because your disk is not properly formatted Format the disk first using the FDISK and FORMAT commands 4 Check that all connectors and boards are securely ...

Reviews: