background image


OSD options 


Please refer to "External Controls" on Page 6. 
To adjust the OSD settings:   

1.


Press the 

MENU

 button to open the OSD menu. Press again to enter a selection of 10 

functions on OSD. 

2.


Use the buttons marked < or >, to highlight a control, then adjust the control to the desired 
level.  

3.


When you have finished making all selections, press the 

AUTO

 button to exit the OSD.   
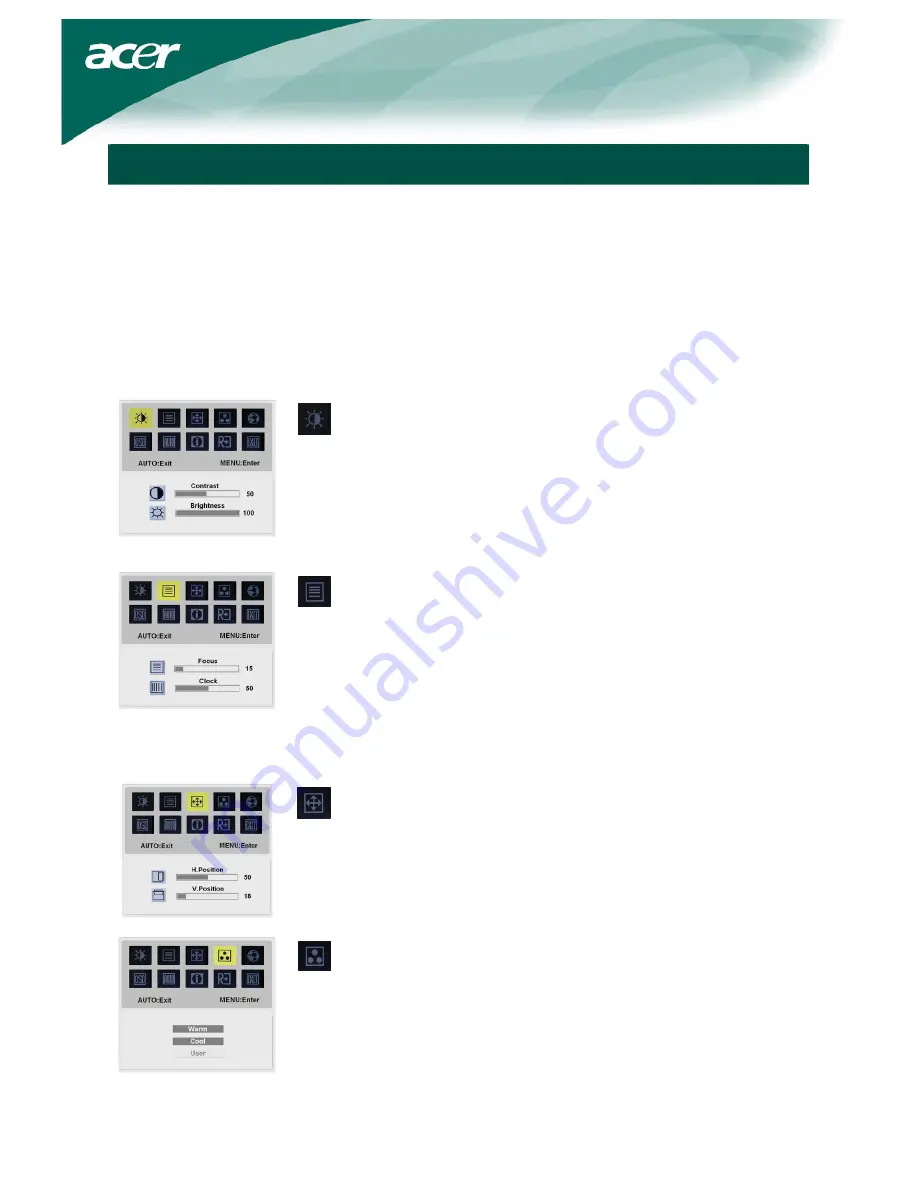
 

OSD Menu 


Contrast: 

This adjusts dark and light shades of color relative to each other to 
achieve a comfortable contrast. 

Brightness: 

This adjusts the brightness of the picture on the screen.


Focus: 

This removes any horizontal distortion and makes the picture clear and 
sharp. 

Clock: 

If there are any vertical stripes seen on the background of the screen this 
renders them less noticeable by minimizing their size. It also changes the 
size of the horizontal screen.


H-Position: 

This adjusts the horizontal. 

V-Position: 

This adjusts the vertical.


COLOR: 

There are three ways of adjusting color: 

Warm

 (Reddish white) 

Cool

 (Bluish white) 

User

 defined: 

You can adjust the colors red, green and blue to the intensity you desire.


Summary of Contents for LCD monitor

Page 1: ...ents 3 Installation instructions 4 Assembling the Monitor 4 Detaching the Monitor 4 Adjusting the Viewing Angle 4 Connecting the Devices 5 Switching the Power 6 Adjusting display settings 6 External C...

Page 2: ...electrical shock and or damage to the unit z If you encounter a problem please check the Troubleshooting section first If this does not resolve the problem do not attempt to repair the monitor by your...

Page 3: ...ending on the desktop pattern you use The LCD screen has effective pixels of 99 99 or more It may include blemishes of 0 01 or less such as a missing pixel or a pixel lit all of the time Due to the na...

Page 4: ...n To detach the monitor 1 Unplug the AC power cord to make sure the power is off 2 Pull the 4 hooks on bottom side of the base and hold 3 Separate the monitor and base and put them into carton Importa...

Page 5: ...output socket of the graphics card on the computer Then tighten the thumbscrews on the connector 3 DVI D Cable Optional Connect the signal cable to the DVI D input socket of the monitor and connect t...

Page 6: ...a video signal check the connections Adjusting display settings External Controls 1 AUTO If OSD is active press to exit a selection in OSD If OSD is inactive press and the monitor will automatically...

Page 7: ...ive to each other to achieve a comfortable contrast Brightness This adjusts the brightness of the picture on the screen Focus This removes any horizontal distortion and makes the picture clear and sha...

Page 8: ...se OSD SETTING This changes the position of the OSD window on the screen and staying time Auto Config System runs auto configuration Optional Input signal Analog Input Digital Input Select either Anal...

Page 9: ...inappropriate colors See Color Adjustment to adjust RGB color or to select color temperature Picture bounces or a wave pattern is present in the picture Move or switch off electrical devices that may...

Page 10: ...etting OSD Setting Auto config Input Signal Auto config Input Signal Information Information Reset Reset Exit Exit Video Interface Video Analog 0 7V Digital TMDS Optional Sync TTL Plug Play DDC2B Powe...

Reviews: